
Plywood Guide for Real‑World Projects
Most projects don’t fail because someone picked “bad wood”; they fail because someone picked the wrong plywood for the job. You’ve got panels that look almost identical on the rack, but behave completely differently once they’re hanging on a kitchen wall, spanning floor joists, or facing coastal humidity. Let’s unpack how to tell those apart so your next build doesn’t surprise you six months down the line.
What Exactly Is Plywood? (And Why It Behaves the Way It Does)
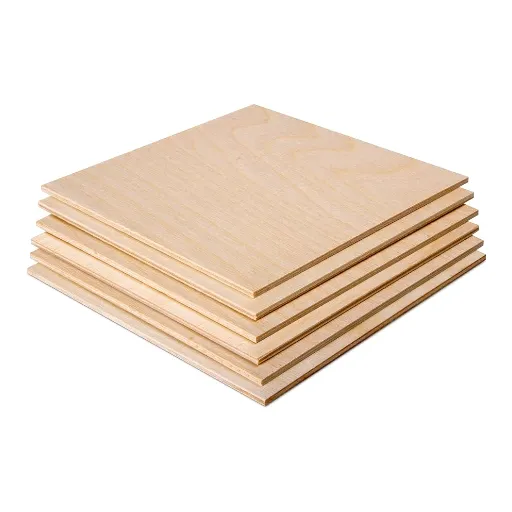
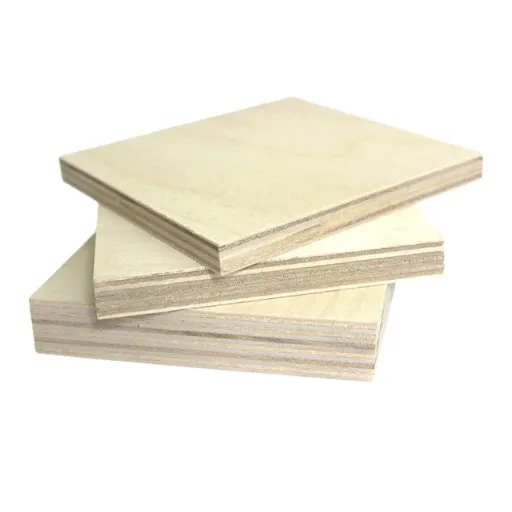
Plywood is not “just sheets of wood”; it’s an engineered stack of thin veneers whose layout quietly decides whether your panel stays flat or turns into a potato chip. Each sheet is built from multiple layers of wood peeled or sliced from logs, then laid with the grain of each layer crossing the next, usually at 90 degrees. This cross‑grain construction is what gives plywood its familiar combination of stiffness, dimensional stability, and the ability to take a knock without shattering like glass.
Those veneers aren’t all doing the same job. The outer faces carry a lot of the bending stress and give you the visual finish, while the core plies are there to keep thickness, hold fasteners, and stop the panel from telegraphing every little movement of the timber underneath. Change the core species, glue line, or number of plies and you get a panel that looks similar on a spec sheet but behaves very differently on site. Swap a denser core for a lightweight one and you might save 3–4 kg on a standard 18 mm sheet; you’ll feel that by the time you’ve carried a dozen up a staircase.
The glue and pressing process matter just as much as the wood. A decent exterior or “boiling waterproof” adhesive line can handle long‑term humidity swings and the occasional leak, while a low‑grade interior glue might start creeping or delaminating if someone decides to use it behind a shower wall. Pressure, temperature, and press time decide how well those veneers truly become one composite panel instead of a stack of layers that want to go their own way the first time the weather changes.
Grain direction is the other quiet hero. Because each veneer’s grain runs across the previous one, the panel is much less likely to expand or shrink dramatically in one direction when moisture moves in or out. That’s why a properly made 19 mm subfloor panel can span joists at 400 mm centers and still feel solid underfoot, while a similar‑thickness solid wood board would cup, split, or telegraph every joist line over a couple of seasons. Get the layup wrong, or accept too many core gaps, and you’ll see it: screws that suddenly lose bite, cabinet doors that go slightly out of square, floors that feel just a bit drum‑like where the panel wasn’t doing its share of the work.
Key Types of Plywood and Where They Make Sense
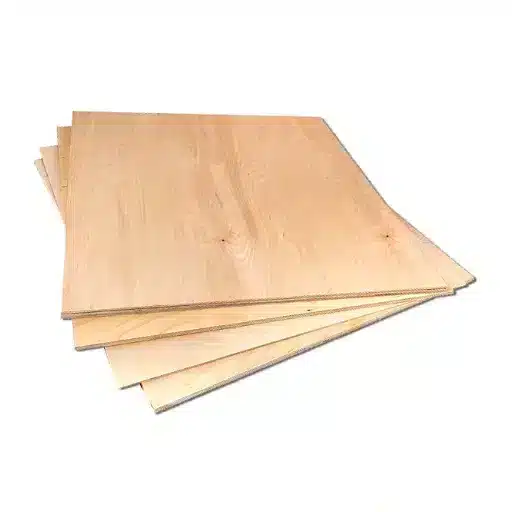
There isn’t one “general” plywood that does everything well; each type is tuned for a specific kind of abuse. Once you match the core, face, and glue line to the job, a lot of the usual site problems just stop showing up.
Softwood vs hardwood plywood in structural work
Softwood structural plywood is the workhorse you throw at floors, roofs, temporary decks, and sheathing. It’s usually made from species like pine, spruce, or fir, and optimized for stiffness and span rather than a pretty face. You see it in subfloors, wall bracing, roof diaphragms, pallet decks, and anywhere the panel is mostly hidden but the structure depends on it.
Hardwood plywood steps in when you still need structural performance but you also care about the surface and long‑term durability. Think birch or mixed tropical hardwood cores where screw‑holding and impact resistance matter, like in high‑traffic stage platforms, bus or train interiors, or container flooring. Take a 19 mm hardwood plywood panel and a similar softwood panel, screw both into the same framing, and jump on them; you’ll feel the difference in deflection and the way the screws “bite” into the core.
Softwood is often lighter and a bit more forgiving to handle all day. That matters when a crew is carrying 30–40 sheets up scaffolding in a shift. But hardwood cores usually tolerate concentrated loads better and are less prone to crushed edges under point loads from furniture legs, pallet jacks, or racking feet. So on paper they may both be “structural plywood”, yet on site they live in slightly different worlds.
MR, BWR, and BWP grades in plain language
MR, BWR, and BWP are really just shorthand for how much moisture abuse the glue line can take before the panel starts to complain. MR (Moisture Resistant) uses interior‑grade resin designed for occasional humidity and short‑term damp, not constant wetting. It’s fine for dry interiors, furniture, wardrobes, and paneling where the worst thing it sees is a damp cloth and a brief spike in humidity.
BWR (Boiling Water Resistant) steps things up with glue that can tolerate much harsher conditions, including intermittent wetting and outdoor exposure under some level of protection. This is where exterior doors, exposed balconies with decent detailing, and semi‑exposed cladding often land. If you’ve ever seen kitchen carcasses near a sink stay fine while the cheap MR backs swell and bubble, you’ve seen the boundary between what MR and BWR are really for.
BWP (Boiling Water Proof) is the “stop pretending, this will be wet” category. Here the adhesive system is rated to handle prolonged contact with water, repeated wet–dry cycles, and situations where trapped moisture is almost guaranteed. Think tanking areas, certain marine or near‑marine applications, or locations where failure would be too expensive to tolerate. The cost jump from MR to BWR can feel modest, but from MR to true BWP across 60–70 sheets in a wet‑heavy project is where you consciously decide whether that premium is cheap insurance or overkill for the use case.
So in practice, MR is for genuinely dry interiors, BWR is for “may get wet, should dry out”, and BWP is for “will be wet, often and for a long time”. When you spec plywood, you’re really deciding which description matches the worst‑case reality of that project, not the best case the sales brochure imagines.
Speciality options: marine, shuttering, veneered panels
Marine plywood is a subset where both the glue and the core quality are dialed up. You get high‑grade BWP or equivalent resin systems, tightly controlled core gaps, and better face veneers, because voids or weak spots in a hull, dock, or high‑moisture structural element can turn into failure points. True marine panels are overkill for most kitchen or wardrobe work, but in boats, floating structures, or permanent wet zones, regular exterior plywood is the false economy.
Shuttering (or formwork) plywood is built to be poured against. Here, the face is usually coated with a film or resin overlay to resist concrete paste, moisture, and abrasion from repeated stripping and cleaning. The core doesn’t need furniture‑grade cosmetics; it needs enough strength, stiffness, and bond quality to survive multiple pours without swelling, delaminating, or printing grain into the concrete more than the contractor can tolerate. Get this wrong and you start losing formwork reuse cycles, which escalates slab costs very fast on medium‑to‑large jobs.
Fancy or veneered plywood is almost the opposite: structural enough for furniture and interiors, but the real value is in the face. A decent core is skinned with decorative species—oak, walnut, teak, ash, or more exotic options—and intended for visible surfaces: wall paneling, built‑ins, high‑end cabinetry, reception desks. Here you’re balancing three things: the look of the veneer, the stability of the substrate, and how much sanding/finishing it can take before you burn through that top layer. A 0.6 mm veneer might be fine for a carefully finished boardroom wall, but a shop fit‑out that’s going to be dinged and reworked on site often benefits from a slightly more forgiving layup.
The point is, once you know what the plywood will actually live through—wet cycles, impacts, visible faces, spans—you can line these types up like tools in a box and pick the one that fits, instead of hoping one generic sheet will quietly do five jobs.
4 Things to Check Before You Buy Plywood
Good plywood is not a brand logo; it’s what you see and feel in the sheet in front of you. Five quick checks before you sign the GRN will save you from callbacks, swollen cabinets, and crews swearing at you on site.
Thickness, core gaps, and visible defects
If the plywood can’t hold its stated thickness, everything downstream gets messy. Measure a few sheets with a caliper or tape; an “18 mm” board that wanders between 16.8 and 18.7 mm inside the same stack is going to throw off hinge cups, grooves, and leveling. A little variation is normal, but when you can see the difference just by stacking two sheets side by side, you already know what the carpenter will say.
Check the edges for core gaps. Not one token glance—run your eyes along a full long edge and a short edge on random boards. If you see long, continuous voids, or gaps big enough to stick a 3 mm drill bit into, those are going to show up as soft spots under screws, weak corners, and random hollow sounds when you tap panels already fixed in place. On visible faces, look for open joints, overlaps, or football‑shaped patches that haven’t been sanded flush; those might be manageable on the “back” face, but they’re trouble on the show side.
Turn a sheet against the light and sight along it like a straightedge. Severe bow or twist in more than 2–3 sheets out of a bundle is a bad sign for the batch. A little camber can often be tamed by fixing and balancing laminate on both sides; a sheet that looks like a propeller will fight you every step of the way.
Density, weight, and screw‑holding
Weight tells you a lot before you ever see a lab report. Pick up a corner of an 18 mm sheet; after you’ve handled enough, you’ll know when something feels suspiciously light for its spec. Very low‑density cores might still be “plywood”, but they often trade away screw‑holding, impact resistance, and that solid feel you want in a door or stair riser.
Screw‑holding is where cheap boards give themselves away. Take a few offcuts, drive a wood screw 18–20 mm in from the edge, then back it out and re‑drive into the same spot. If the threads chew the core into dust on the second attempt, that panel is not your friend for hardware‑heavy applications like kitchens and wardrobes. In high‑use doors or partition frames, those weak edges will start to loosen up just when the project comes out of defect liability.
Density also affects vibration and sound. A slightly heavier, denser plywood in a partition or riser often feels “quieter” and more solid underfoot, whereas ultra‑light panels can sound drum‑like or hollow. That might not bother a warehouse, but in a boutique retail fit‑out or hotel corridor, you’d notice.
Moisture content and warping risk on site
Plywood arrives with some target moisture content, then immediately starts negotiating with your local climate. If the boards have been stored poorly—direct concrete contact, open yard, no stickers—you’ll see it in edge swelling, surface ripples, or panels that don’t sit flat on the stack. Even a cheap handheld moisture meter is worth carrying; spot‑check a few sheets in the middle of the pack, not just the top two.
What you’re really managing is the difference between the board’s moisture content and the environment where it will live. Take boards that are too “wet” into an air‑conditioned apartment and they’ll shrink, open joints, and sometimes telegraph every core imperfection. Take overly dry panels into a coastal, high‑humidity job and they can swell, push against fasteners, or dish slightly. That’s why it pays to get the plywood on site a bit early, stored off the floor and flat, so it can acclimatize before you cut all the parts.
Watch for edge sealing, especially on shuttering and exterior‑grade boards. Factory‑sealed edges won’t solve everything, but bare, thirsty edges on a slab job with daily watering are an invitation for localized swelling and delamination. If you know the job will be cruel with water, spec the grade to match and then treat those edges like the vulnerability they are.
Certifications, emissions, and local standards
Certifications are not magic, but they’re a quick filter. Look for marks that tie back to recognized standards—structural ratings, glue bond tests, and formaldehyde emission classes for interior work. On paper they might be small logos in a corner; on site they’re the difference between “this should behave within a known range” and “we’re hoping this batch is okay”.
Emissions matter in tight, climate‑controlled spaces. Boards rated to lower formaldehyde classes are a safer bet in bedrooms, schools, and healthcare interiors where off‑gassing is not just an annoyance but a genuine spec point. If your client insists on “green” or low‑VOC materials, you need to be able to show that the plywood substrate matches whatever story the decorative finishes are telling.
Local standards and building codes sit over all of this. Some jurisdictions specify minimum performance classes for structural plywood in shear walls or roofs; others define where interior‑grade boards can and cannot be used in egress routes. It’s pointless to have beautifully finished joinery if an inspector red‑tags the substrate. So before you chase a small price saving from an unfamiliar mill, check whether their paperwork and test reports line up with what your structural engineer or architect has actually called up.
When you put these checks together—thickness and defects, density and screws, moisture behavior, and the paperwork behind the board—you stop buying “plywood” as a generic commodity and start buying a predictable building component. That’s really the goal.
Plywood for Kitchens, Wardrobes, and Furniture: What Actually Works
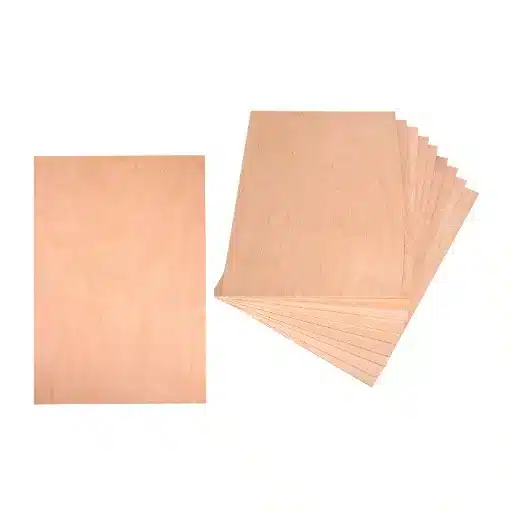
Kitchen and wardrobe failures almost never start at the laminate; they start at the plywood you can’t see. If the core, grade, and thickness aren’t matched to where the piece sits and how it’s used, hardware starts loosening, edges swell, and doors go out of line long before they should.
Best plywood specs for modular kitchens
For modular kitchens, treat the carcass as semi‑wet, even if the client swears the area is “well ventilated”. Sinks drip, mops splash, and steam finds every unsealed edge. So MR‑grade interior plywood on carcasses is usually false economy in busy homes. A BWR or true BWP‑grade plywood core for the lower cabinets gives you a glue line that can tolerate years of mild leaks, cleaning water, and daily humidity swings without the sides ballooning or the bottom panel softening around the waste pipe.
Thickness matters more than clients think. For most modular systems, 16–18 mm plywood for carcass sides and partitions is the sweet spot: stiff enough that a 700–750 mm wide cabinet doesn’t “breathe” when you load it with crockery, but not so heavy that installation becomes a wrestling match. Go thinner, say 12 mm on tall units, and you’ll see fastener heads printing through, boxes racking slightly during transport, and a general “flimsy” feel when drawers slam shut.
For shelves carrying real weight—stacks of plates, pantry jars, small appliances—a denser core is worth hunting down. Two boards can both be “18 mm BWR plywood” on paper, yet the one that feels a bit heavier in the hand will usually hold screws better and sag less on long spans. If you’re doing open shelves over 900 mm, it’s often smarter to stiffen the front edge or step up density than to pretend the material specs don’t matter and hope the hardware saves you.
Back panels are the quiet troublemakers. A 6 mm or 8 mm plywood back, properly housed in grooves and fixed, keeps a tall cabinet square and helps it survive shifting and refits. Swap that for cheap hardboard or a loose‑fixed thin panel and you’ll chase alignment issues for years, especially on taller pantry units where even a 2–3 mm skew shows up in door reveals.
Wardrobe shutters vs carcasses – do they need the same grade?
Carcasses and shutters live different lives, even on the same wardrobe. Carcasses are static boxes, fixed to walls, sometimes touching damp plaster or cold external walls. Shutters are moving panels, hung on hinges, with hardware concentrated at a few points and fingers constantly pulling on them. So no—they don’t always need exactly the same plywood grade, but they do need compatible performance.
For carcasses in bedrooms or dry walk‑in closets, a good MR‑grade plywood is usually enough if the room remains genuinely dry and the back isn’t pressed hard against a perpetually damp wall. Where there’s any risk of condensation or an external wall behind the unit, stepping up to BWR for the side panels is cheap insurance. Think of it as protecting the “shell” that everything else relies on.
Shutters care more about weight, stiffness, and screw‑holding than about long‑term wall moisture. You’re hanging a 2.1 m high, often 450–600 mm wide panel off 3 or 4 hinges. If the plywood is too light and soft in the core, hinge screws will slowly loosen, especially on frequently used doors like the middle pair on a three‑door wardrobe. A denser, void‑free plywood in 18–19 mm for larger shutters gives better edge hold and a nicer feel when the door swings—less rattle, fewer micro‑vibrations.
You can sometimes drop the shutter grade one notch below the wet‑zone spec. For example, BWR carcasses in a bedroom with MR shutters can be fine if the shutters are well‑sealed and not exposed to bathroom steam every morning. But mix too aggressively—MR carcasses on a damp external wall with long, heavy shutters—and you’ll see it: tiny misalignments after the first monsoon, doors kissing each other at the top, a 2–4 mm gap at the bottom, and hinges that need regular tightening.
One practical habit that pays off: agree a clear spec matrix per project. For instance: “Kitchen base and tall carcasses: 18 mm BWR plywood; wall cabinets: 16 mm BWR; wardrobe carcasses: 18 mm MR; wardrobe shutters: 18 mm high‑density MR or BWR if on a bathroom‑adjacent wall; backs: 6–8 mm MR plywood in grooves.” Write it once, reuse, tweak where the client or climate demands. It’s much easier than arguing with a finished, swollen cabinet about what you “meant” when you said “good plywood” in the BOQ.
Plywood vs MDF vs Particleboard: Which One Wins Where?
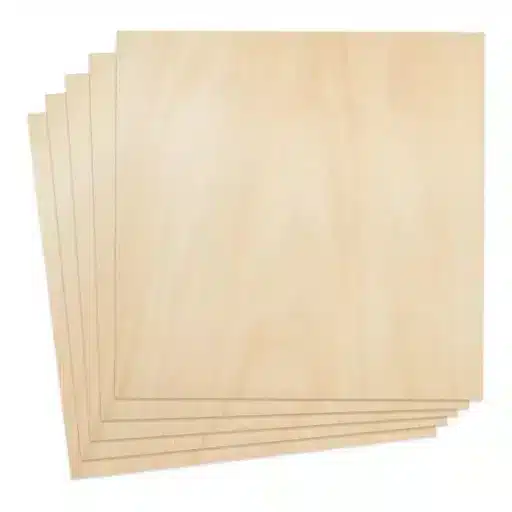
The right panel is rarely “the best material overall”; it’s the one that fails slowest in that specific job. Plywood, MDF, and particleboard each win on different axes, and treating them like interchangeable rectangles is where most durability problems start.
Cost versus lifespan in typical interior projects
If you rank them on price alone, particleboard is usually the cheapest, MDF sits in the middle, and plywood is at the top for the same thickness and footprint. In a low‑abuse rental fit‑out that’s expected to be ripped out in 5–7 years, it can make sense to lean heavily on particleboard and MDF for boxes and reserve plywood for only the wet or load‑critical areas. In a private apartment where the client expects the kitchen and wardrobes to outlive one repaint cycle, that math flips pretty fast.
Think in terms of cost per year of acceptable service, not cost per sheet. A particleboard wardrobe carcass might be 20–30% cheaper on day one, but if it starts to sag at shelf pins, blow out at hinge screws, or swell at skirting‑level within a couple of monsoons, you’ve paid for two jobs to get one long‑term result. Plywood, with its cross‑laminated veneers and better screw‑holding, tends to tolerate overloading, rough use, and minor leaks much better, so the extra money is buying you headroom and tolerance rather than some abstract “premium” badge.
MDF sits in an interesting middle ground. It’s not as strong as plywood in structural terms, yet in dry, air‑conditioned interiors it can hold up surprisingly well for cabinet doors, feature panels, and carcasses that aren’t being abused with heavy loads. Where clients want a very specific painted look and budget is tight but not rock‑bottom, a hybrid approach—plywood in wet zones and high‑load elements, MDF on painted façades and light‑duty internals—often gives the best cost–lifespan balance.
Machining, edge finishing, and paint quality
If you care about sharp profiles, clean router work, and glass‑smooth paint, MDF wins on surface behavior. Its fine, homogeneous core lets you machine tight radii, shaker profiles, and small details without fighting grain tear‑out, and it sands to a uniform surface that takes primer and paint very nicely. That’s why a lot of high‑end painted doors and wall panels are MDF on the outside even when the carcass behind is plywood.
Plywood behaves more like real wood. It’s stronger and stiffer, but the grain direction changes between plies, so aggressive routing can expose core veneers or chip out along the face grain if cutters are dull or feeds are too fast. For simple square‑edged doors, open shelving, and carcasses that will be laminated, plywood is fine; for intricate profiles that need to be painted dead‑flat, it takes more care and sometimes more putty and priming to get the same finish.
Particleboard is the least forgiving on edges. You can cut it cleanly with the right blades, but raw edges tend to crumble a bit, and if you route or over‑sand them you’ll quickly see the coarse chips under the melamine or veneer. It’s happy living behind factory‑applied laminates and edge banding in simple shapes. Start asking it to carry detailed CNC work or exposed painted edges and you’re fighting the material.
So the usual pattern in serious joinery is: plywood for structure and long spans, MDF where visible paint quality and routing complexity matter, particleboard for low‑visibility, regular‑shape boxes that are fully skinned with laminate or foil and not subject to heavy or wet use.
Weight, handling, and installation speed
On site, crews don’t talk about modulus of elasticity; they talk about “how many of these can I carry without wrecking my back.” MDF is dense and heavy—an 18 mm MDF sheet often feels noticeably heavier than an equivalent plywood sheet—so while it machines beautifully in the shop, it can slow down handling and installation in tight apartments or on upper floors without lifts. You’ll hear it in the way teams grumble when they have to haul 25–30 MDF doors up three flights.
Plywood, for its strength, is relatively light for the stiffness it delivers. That makes it ideal for large carcasses, tall units, and any element that needs to be lifted into place, held temporarily, and fixed. Installers can often maneuver a full‑height plywood wardrobe side solo or with one helper, whereas a similar MDF panel may need extra hands just to avoid corner damage and fatigue. That ease of handling translates to speed and fewer site damages.
Particleboard tends to be lighter than MDF but more fragile at edges and fastener points. So you can move it around quickly for standard boxes and shelves, yet you have to treat it with more care near corners and screw locations. On fast‑track, budget projects where every cabinet is a simple rectangle and everything is fully edged and laminated, that trade‑off can be acceptable. On high‑touch projects with multiple site adjustments, it’s not.
In practice, when speed and predictability are critical, many contractors lean on plywood for the “bones” of the job—tall units, long runs, wet‑adjacent cabinets—and use MDF or particleboard selectively where their strengths shine: MDF for painted fronts and detailed panels, particleboard for low‑risk, fully skinned modules in very dry, low‑wear areas. Plywood isn’t always the answer everywhere, but where failures hurt the most, it wins more often than not.
Frequently Asked Questions (FAQ)
-
What is the best plywood for a kitchen under the sink?
Go straight to a BWR or BWP‑grade plywood for the base and sides under the sink, not MR. That zone sees drips, cleaning water, and the occasional slow leak. An 18 mm BWR carcass with all cut edges sealed and a simple aluminum drip tray in the bottom cabinet survives far longer than a cheaper MR box you have to replace after the second plumbing issue. -
Why did my plywood wardrobe doors start bending after one monsoon?
Two common culprits: low‑grade or uneven‑moisture plywood and single‑side finishing. If only the front face got laminate or paint and the back is raw or poorly sealed, it will take up moisture at a different rate and the door will bow toward the drier side. Tall shutters over 2.1 m are especially sensitive if the core has gaps or mixed veneers. -
Can I use plywood instead of MDF for painted shaker‑style cabinet doors?
Yes, but expect more prep. Plywood is stronger and more moisture‑tolerant, yet routing shaker profiles across cross‑grained veneers can expose the core and cause tear‑out. In practice, many shops use high‑quality plywood for the door frame and an MDF or HDF center panel, or they do very shallow profiling and spend extra time on filling and priming to get a dead‑flat painted finish. -
Is 12 mm plywood enough for wardrobe carcass sides?
It can work on small, built‑in wardrobes with short spans and plenty of fixing points, but it’s marginal for tall, free‑standing units or wide modules. On a 900 mm wide, 2.4 m high wardrobe, 12 mm sides will “breathe” under load and are more likely to show screw heads and fastener imprinting. Most contractors settle on 16 or 18 mm for sides and use 12 mm only for internal dividers or drawers. -
Why does my plywood subfloor squeak even though the material is good?
Squeaks are usually about installation, not panel quality. If the plywood went down over an uneven subfloor, with a few proud nails or missing screws, you get tiny vertical movements around those spots every time someone walks by. Even a single missed joist line or skipping glue in a hallway can create a string of squeaks you only notice at 11 p.m. when the house is quiet.
References
-
APA – The Engineered Wood Association. (2020). APA Publishes Updated Engineered Wood Construction Guide (Form E30). https://www.apawood.org/apa-publishes-updated-engineered-wood-construction-guide-1
-
APA – The Engineered Wood Association. (2012). Panel Design Specification (D510C_2012). http://design.medeek.com/resources/structural/D510C_2012.pdf
-
APA – The Engineered Wood Association. (n.d.). Sanded Plywood – APA Product Guide. https://www.socomi.com/wp-content/uploads/APA_SandedPlywood.pdf
-
American Wood Council. (2018). Manual for Engineered Wood Construction. https://awc.org/publications/2018-manual-for-engineered-wood-construction/
-
U.S. Environmental Protection Agency. (2026). Formaldehyde Emission Standards for Composite Wood Products (TSCA Title VI Update). https://www.epa.gov/formaldehyde/formaldehyde-emission-standards-composite-wood-products