
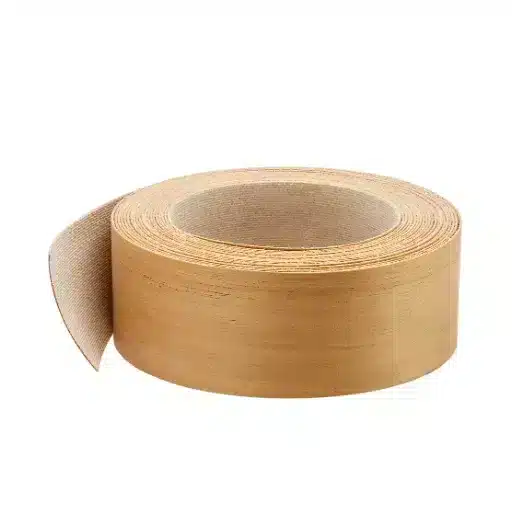
Pre-glued Edge Banding: Practical Guide for Woodworkers and Cabinet Shops
Pre-glued edge banding is one of those little shop upgrades that quietly saves you hours once you’ve used it a few times. You iron it on, trim the edges, and suddenly that raw plywood edge looks like it came off a much more expensive machine, which is why so many small cabinet shops and serious DIYers keep a few rolls within arm’s reach.
When Pre-glued Edge Banding Makes Sense (And When It Doesn’t)
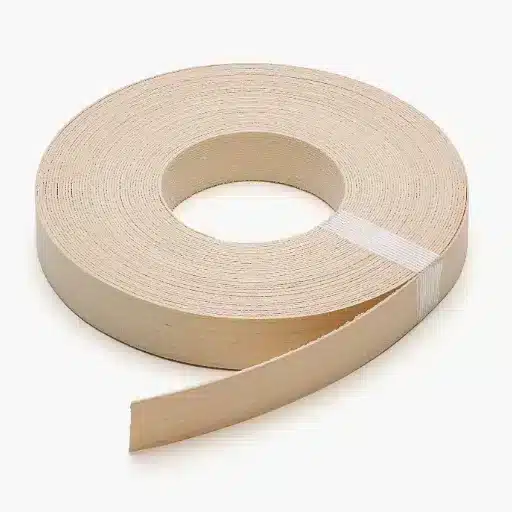
Pre-glued Edge Banding is great right up to the point your volume and quality demands outrun its convenience. That’s the line you’re really trying to find.
Ideal use cases: small shops, one-off builds, on-site touch-ups
Small custom shops and serious hobbyists get the most mileage here. If you’re doing a run of built-ins for a single room, or a batch of six cabinet boxes for a client, a few rolls of pre-glued tape and an iron can keep the job moving without tying up cash in more machinery. You can set up a quick station on a plywood offcut, blue tape as a fence, cheap trim knife, and be turning around parts fast enough that no one is waiting on a machine cycle.
It shines on one-off builds and prototypes. You’re testing a new carcass design, or knocking out a single vanity for a repeat client, and you don’t want to re-tune the edge bander for one weird color or thickness. So you grab a pre-glued roll, band the visible edges only, and keep the experiment lean. On-site touch-ups are the other sweet spot: fixing a chipped edge in a dentist’s office, covering a mis-sized panel in a retail install, or adding a clean edge to a filler strip the GC suddenly “needs by tomorrow”.
Situations where a dedicated edge bander + loose tape is better
Once you’re edging dozens of panels in a day, the equation flips. A dedicated edge bander with loose tape gives you consistent glue application, pressure, and trimming that’s hard to match with a household iron and a hand trimmer, especially when you’re running 40–60 parts per hour. Heat-activated glue on pre-glued tape is fine, but it’s not tuned the same way as a modern EVA or PUR setup with proper pressure rollers and controlled temperature.
Shops doing high-end cabinetry or institutional work usually need the reliability of a machine. You notice it in inside corners, long runs, and high-touch horizontal edges where pre-glued can telegraph every small inconsistency in pressure or heat. And if you’re trying to keep edges dead straight on a 94-inch pantry panel, wrestling it across a bench with an iron isn’t just awkward, it’s a risk to your finish quality.
Cost and waste considerations for different shop sizes
At low volume, pre-glued rolls are deceptively efficient. You buy exactly the species or color you need, run a small batch, and you’re not storing half a dozen 500-meter cartons that may or may not get used this year. Offcuts are manageable: a 1.8-meter scrap goes in a bin and will probably bail you out on some future drawer bank.
But as your throughput climbs, the cost per meter starts to look heavier than loose tape plus bulk glue, especially when you factor in labor time spent babysitting heat and trimming by hand. Larger shops also think in terms of waste at the panel level: one misapplied strip on a 30-piece kitchen is annoying; the same failure pattern on 230 dorm room desks is a real money leak. So the more you standardize materials and colors, the more a proper edge bander with non-glued tape pays for itself, while pre-glued stays in the drawer for oddball colors, quick fixes, and the jobs that don’t justify spinning up the big machine.
Choosing the Right Pre-glued Edge Banding for Your Project
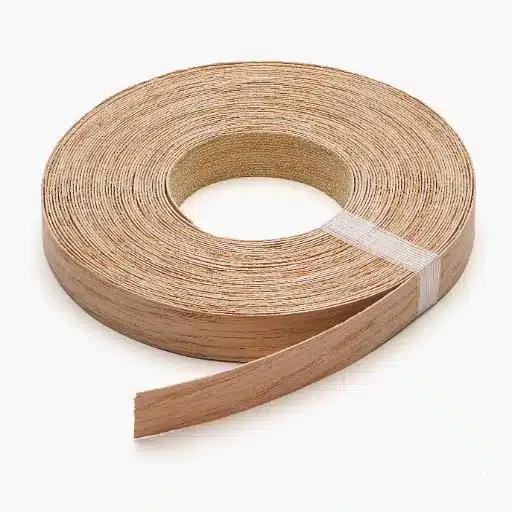
The wrong tape on the right panel still gives you the wrong result. Pre-glued Edge Banding only looks “effortless” when the material, size, and glue actually match how that piece will be used.
Matching material and finish to plywood, melamine, or veneer
Start with the core, not the tape. For veneered plywood or high-end furniture panels, pre-glued real wood veneer edging is usually the better match because it takes stain and clear coats the same way as the face, so you don’t end up with a plasticky edge next to a natural-looking field. On melamine carcasses or white closet systems, pre-glued PVC or melamine banding is more honest: it blends with the printed surface, shrugs off knocks, and nobody expects it to stain like oak anyway.
Color and sheen matter more than spec sheets suggest. A “white” melamine edge from one brand can sit just a bit off compared to a common cabinet white, and you’d notice it under LED strips along a run of 2.4‑meter uppers. So pull a small offcut, wipe on your actual finish, and hold the banding right up to the panel under real site lighting before committing a whole kitchen. That extra 90 seconds saves you from living with a near-miss for years.
Dialing in width, thickness, and glue type for durability
Width is where a lot of people get lazy. On 18 mm (3/4″) sheet goods, a 22 mm band gives you a comfortable 2 mm or so to trim on each side without knife tracks wandering into the face; go much wider and you’re just shaving off time and material for no gain. Thin veneer edging around 0.5–0.6 mm feels nice and crisp on furniture, but on high-traffic commercial fronts, a slightly thicker PVC edge can take far more abuse before you see dents at the corners.
Glue type on pre-glued rolls is often treated as a given, but it shouldn’t be. Some tapes use lower-melt adhesives that behave fine in a bedroom but start to creep or soften near appliances, radiators, or big south-facing windows. So if you’re edging panels next to a built-in coffee machine or in a sun-baked lobby, look for product notes that mention higher heat resistance or “hot-melt EVA with elevated softening point,” not just generic “heat-activated glue.”
Checking quality: glue coverage, backing, and flexibility
Before you commit a whole job, cut a 150 mm sample and look at the back. You want glue coverage that’s consistent across the width, no bald spots or heavy ridges where it’s clearly thicker in the middle than at the edges. Uneven glue is what gives you those annoying little gaps where the edge sits proud or won’t quite bond on the outer millimeter.
Backing and flexibility tell you how that roll will behave on a real panel, not on the website. Some veneer banding feels like dry crackers when you bend it across a slight radius; others flex smoothly around a 3 mm eased edge without checking or telegraphing grain cracks. For PVC, the test is whether it will uncoil without fighting you and sit relatively flat on the edge rather than springing up and cooling before you can get pressure on it. If the tape behaves more like a stubborn ruler than a cooperative strip, it’s going to slow you down at scale.
How to Apply Pre-glued Edge Banding Without Fighting It
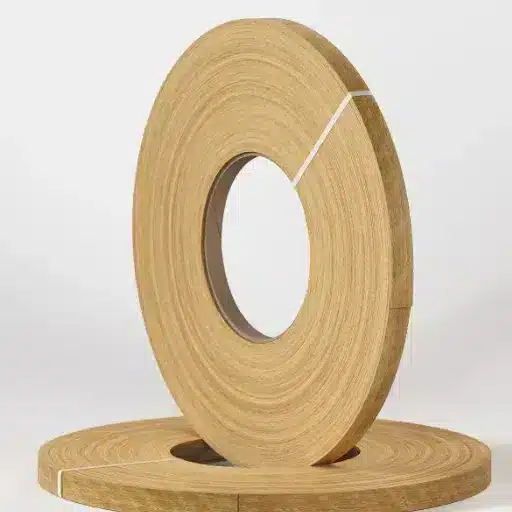
Pre-glued Edge Banding behaves nicely when you control three things: surface, heat, and pressure. Miss any one of those and you start chasing bubbles, gaps, or lifted corners.
Prep that actually matters: edges, dust, temperature
Sharp, square edges are non‑negotiable. If the panel came off a slightly dull blade and you can feel micro-chipping with your fingernail, you’re already making the glue’s job harder because it has to bridge tiny gaps instead of wetting a clean surface. A couple of light passes with 150–180 grit on a sanding block, kept dead flat to the edge, is usually enough to knock off fuzz without rounding things over.
Dust is the quiet saboteur here. Band a panel straight off the sander and you end up bonding glue to dust instead of glue to wood or melamine, which is why the strip feels fine on day one and starts to peel on that 1.9‑meter run a month later. Wipe edges with a clean rag or a quick blast of compressed air, and if you’re working with melamine or prefinished panels, a fast swipe with a lint‑free cloth and a bit of solvent (like denatured alcohol) goes a long way. The surface doesn’t need to be sterile. It just needs to be clean enough that the glue can actually grab.
Temperature matters more than most people admit. If you’re working in a cold garage in January, the panel, glue, and even the iron plate are all fighting each other; the glue cools before you can press it in. So let the tape and panels sit in the shop for a while, aim for a comfortable “shirt sleeves” environment, and don’t be shy about doing a test strip first to see how fast the glue flashes and grabs.
Using a household iron vs. edge-banding tools (pros and cons)
A household iron works fine if you respect its limits. Set it just below the “cotton” setting for most pre-glued products, keep the plate moving, and use the nose of the iron to walk along the banding rather than parking the whole soleplate in one spot. You want the glue to fully melt and go glossy without scorching the veneer or blistering PVC. Count a slow three-second pass on a small test offcut and watch how the glue behaves; that little experiment tells you a lot.
But there’s a ceiling to what an iron can do consistently. On long cabinet sides or tall pantry panels, the heat zone under the iron is small and cools quickly, so you’re working in short, overlapping segments and relying on hand pressure or a roller right behind it. That’s where dedicated edge-banding tools earn their keep. A simple hand edge-banding roller gives you much better and more even pressure, and dedicated electric edge trimmers/heat tools can maintain more consistent temperature and speed, especially when you’re doing ten or twelve identical parts in a row.
Still, you don’t need a full edge-bander to get good results. A cheap iron that’s “sacrificed” to the shop, a scrap of clean MDF as a flat backer, and a decent J‑roller is enough to produce clean, reliable edges once you get your rhythm. Just don’t mix that iron back into the laundry room unless you like glue on your shirts.
Trimming, flushing, and softening edges so they don’t chip out
Trimming is where most of the visible sins happen. If you go straight at the fresh banding with an aggressive block plane or a random knife, you’ll pull the glue line or chip the veneer, especially at the last 15 mm of the run. Purpose-made edge trimmers—those little double-sided “V” cutters that ride the panel—do a surprisingly good job if you keep them sharp and take your time. Short, controlled strokes beat long, aggressive ones every time.
Once the bulk is trimmed, flushing to the face is a feel thing. A sharp block plane set for a whisper-thin cut, held at a slight skew, can leave a glassy edge on solid panels; on veneered sheet, a fine file or 240–320 grit on a backing block gives you a safer margin. Work from the middle out toward each end rather than running off the corner—that habit alone saves a lot of chip-outs.
Softening the edge is the final insurance. A single light pass with 320 grit just breaking the sharp corner makes the edge less likely to get caught by sleeves, bags, or cleaning tools, which is usually when chipping starts. Think of it like easing a door edge: you’re not rounding it over, just taking the knife off it. Once you’ve done a few this way, you can run a hand along the panel and feel immediately whether the edge is going to survive a real house or shop, not just the photos.
“Why Is This Peeling?” Common Issues and Fixes
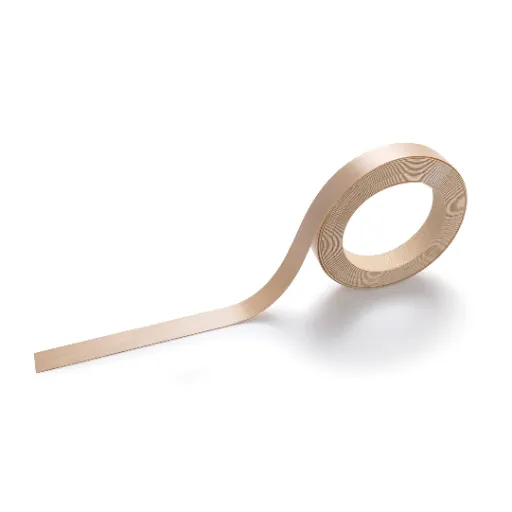
When Pre-glued Edge Banding starts lifting, it’s almost always the same culprits: not enough heat, not enough pressure, or a surface that was never really ready. The good news is most of it is fixable without rebuilding the cabinet.
Glue not bonding (heat, pressure, and surface problems)
If the banding feels “stuck but not committed,” you’re in that half-bond zone where the glue softened but never fully wet the surface. Too fast a pass with the iron, or an iron that’s running cooler than you think, leaves the glue textured instead of glossy and flowed, so it clings but doesn’t really key into the fibers. Dust, factory oils, or a slightly burnished melamine edge just make that worse.
The fix is usually targeted reactivation. Warm a 150–200 mm section with the iron, using a bit more dwell time than you did the first round, then immediately follow with a hard roller or a scrap block wrapped in a rag, pushing firmly from the middle out. On raw wood edges you can sometimes lightly scuff with 180–220 grit before reheating to give the glue something fresh to bite into. If you reheat and still see obvious gaps when it cools, that piece either needs more aggressive sanding back to clean material or a different adhesive altogether.
Corners lifting and how to reinforce high-wear areas
Corners are where Pre-glued Edge Banding gets stress-tested in real life. A backpack catches a cabinet edge twice a day, a vacuum hose clips the pantry side, kids drag a chair past a desk panel—that’s where the last 10–15 mm starts to lift. If those ends weren’t really pressed down, or the glue there overheated and skinned, they’ll peel back just enough to annoy you.
So you treat corners as a separate operation. After trimming, reheat just the last 30 mm with the tip of the iron, then press hard with a block or roller, almost like you’re trying to “ramp” the edge into the panel. On high-wear pieces—school furniture, rental units, shop cabinets—you can even micro‑chamfer that corner with 320 grit so there’s no sharp lip to catch. It feels like a tiny step, but you’d notice the difference after a few months of real use.
Damage repair: spot reactivation vs full replacement
Not every scar calls for a full strip replacement. If a small section has lifted or taken a light ding, reactivation is usually faster: slip a thin putty knife or feeler gauge behind the loose area, flick out any dust, then work a bit of heat in with the iron and press back down. Clamp with a scrap and a spring clamp for 10–15 minutes if you can, just to keep it honest while it cools.
Full replacement makes more sense when the edge is chewed up, cracked along the grain, or the peeling runs most of the length. In that case, it’s cleaner to warm the banding in sections, lift it with a scraper while the glue is soft, then scrape or sand back to bare edge before starting fresh. It feels like a bigger job, but you end up with a more trustworthy edge instead of babysitting a patchwork of fixes every few weeks.
Pre-glued Edge Banding vs Other Options
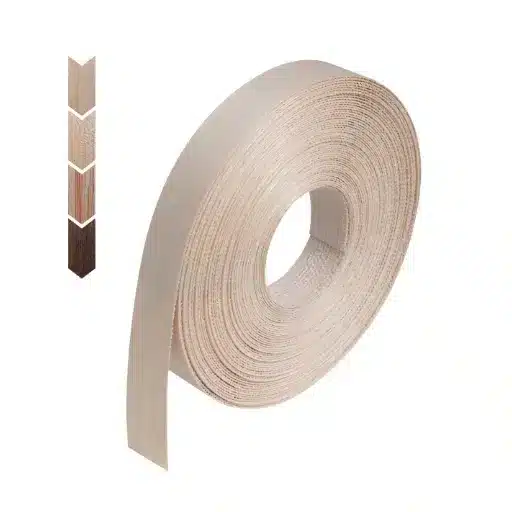
Pre-glued Edge Banding solves a specific problem: you want a clean edge without setting up a full glue system or edge bander. Everything else is a trade against that convenience.
Pre-glued vs non-glued tape with EVA/PU adhesive
Non-glued tape with EVA or PU adhesive is built for throughput and consistency, not quick fixes. You’re melting a separate glue, applying it with a roller system, and pressing the tape on with controlled pressure, so the bond is usually stronger and more uniform across long runs. It’s the setup you see on serious cabinet lines and institutional furniture because it shrugs off daily abuse and temperature swings better than most heat-activated pre-glued strips.
But that performance comes with overhead. You’re committing to an edge bander, glue maintenance, cleaning cycles, and keeping settings dialed in for different materials and thicknesses. Pre-glued is the opposite: grab a roll, plug in an iron, and you’re in business for a 7‑cabinet project or a handful of shelves. So the question isn’t “which is better” in the abstract, it’s “do you have enough repeat volume to justify the machinery and glue management”.
Pre-glued vs peel-and-stick and edge paint solutions
Peel-and-stick edge tapes look tempting on paper. No heat, no special tools, just press and go. In practice, the pressure-sensitive adhesive is rarely as tenacious as a properly heated and pressed pre-glued bond, especially on slightly rough plywood edges or in rooms that see humidity and temperature swings. You can get away with peel-and-stick for closet interiors or light-duty shelving, but you start to see edges lifting or creeping on cabinet doors, desk fronts, or kids’ furniture.
Edge paint is even more of a compromise. It’s great for hiding a raw MDF or plywood edge in a budget built-in or a shop storage run, and with good prep and primer you can get a surprisingly clean look from a few feet away. Up close, though, you still see the core structure, and it doesn’t protect the edge the way a physical band does. Pre-glued Edge Banding gives you an actual sacrificial layer that can take knocks and dings; paint is just a colored film sitting on the same vulnerable edge.
Durability and appearance over time in real-world use
On a kitchen that gets used hard every day, pre-glued that was applied well will hold up much better than peel-and-stick or painted edges, but still won’t quite match a dialed-in EVA/PU edge-banded setup in a pro shop. You tend to see the difference at dishwashers, near ovens, and on pantry sides where bags and vacuum hoses hit the same spots over and over. Pre-glued will eventually show a bit of polishing at the corners or the odd lifted patch if the prep wasn’t great; a good machine-applied EVA or PU edge often just looks slightly burnished after years.
Visually, real wood pre-glued edging has a big advantage over paint or plastic tape when you’re matching veneered panels. It takes stain and clear coats in the same family as the face, so the whole panel reads as a single piece rather than “nice front, cheap edge.” PVC and melamine pre-glued edge banding, on the other hand, is more about color match and durability; if the color is right, the average person never thinks about what’s under their hand, they just feel a smooth, consistent edge that doesn’t snag or chip. In the end, that’s what you’re really buying: not just adhesion, but how invisible that edge feels in day-to-day use.
Frequently Asked Questions (FAQ)
-
Is pre-glued edge banding strong enough for a busy family kitchen?
Yes, if you prep well and apply good heat and pressure. On 3/4″ cabinet boxes, sand the edge lightly with 180 grit, clean the dust, then use a hot iron and a J‑roller. I’ve seen pre-glued veneer on dishwasher-adjacent panels hold up for years, with only a light rounding of the front corners from daily use. -
Can I use pre-glued edge banding with just a regular household iron?
You can. Set the iron just under “cotton,” keep it moving, and work in 200–300 mm sections. Press firmly with a block or roller right after heating. On a small job like a home office desk, I’ll tape the banding in place with blue tape, walk the iron along the edge, then burnish once more after it cools for a minute. -
What size pre-glued edge banding should I buy for 18 mm plywood?
For 18 mm (3/4″) sheet goods, 22 mm wide banding is a good sweet spot. It gives you a couple of millimeters overhang per side so you can trim flush without risking the face veneer. On a run of closet shelves, that extra width means your edge trimmer stays safely on banding instead of occasionally biting into the melamine. -
Why does my pre-glued edge banding keep peeling at the ends?
Ends usually peel because they never got full heat and pressure. The last 20 mm gets rushed. On your next panel, reheat just the final bit with the nose of the iron, then press hard with a scrap block, almost “rolling” the edge into the panel. On a kid’s bookshelf, I’ll even ease that front corner with 320 grit so backpacks don’t catch it. -
Is pre-glued edge banding OK for commercial or office furniture?
For light- to medium-duty office pieces, yes—think meeting room cabinets or printer stands that won’t see constant abuse. I’d be more cautious on dorm beds or cafeteria tables. There, a non-glued tape with EVA/PU on a proper edge bander usually outperforms it, especially on those long 2.1 m edges that get bumped by carts and chairs every day.
References
-
Woodworking Network. (2014). How to Evaluate Quality Edge Banding. https://www.woodworkingnetwork.com/panel-talk/panel-talk-blogs/how-evaluate-quality-edge-banding
-
American Wood Council. (2022). Wood Products in Cabinetry and Millwork: Performance Considerations. https://www.awc.org/