
Refinishing Maple Floors: A Maple-Specific 2026 Guide
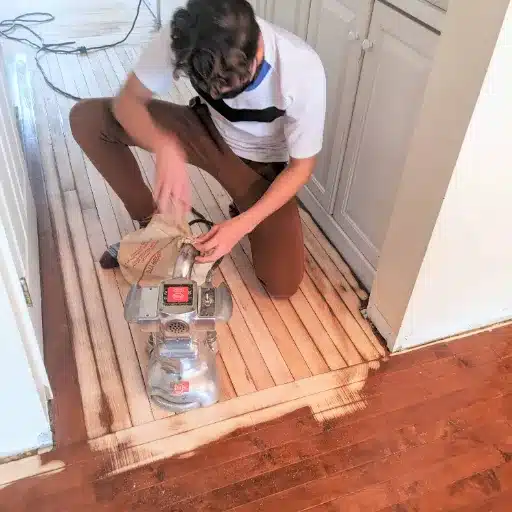
Refinishing maple floors works best when you finish-sand at 120 grit, keep the sander moving to avoid burning the wood, and seal it with a water-based finish that resists yellowing. Because hard maple is dense (Janka hardness around 1,450) and pale, it shows every sanding mark and every speck of dirt. The process is far less forgiving than refinishing oak.
When Dana bought her 1964 ranch house, the original maple floors were covered in carpet. She pulled it up expecting a refinish to be a weekend project. One pass with a rented drum sander changed her mind. The white maple darkened to a scorched brown streak where she had paused the machine, and the scratch pattern looked like a light show under the afternoon sun. Dana learned the lesson every maple owner learns: this wood rewards patience and punishes hurry.
If you own maple floors, you already know they are worth saving. They are among the hardest, most beautiful domestic hardwoods, and a proper refinish can bring back a floor that looks brand new.
Refinishing maple hardwood floors is a different job from refinishing oak, and this guide treats it that way. You will learn how to tell whether your maple floor needs a full sand or just a recoat, how to sand it without burning it, which finishes keep maple light, and what the whole job costs in 2026. We will also cover the parts most guides skip: yellowing, blotchy staining, and the honest limits of thin engineered wear layers.
Key Takeaways
- Maple is denser and more photosensitive than oak, so refinish it carefully: finish at 120 grit, keep the sander moving, and never skip grits.
- Use the water-bead test to decide between a screen-and-recoat (about $1.50 to $3.00 per square foot) and a full sand-and-refinish (about $3.00 to $8.00 per square foot, plus $1 to $2 for maple’s density).
- Solid maple supports about 5 to 8 refinishes over its life; engineered maple allows 0 to 3 depending on wear layer, and floors with HDF cores cannot be sanded at all.
- A water-based finish with UV inhibitors keeps maple light and resists the ambering that oil-based polyurethane adds over time.
- Refinishing preserves the embodied carbon in your existing floor and beats replacement on both cost and environmental impact.
Why Refinishing Maple Floors Is Different
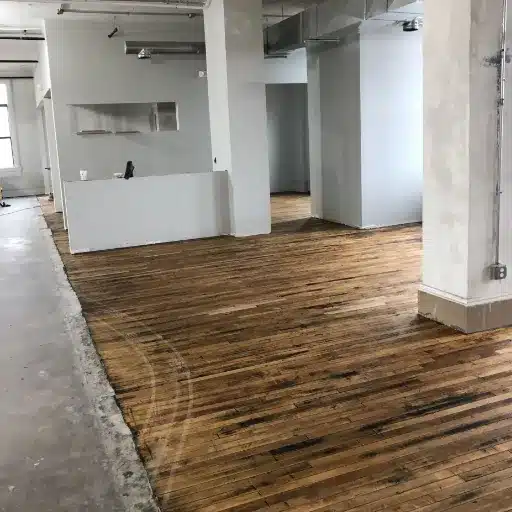
Maple is not a harder version of oak. It is a different animal under a sander, and understanding why saves you from expensive mistakes.
Hard maple (Acer saccharum) ranks around 1,450 on the Janka scale, harder than red oak (about 1,290) and white oak (about 1,360), as documented by The Wood Database. That density makes maple wonderfully dent-resistant. It also means the wood heats up fast under an abrasive, and heat is what causes burnishing, the shiny scorch marks that show up when a sander sits too long in one spot.
The pale, uniform grain compounds the problem. Maple has almost no grain texture to hide behind, so swirl marks, chatter, and cross-grain scratches that would vanish on oak stand out sharply. This is why professionals finish maple at 120 grit and never go coarser on the final pass. Coarse grits are for stripping old finish, not for the final cut.
There is a second layer of complexity: maple’s chemical behavior. The same dense grain that resists dents also absorbs stain unevenly, which is why maple blotches if you try to darken it. If you plan to change the color during your refinish, read our guide to staining maple floors before you buy a single can of pigment. And if you are deciding between a real-maple veneer and a solid board in the first place, our comparison of engineered maple vs. solid maple explains how each one handles a sander.
Maple also moves more than oak with changes in humidity. Keep the room near 35% to 55% relative humidity after refinishing, and the wood will stay flat and tight.
Should You Refinish, Recoat, or Replace?
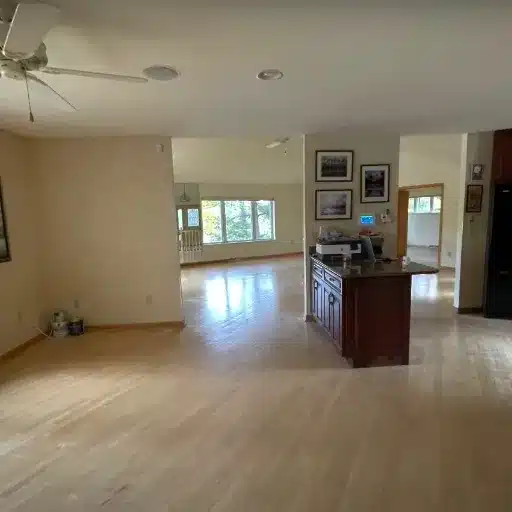
Before you rent a sander, run three simple tests. They tell you whether your floor needs a full refinish, a lighter recoat, or a replacement.
The water-bead test. Put a few drops of water on the floor and watch. If the water beads up and sits for several minutes, your finish is still intact and a screen-and-recoat may be all you need. If the water soaks in within about a minute, the finish has failed and the wood is exposed.
The raking-light inspection. Turn off the room lights and shine a bright light low across the surface. Angled light reveals what flat light hides: dish-out (dips worn into traffic lanes), chatter marks, and swirl patterns from a previous bad sanding job.
The nail and edge check. Look for protruding nails, cupped boards, and dark black water stains. Protruding nails must be set before sanding or they will shred your paper. Black stains that reach through the wood will not sand out.
If your maple floor shows only a dull sheen and light surface scratches, you are a recoat candidate. If it has deep scratches, worn-through finish, or a color you want to change, plan on a full sand. If it has widespread cupping, buckling, or water damage that has reached the core, replacement of affected boards, not refinishing, is the honest answer.
Want to know if your floor is refinishable before you spend a dollar? Contact our team with a few photos and your floor’s age, and we will help you diagnose it.
Screen and Recoat vs. Full Sand-and-Refinish
These are the two real options, and they are not interchangeable. Here is how they compare.
| Factor | Screen and Recoat | Full Sand-and-Refinish |
|---|---|---|
| What it does | Scuffs the existing finish and adds a new topcoat | Removes finish and a thin layer of wood, then rebuilds |
| Fixes | Dull finish, light scratches | Deep scratches, dents, stains, color changes |
| Removes wood | Almost none | About 1/32 to 1/16 inch per sanding |
| Cost | $1.50 to $3.00 per square foot | $3.00 to $8.00 per square foot (plus $1 to $2 for maple) |
| Time | About 1 day | 3 to 5 days |
| Dust | Minimal | Significant, though containment helps |
| Can change color | No | Yes |
Screen and recoat maple floors, sometimes called buff and recoat, is the affordable maintenance step. Done every 3 to 5 years, it can postpone a full refinish by years. It cannot hide deep damage or shift the color, no matter what a product label promises.
Full sand-and-refinish is the reset button. It is the only way to erase deep scratches, remove pet stains, or take a floor from dark walnut back to light natural maple. Because maple is dense, this option costs a bit more than it would on oak. The extra sanding effort is real.
If your engineered floor has a thin wear layer, neither of these options may apply to you, which is exactly what the next section explains.
Can Engineered Maple Floors Be Refinished?
Sometimes yes, sometimes no. The deciding factor is the wear layer, the real maple veneer bonded to the top of the board. Total plank thickness tells you almost nothing. The wear layer tells you everything.
| Wear Layer Thickness | Refinishing Potential |
|---|---|
| Under 2 mm | No sanding; screen-and-recoat only |
| 2 to 3 mm | About one careful sanding |
| 3 to 4 mm | 2 to 3 sandings |
| 6 mm and up | Approaches solid maple |
Boards built on a high-density fiberboard (HDF) core sit at the bottom of that table. Their surface is too thin to sand, so a screen-and-recoat is the only refresh available. A plywood core with a 3 to 4 mm wear layer, by contrast, behaves much like a thinner solid floor.
To find your wear layer, check the manufacturer’s spec sheet, measure a leftover plank from the edge, or peek at a board under a floor vent. If you cannot find the number, treat the floor as thin and recoat rather than sand.
How to Refinish Maple Floors, Step by Step
Here is the process, in order. If you only read one section of this guide, make it this one.
- Clear and protect the room. Remove furniture, set up plastic sheeting over doorways, and seal HVAC vents. Dust travels everywhere.
- Repair before you sand. Set protruding nails with a punch, replace rotted boards, and fill cracks with a stainable wood filler matched to your final color.
- Sand in sequence. Use a drum or belt sander for open areas and an edger along walls. Start with a coarse grit to strip finish, then step through the grits. On maple, do not skip steps. End at 120 grit and stop there.
- Keep the machine moving. Always sand with the grain, never pause in one spot, and use light, overlapping passes. Momentum is what prevents burnishing.
- Hand-scrape the corners. The areas the edger cannot reach need a cabinet scraper or sanding block, worked with the grain.
- Vacuum and tack-cloth. Remove every trace of dust. Contaminated surfaces cause fisheyes and poor adhesion.
- Stain if you want color, but test first. Try your stain on a hidden scrap. See the blotch section below.
- Apply 2 to 3 thin finish coats. Buff lightly between coats with a fine screen or pad.
- Let it cure. The floor is walkable in about 3 hours, furniture can return in 7 to 14 days, and full cure takes about 30 days.
That fourth step is where most DIY jobs go wrong. Marcus, a handy homeowner in Ohio, tried to refinish 600 square feet of maple in a single weekend. He moved too fast on the final pass, and by Sunday night the floor was covered in burnish streaks and pigtail swirls. Fixing it meant sanding the entire floor again, twice the work, twice the rental fees, and a week of lost time. The tool did not fail him. The pace did.
Choosing the Best Finish for Maple Floors
The finish you choose decides whether your maple stays light and clean or turns honey-gold within a few years. Here are the three real options.
Water-Based Polyurethane
Water-based polyurethane is the best default for maple. It stays clear, resists the ambering that plagues oil-based products, dries in as little as two hours, and emits far fewer volatile organic compounds (VOCs). Look for formulas with UV inhibitors, which slow the wood’s natural color shift.
Oil-Based Polyurethane
Oil-based polyurethane adds a warm, rich tone that some traditionalists love. It is durable and forgiving, but it ambers over time and adds noticeable yellow to pale maple. It also has a stronger odor and a much slower cure, so plan on fewer coats per day and more ventilation.
Natural Oil and Hardwax Oil
Penetrating oils like hardwax oil give a matte, natural look and are easy to spot-repair. They require a maintenance routine, and they offer less surface protection than polyurethane. They suit design-forward spaces where a low sheen matters more than maximum durability.
Whichever you pick, one warning applies to all three: residue from silicone or wax-based cleaners will cause fisheyes and adhesion failure. Strip any cleaner film before you coat. If you are recoating over an existing aluminum-oxide or oil finish with a water-based product, use a bonding agent to help the new coat grip.
Not sure which finish suits your maple? Our engineered maple flooring guide covers grades, finishes, and styles, and our real maple veneer products are built for projects that need lasting color consistency.
Do Maple Floors Turn Yellow When Refinished?
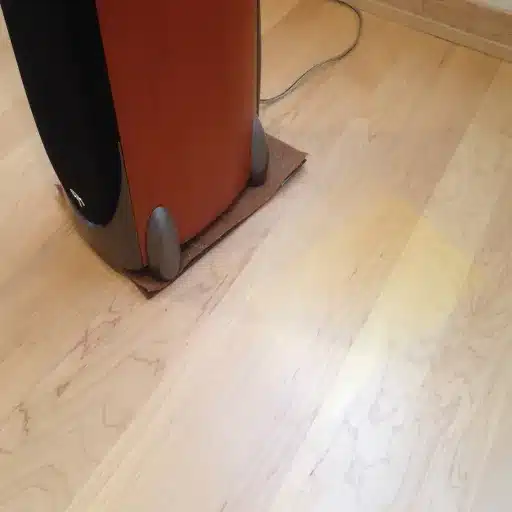
They can, but you control most of it. Yellowing has two separate causes, and only one lives in the wood itself.
The first cause is the wood. Maple is photosensitive. Over years of sunlight, even a sealed maple floor drifts from cream toward honey as UV light works on the wood fibers. The second cause is the finish. Oil-based polyurethane ambers on its own as it ages, layering an orange cast on top of the wood’s own change.
Here is the good news for refinishing. Sanding removes the aged finish, and with it most of the amber. Once you take the sander to maple, the wood underneath returns to a surprisingly light tone. What sanding cannot undo is the wood’s own patina, a gentle color that develops with age and cannot be fully reversed.
To slow future yellowing, choose a water-based finish with UV inhibitors, keep rugs and window treatments in bright rooms, and consider window film on sun-facing glass. Both causes are summarized by finish manufacturers and flooring authorities, and you can confirm the wood properties through the Maple Flooring Manufacturers Association.
Staining Refinished Maple Floors Without Blotching
Maple has a dense, diffuse-porous grain that absorbs pigment unevenly. That is the whole explanation for blotching. Open-grain woods like oak drink stain evenly because the pores take it uniformly. Maple’s pores are tight and inconsistent, so pigment lands in patches.
If you want a different color, you have tools:
- Pre-stain conditioner. Fills and evens the surface so pigment absorbs more uniformly.
- Gel or dye stains. Gel stains sit on the surface and give more control; dye stains penetrate evenly without muddying the grain.
- Water-popping. Dampening the wood first raises the grain and helps the stain take consistently.
- Washcoat sealing. A thin sealer coat before staining limits how deep pigment can go.
Test every option on a scrap of the same wood first. If you want a deep, rich color and even coverage, a pro is often worth the cost. For the full method, including the mistakes to avoid, see our step-by-step guide to staining maple floors and our fixes for blotchy wood stain.
What Refinishing Maple Floors Costs in 2026
Maple floor refinishing cost depends on the method, the size of the room, and whether you DIY or hire out. Here is a realistic 2026 picture.
| Service | Cost per Square Foot | Typical Time |
|---|---|---|
| DIY screen-and-recoat (supplies only) | $0.50 to $1.50 | 1 day |
| Professional screen-and-recoat | $1.50 to $3.00 | 1 day |
| Professional full refinish | $3.00 to $8.00 (plus $1 to $2 maple premium) | 3 to 5 days |
| Full replacement | $10 to $25 | 1 to 2 weeks |
Refinishing is roughly 40% to 60% cheaper than replacement, and the National Association of Realtors has repeatedly found that refinishing delivers one of the highest returns of any interior project. For a 500 square foot room, expect a professional full refinish to land between $1,500 and $4,000, while a DIY version might cost $500 to $1,000 in materials and rentals.
DIY maple floor refinishing saves money, but the risk is concentrated. Burnishing, gouges, and blotchy stain are hard to undo on maple, and correcting them can cost more than hiring a pro from the start. A pro brings the right equipment, dust containment, finish compatibility knowledge, and a warranty. If your home was built before 1978, professionals also follow the EPA Renovation, Repair and Painting rule to manage old paint dust safely.
Sustainability: Why Refinishing Beats Replacement
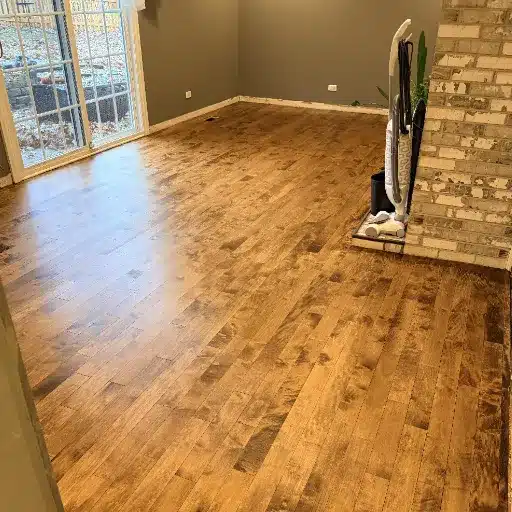
Every time you refinish a maple floor instead of tearing it out, you keep a fully grown hardwood tree out of the waste stream. That is the quiet environmental win of refinishing.
A new floor means new milling, new transport, and new finishing, along with the carbon all of that releases. Your existing floor already stores carbon in its fibers. Refinishing preserves that storage and adds only a thin layer of finish, which is a fraction of the material and energy of a replacement.
You can make the choice even greener. Select low-VOC, water-based finishes that meet indoor air quality standards such as FloorScore, and look for responsibly sourced wood, including certified maple veneer, when any boards do need replacing. Refinishing responsibly is one of the simplest ways to build a greener home, one floor at a time.
FAQ: Refinishing Maple Floors
How many times can you refinish maple floors?
Solid maple supports about 5 to 8 full sand-and-refinish cycles over a 50-to-100-plus-year life, because it carries about 1/4 inch of sandable wood above the tongue. Engineered maple allows 0 to 3 sandings depending on wear layer, and floors with HDF cores cannot be sanded at all.
Can engineered maple floors be refinished?
Only if the wear layer is thick enough. A wear layer of 2 to 3 mm allows about one careful sanding, 3 to 4 mm allows 2 to 3, and 6 mm and up behaves much like solid maple. Under 2 mm, or on an HDF core, use screen-and-recoat instead.
What grit should I finish maple floors with?
Finish at 120 grit, never coarser. Coarse grits are for stripping, not for the final pass. Go through the full grit sequence without skipping steps, because maple shows every shortcut.
Do maple floors turn yellow when refinished?
Partially. Sanding removes the ambering of an aged oil-based finish, but the wood’s own UV-driven patina cannot be fully reversed. A water-based finish with UV inhibitors keeps the floor as light as possible going forward.
Is it cheaper to refinish or replace maple floors?
Refinishing is typically 40% to 60% cheaper than replacement. A professional full refinish runs about $3 to $8 per square foot, while new flooring installed runs $10 to $25 per square foot.
Can I stain maple floors a different color when refinishing?
Yes, but maple blotches easily because of its dense grain. Use a pre-stain conditioner, a gel or dye stain, or a washcoat, and always test on a scrap first. If you want a deep color with even coverage, a professional is often the safer route.
Final Thoughts
Refinishing maple floors is a job where the details decide the outcome. Maple’s hardness and pale, even grain make it beautiful and durable, but also unforgiving. Finish at 120 grit, keep the sander moving, test your stain, and choose a finish that will not amber.
You do not have to do it alone. Our engineered maple flooring guide and our comparison of hard maple vs soft maple flooring will help you understand exactly what you are working with. With the right approach, your maple floor can look new again, and it can keep that character for decades to come.
Contact VitalWood Global for certified, sustainable maple products and refinishing questions. We are here to help you protect the floor you already love.