
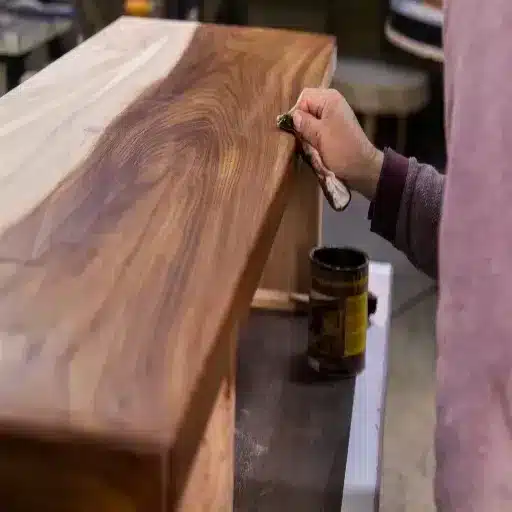
How to Fix Blotchy Wood Stain: 5 Proven Repair Methods
Blotchy wood stain happens when porous areas of the wood absorb more pigment than harder, denser areas, leaving uneven color across the surface. You can fix it by applying a gel stain over the existing color, darkening the whole surface with a second coat, evening it out with a toner or glaze, sanding back to bare wood, or stripping and starting completely fresh.
Most blotching comes from softwoods like pine and maple, from skipping grits during sanding, or from applying stain without a pre-stain wood conditioner. The good news is that you rarely have to scrap the whole project. The right fix depends on how bad the blotches are, what species you are working with, and how much time you are willing to invest. In this guide, you will learn how to assess the damage, choose the least invasive repair method, and prevent blotchy stains from happening next time.
For the complete staining workflow from start to finish, see our guide on how to stain wood.
Key Takeaways
- Blotchy stain is caused by uneven wood density, not by poor stain quality.
- Gel stain is the fastest fix for light to moderate blotching because it sits on top of the wood.
- A toner or glaze over a sealed surface gives professionals the most even results.
- Sanding back to bare wood is the most reliable fix for severe blotching.
- Pre-stain wood conditioner prevents blotching on pine, maple, birch, and cherry.
What Causes Blotchy Wood Stain?
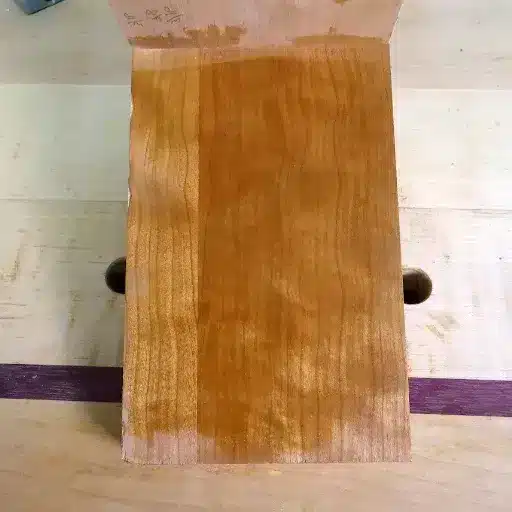
Wood is not uniform. Even within the same board, some areas are softer and more absorbent, while others are harder and denser. When the stain soaks in faster in the soft spots, those areas look darker. The hard areas stay lighter. The result is a blotchy, streaky, or mottled finish.
Common Causes
- Uneven density. Softwoods like pine, fir, spruce, and cedar have earlywood and latewood rings that absorb stain at very different rates.
- Hardwoods with tight grain. Maple, birch, and cherry can look blotchy because the grain is so tight and uneven that stain penetration varies.
- Skipped grits during sanding. Jumping from 80-grit to 220-grit leaves deep scratches that hold more pigment.
- Missing pre-stain conditioner. A conditioner partially seals the wood, so the stain absorbs more evenly.
- Stain left too long before wiping. The longer the stain sits, the more it soaks into soft spots.
- Wrong stain type. Thin, penetrating stains exaggerate blotching on difficult species.
If you are starting a new project, the best defense is proper preparation. Our guide to how to prepare wood for staining walks through sanding and conditioning step by step. Pine is especially tricky because its earlywood absorbs stain much faster than the harder latewood rings. For pine-specific techniques, see our guide on how to stain pine wood without blotching.
Method 1: Apply a Gel Stain Over the Existing Color
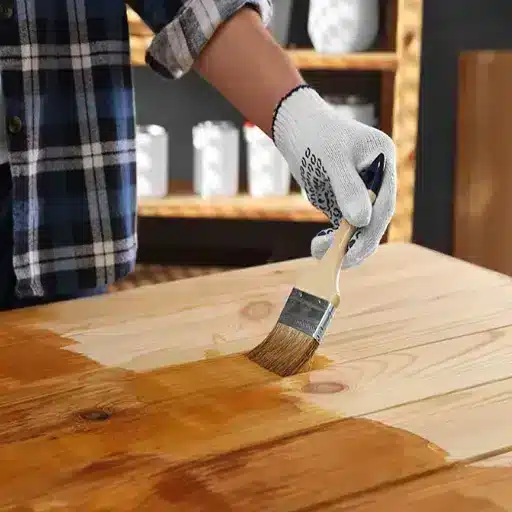
Gel stain is thick and pigment-heavy. Instead of soaking deep into the wood, it sits on the surface. That makes it one of the best ways to fix blotchy wood stain without sanding back to bare wood. WOOD Magazine explains how gel stain and similar techniques help you avoid or fix blotchy stains on softwoods and tight-grained hardwoods.
Method 2: Darken the Entire Surface
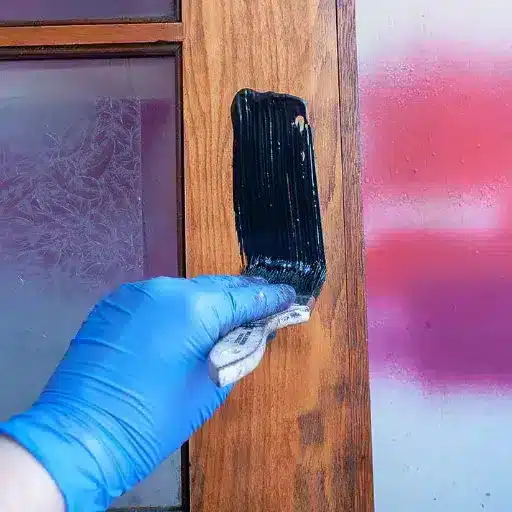
Darkening the whole piece is the simplest way to make blotches less noticeable. When everything is darker, the contrast between light and dark areas shrinks.
When to Use It
Use this method when the current color is lighter than your target, and the blotching is mild. It works best on pieces that can handle a darker look.
Steps
- Make sure the existing stain is fully dry.
- Choose a stain one or two shades darker than the current color.
- Apply a thin, even coat over the whole surface.
- Wipe off the excess promptly and evenly.
- Evaluate once dry. A second coat may help, but avoid building up too much stain or the finish can feel sticky.
Risks
This method can make the finish look muddy if the blotting is severe. It also limits your final color to something darker than what you already have.
Method 3: Apply a Toner or Glaze Over a Sealer
A toner or glaze adds color over a sealed surface, which gives you much more control than staining raw wood. This is the method professionals use when they need a perfectly even color.
When to Use It
Use a toner or glaze for moderate to severe blotching on furniture, cabinets, or any piece where appearance matters most.
Steps
- Seal the stained surface with one coat of clear shellac or dewaxed shellac.
- Once dry, scuff lightly with 320-grit sandpaper.
- Mix a compatible glaze or toner in a color close to your target.
- Apply the glaze evenly with a soft cloth or brush.
- Wipe or feather the glaze until the color looks uniform.
- Seal with two or more topcoats for protection.
This approach takes patience, but it can rescue a piece that looks almost ruined.
Method 4: Sand Back to Bare Wood and Restart

If the blotching is severe or the color is completely wrong, sanding back is the most reliable fix. It gives you a clean slate.
Steps
- Remove any topcoat with the appropriate stripper or sandpaper.
- Sand through the grit progression: 120, 150, 180, and finish with 220.
- Do not skip grits. Each grit removes the scratches left by the previous one.
- Raise the grain by wiping the surface with a damp cloth, then sand lightly with 220-grit once it dries.
- Apply a pre-stain wood conditioner if you are working with pine, maple, birch, or cherry.
- Apply the stain evenly and wipe off the excess.
- Seal with your chosen topcoat.
For pine-specific techniques, see our guide on how to stain pine wood without blotching.
Method 5: Strip the Finish and Start Fresh
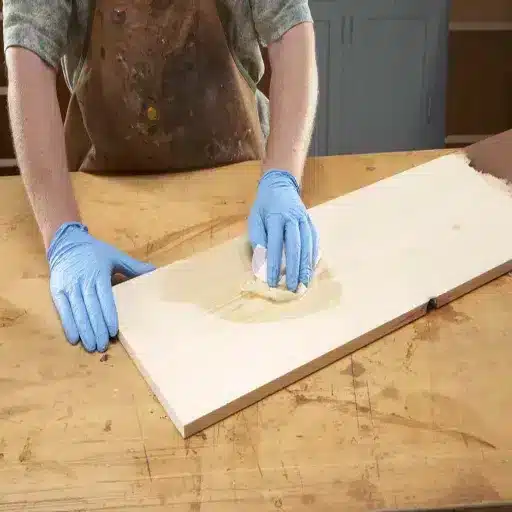
Sometimes sanding alone will not remove enough of the old stain. Thick gel stains, dyes, or oil-based stains can penetrate too deeply for sanding to reach.
When to Use It
Use chemical stripping when the stain color is very dark, when you want a much lighter final color, or when the wood has intricate details that are hard to sand.
Steps
- Work in a well-ventilated area and wear gloves, eye protection, and a respirator.
- Apply a chemical stripper according to the manufacturer’s instructions.
- Let it sit until the old finish softens.
- Scrape away the softened finish with a plastic scraper.
- Clean the surface with mineral spirits or the recommended neutralizer.
- Sand lightly, condition if needed, and re-stain.
A Quick Story
A furniture maker named David built a pine coffee table and stained it with a dark walnut penetrating stain. The next morning, the tabletop looked tiger-striped. The soft earlywood had soaked up almost black pigment, while the harder latewood looked pale. David did not want to rebuild the table, so he scuffed the surface with 220-grit paper and applied two thin coats of dark walnut gel stain. The gel sat on top of the wood instead of soaking in, and the stripes disappeared. After sealing with water-based polyurethane, the table looked intentional and professional. His lesson: when the wood fights you, change the product, not the project.
How to Prevent Blotchy Stains Next Time
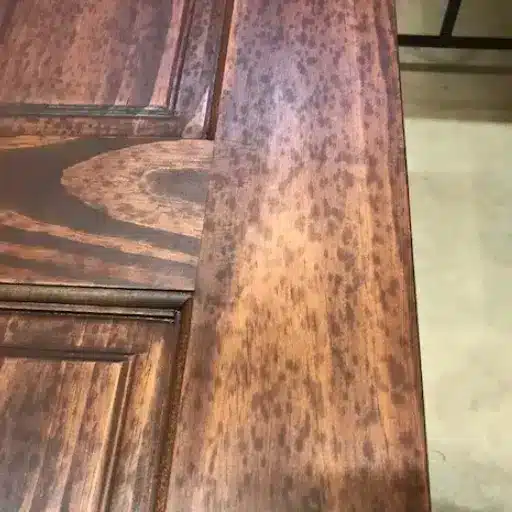
Prevention is easier than repair. Follow these steps on your next project.
Sand Evenly
Start with a coarse grit and move through each intermediate grit. Do not jump from 80-grit to 220-grit. The finer grit cannot remove the deep scratches left by the coarse grit, and those scratches act like reservoirs for extra stain pigment.
Raise the Grain
Wipe the wood with a damp cloth after final sanding. Let it dry, then sand lightly with 220-grit. This removes the fuzzy fibers that would otherwise stand up and unevenly grab stains.
Use Pre-Stain Wood Conditioner
A wood conditioner partially seals the surface so soft areas cannot over-absorb stain. It is essential for pine, fir, spruce, cedar, maple, birch, and cherry. Apply it evenly, let it penetrate for the recommended time, wipe off the excess, and stain within two hours.
Choose the Right Stain
Gel stains and thicker-bodied stains are more forgiving on blotch-prone species than thin, penetrating stains. If you want a very light or natural look, consider a clear oil finish instead of a stain.
Apply Stain Correctly
Apply stain with the grain using a brush, rag, or foam applicator. Do not let it pool in corners or scratches. Wipe off the excess with a clean rag before the stain starts to tack up.
Test First
Always test your full finish schedule on scrap wood from the same board or batch. This is the only way to see exactly how the color will look on your actual wood.
Safety Tips for Stain Removal and Reapplication
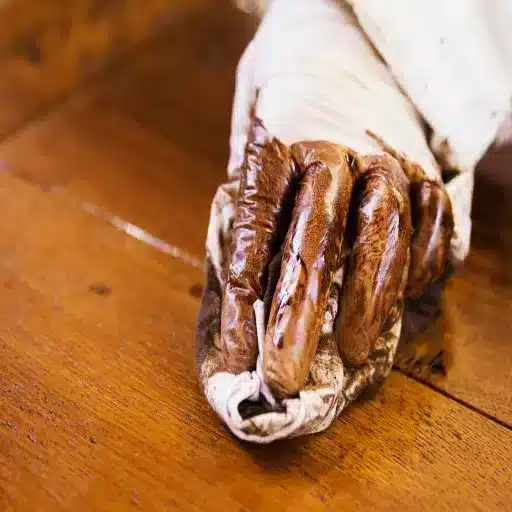
Stain removal and reapplication involve chemicals, dust, and combustible materials. Take safety seriously.
Rag Disposal
Oil-based stain rags can spontaneously combust as the oils oxidize and generate heat. Lay used rags flat to dry outdoors on a non-flammable surface, place them in a sealed metal container filled with water, or dispose of them according to local hazardous waste guidelines. Never bunch wet stain rags together in a trash can.
Personal Protective Equipment
Wear nitrile gloves, safety glasses, and a respirator when sanding old finishes or working with solvents. Work in a well-ventilated space.
VOCs and Indoor Air Quality
Many stains and strippers release volatile organic compounds. The EPA explains how volatile organic compounds affect indoor air quality. Choose low-VOC or water-based products when working indoors.
Frequently Asked Questions
Can you fix a blotchy stain without sanding?
Yes. Gel stain, a darker second coat, or a toner over a sealer can all fix blotchy stain without sanding back to bare wood.
Will a second coat of stain fix blotchy wood?
Sometimes. A second coat of a darker stain can reduce the contrast between light and dark areas. It will not fix severe blotching.
Why does pine always look blotchy?
Pine has alternating bands of soft earlywood and harder latewood. The soft bands absorb stains much faster, creating stripes or patches.
Can you stain over a blotchy stain?
Yes. Gel stain is the best option for staining over a blotchy stain because it does not penetrate deeply.
Is gel stain better for blotchy wood?
Generally yes. Gel stain sits on the surface rather than soaking in, so it evens out color variation.
What is the best way to remove a blotchy stain?
The best way depends on the severity. Start with gel stain or a toner. If that fails, sand back to bare wood or use a chemical stripper.
Does pre-stain conditioner really help?
Yes, especially on softwoods and tight-grained hardwoods. It partially seals the wood so the stain absorbs more evenly.
Conclusion
A blotchy wood stain is frustrating, but it is almost always fixable. Start with the least invasive method and work your way up. A gel stain or a darker second coat can hide light blotching. A toner or glaze over a sealer gives you professional-level control. For severe cases, sanding back to bare wood or stripping is the most reliable path to a clean finish.
The real secret is prevention. Even sanding, grain raising, pre-stain conditioner, and the right stain type will keep your next project looking even from the first coat.
If you need help choosing the right wood species or finish for your next project, contact our team. We are here to help you build something beautiful and lasting.