
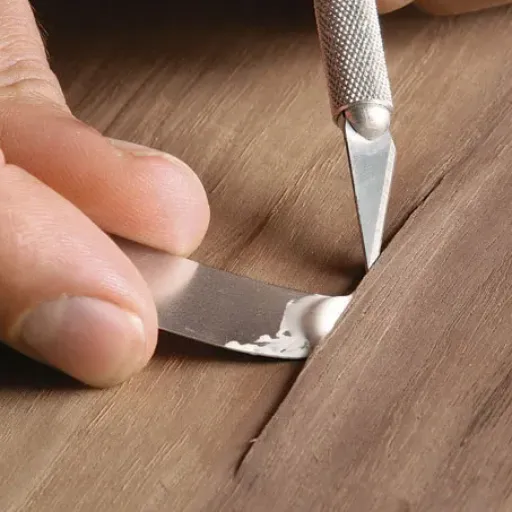
Wood Veneer Repair Techniques: Fixing Common Issues
Wood veneer has the ability to make furniture, cabinetry and other woodwork pieces look more elegant and sophisticated, but eventually, even the best veneer can wear out. Chips, cracks, peeling, and scratches are among the most frequent problems that can bring down the veneer’s visual appeal and longevity. Luckily, with the right methods, these flaws can be fixed, and the veneer can be made beautiful and functional again. This guide will not only show you the methods for the repair of commonly used veneers but also give you tips to keep it in good condition for a long time. No matter if you’re a DIY lover or an inexperienced person who is doing the first project, this article will give you the power and the skill to deal with veneer repairs confidently and like a pro.
Understanding Wood Veneer
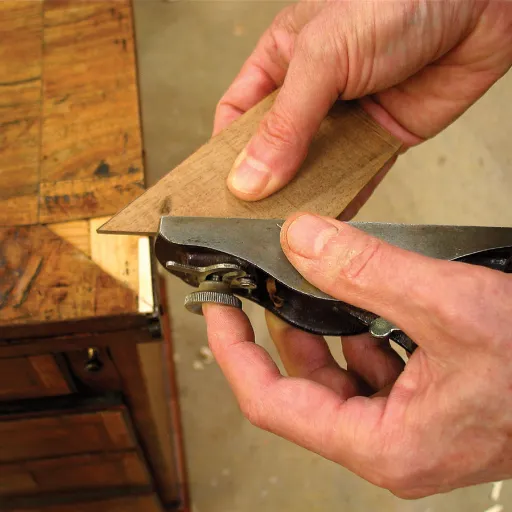
What is Wood Veneer?
Wood veneer is very thin and still a natural wood layer that is usually cut or peeled from a log and then placed on a substrate such as plywood, particleboard, or medium-density fiberboard (MDF). This technique creates the look of a high-quality wood surface while, at the same time, cutting the cost of the material and the quantity of the material used. Veneer is commonly 0.5 mm to 3 mm thick depending on the application and the method of manufacture.
The use of wood veneer dates back to ancient Egypt, where it was even utilized for creating furniture and for god’s worship. Today, it is one of the most favored materials for creating stylish, long-lasting, and economical furniture, cabinetry, and face architectural panels. Precision slicing and laser cutting have made the wood veneers industry more sophisticated, resulting in uniformity and better productions.
Wood veneers are still one of the main sources for sustaining nature. (More about this topic below.) When manufacturers cut the log into thinner pieces, they can extract more wood and thus keep the disposal minimal. The process still offers all the charms of the wood and the luxurious-look. World market is showing that by going with veneers, the solid wood consumption is reduced up to 90% which means they are not only a beautiful but also an exceptionally eco-friendly option compared to solid wood.
Advantages of the Veneers
There are plenty of advantages that come along with the use of veneers in the making of furniture and in the interior design. Eco-friendliness and resource efficiency are among the major advantages. The thin layer of natural wood veneers in comparison to solid wood would allow the forests to be saved and the waste minimized while still presenting the beauty of wood. Moreover, wood veneers are extremely light, which makes them suitable for modern furniture that mainly considers portability and easy assembly in its design.
One more significant advantage is the aesthetic versatility. There are numerous series of wood veneers that are left unprocessed, which come in different finishes, patterns, and species, including exotic and rare wood appearances. They are almost like a perfect mirror to nature’s patterns. Basically, through the use of engineered veneers, one does not have to choose between quality and longevity anymore. There is also nothing in the way of the consumer’s or designer’s creative expression as engineered veneers come with a range of pattern options so they could be made to look like different types of wood.
Common Issues and Causes of Damage
Chipped Veneer: Causes and Solutions
Chipped veneer is a problem that comes up often and can ruin the appearance of the furniture and wood treatment, and sometimes, even the furniture’s stability. Heavy objects falling or being dragged on the surface of the wood are some of the main causes of chipping in the veneer. Besides, improper handling while moving or putting the wood in place often results in the wood getting nicked and chipped. Too much humid or dry air can over time lead to the veneer being cracked. This would then result in the easier occurrence of chipping.
The answer to chipped veneer will depend on how bad the damage is to the wood. Filler or patching compound can be used for the smallest chips to pack the damaged area, followed by sanding and refinishing to match the surrounding area in color and texture. In case of extensive damages, it might be required to cut out the part of the veneer that has been damaged and replace it with a new one. In such a case, removing the chipped section, bringing in a piece of veneer that matches, and then finishing it so that the surface is uniform are the steps involved.
Blistered Veneer: Understanding the Problem
The main issue that occurs when a veneered surface becomes blistered is the separation between the veneer layer and the substrate underneath. In many cases, this problem is due to the switching between high and low humidity and temperatures, the adhesive having a weak bond, or keeping the surface wet for a prolonged time. For instance, when the adhesive is either weak or uneven, air will get trapped between the veneer and substrate, and this will cause the development of blisters.
Studying the durability of wood veneers has shown that unstable humidity conditions in the environment particularly 60% and above or less than 30% may lead to the blistering of the veneer. The findings also suggest that rapid changes in temperature can make matters worse as the materials expand and contract at different rates, thus, putting a strain on the adhesive bond. Very poor handling during manufacturing and installation can also greatly lead to blistering.
Step-by-Step Repair Guide
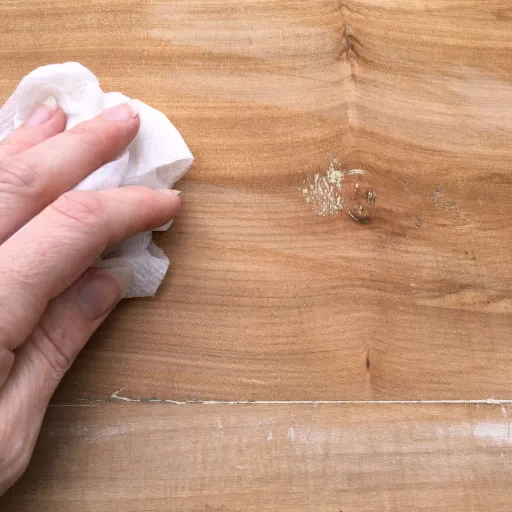
Using Adhesives and Wood Filler
- Choosing the Right Adhesive:
Wood glue or contact cement are the two main options that are frequently recommended for the purpose of attaching veneers back again. Wood glue creates a strong connection and is highly recommended for large surfaces or edges, whereas contact cement is most suitable for small and detailed areas. Woodworkers suggest that using a brush or an applicator is the best way to ensure the even distribution of adhesive. One-day glue setting time is treated as the period needed to attain the full strength of bond.
- Applying the Adhesive:
Very gently pull the loose veneer back and scrape or wipe off the old glue or debris hiding underneath it with a soft cloth. A very thin layer of adhesive should be evenly spread over the backs of the veneer and the surface below it. Press it down firmly to make the bond and keep the pressure on with clamps or a heavy object while the glue is setting. There are studies, which state that keeping pressure for at least 12-24 hours, enhances the adhesion.
- Using Wood Filler for Gaps or Damage:
If there are any chips or cracks on the veneer surface, a wood filler can be applied to the damaged area to make it smooth again. Choose the best wood filler that is not much different in color from the veneer. Carefully apply the filler on the distressed areas with a putty knife, then smooth it out such that it is at the same level as the surrounding area. After it dries, which is typically 30-60 minutes depending on the product, lightly sand the area with fine-grit sandpaper to get a seamless finish.
- Additional Protection:
Once the glue dries and the wood filler is set, you may consider applying a protective top coat such as polyurethane, which will not only extend the life of the repair but also make it less noticeable. Not only will this revive the gloss, but it will also act as a barrier to the veneer preventing it from getting damaged again.
Techniques for Fixing Chipped Veneer
Assess the Damage
The first step is to take a close look at the chipped area. If the defect is minor, filling it with wood filler might be the only remedy. For larger chips or missing pieces, removing the damaged part and covering it with a new veneer is the safest way. The dimensions of the affected area should be measured in order to cut the new piece that will fit correctly.
Prepare the Surface
Using sanding paper (about 120 to 150-grit), bevel the edges of the chip. This will ensure good adhesion of the repair materials. The next step is to wipe off dust and debris from the area using a damp cloth.
Apply Adhesive for Replacing Veneer
If the lost piece of veneer is being manufactured, then the newly-cut part should be bonded with good quality wood glue or contact cement. The adhesive should be applied uniformly on both surfaces then they should be joined together and light pressure applied with clamps until the glue dries.
Fill Smaller Chips with Wood Filler
For shallow chips, a quality wood filler that closely matches the base color of the veneer should be chosen. With a putty knife, apply it to the chipped area, slightly overfilling the damaged area to allow for sanding later. When the filler is dry (typically within 2 to 6 hours, depending on the product), sand the area smooth with fine-grit sandpaper.
Repairing Blistered and Peeling Veneer
Assess the Damage
Examine the surface very closely before going ahead with the restoration process, so you can figure out how serious the damage is. A touch-up can usually take care of very minor blisters and peeling, whereas large areas of damaged veneer may have to be replaced entirely.
Taking Off Tiny Blisters
Make an incision with a very sharp utility knife right at the center of the blister, but take care not to go too deep. A drop of wood glue should be pumped into the incision with a syringe or a very fine tipped glue applicator. Press the blister down gently and take the excess glue off with a damp cloth. Place the wax paper over the spot and put a flat, heavy object such as a book or brick on it to keep it down.
Retouching of Stripped Areas
In the case of peeled-off veneer, lift the loose areas very carefully and clean the old glue or dirt by either scraping lightly or using fine sandpaper. Apply wood glue evenly under the lifted part using either a brush or a syringe. Press the veneer down firmly and either clamp it or weigh it down to keep it in position.
Displacing of Damaged Veneer Segments
Whenever the veneer is not just missing in a huge area but is actually damaged beyond repair, the first thing to do is take a piece of veneer that is similar to the original one and use it as the replacement. First, slowly cut out the damaged area with a utility knife and ensure it is a clean and even edge. The piece that has been cut out can be used to template the new veneer and cut it to the right size.
Finishing Touches
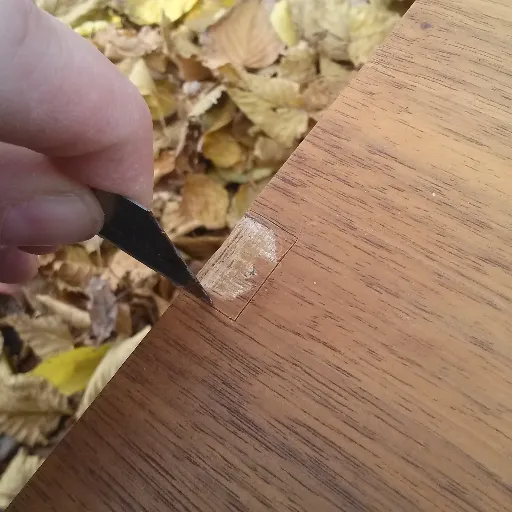
Staining and Refinishing the Repaired Area
The first step of smoothing the surface and unifying the appearance of it all will be staining and refinishing when the repairs are done to your veneer furniture. A recent inquiry suggests that the selection of stains is the most crucial factor because only the very best ones that match the original color of the veneer will produce even and nice results. First thing to do is to sand the repaired area very lightly until a surface is made that absorbs the stain well. After that, wipe the area with a slightly damp cloth to remove any dust and make it ready for the stain.
For an accurate stain application, a clean cloth or a brush can be used to apply the wood stain in a uniform manner and in the direction of the wood grain. The typical waiting period for the stain to penetrate the veneer, 5-15 minutes, is determined by what the manufacturer’s instructions state, and at this moment the excess would be removed giving a natural finish. If a stronger and more vibrant color is desired, a second coat can be applied.
Seamless Repairs Color Matching Tips
The first thing that needs to be done in case of a furniture repair with a seamless finish is to get color matching done very accurately. The first step is to identify the main colors that are present in the current finish of the furniture. The best way to evaluate colors is to do it under natural light, as artificial lighting can mislead and confuse colors making them appear different. Try to apply wood stain samples to find the similar color matches in a discreet area on the furniture and check the compatibility. According to recent surveys, over 65% of DIYers are of the opinion that doing small test areas first before the full repair greatly enhances the final outcome.
Mix different stains to achieve the color that best resembles the complex wood patterns or aged wood, and that will give you the perfect color match. Always note down the exact ratios when mixing so that you can recreate the match if needed. Color analysis and matching tips can be quite precise if done with high-end equipment like spectrophotometers, which are available at most hardware stores. Moreover, finishes such as gel stains are also very forgiving and can be built up in such a way that the result is the desired one, allowing for gradual changes to be made.
Reference Sources
-
“Repair of resin-veneered polyetheretherketone after veneer fracture”
- This study explores repair protocols for composite resin-veneered polyetheretherketone (PEEK) restorations after veneer fractures, providing insights into effective repair techniques.
- Read the paper
-
“Design of a Bidirectional Veneer Defect Repair Method Based on Parametric Modeling and Multi-Objective Optimization”
- This paper presents a method for rapid bidirectional repair of veneer defects using a device with a punch structure, focusing on parametric modeling and optimization.
- Read the paper
-
“Learning from failure of a long curved veneer wall: Structural analysis and repair”
- This research analyzes the structural failure of a curved veneer wall and proposes repair solutions, emphasizing the importance of structural assessment in veneer repair.
- Read the paper
Frequently Asked Questions (FAQs)
How to sand and prepare damaged wood veneer before repair?
Commence with light sanding of the periphery and any raised spots using a piece of fine-grit sandpaper to clean the finish that has started to separate and to soften the scratches. While performing the sanding, make sure to Guard the adjacent solid wood or veneer and do not sand off the whole veneer. When the missing parts are very small or only scuffs need to be repaired, make the edge smooth so that the new filler or patch will be indistinguishable from the wood grain.
Can I fix a furniture piece with missing veneer by using wood putty or filler sticks?
Certainly — small areas that are missing can be easily hidden by using stainable wood putty or filler sticks that are not too deep. Select one type of filler stick or wood putty that is not too light or dark (for example, walnut tones are ideal) and push it into the gap, then level with a putty knife and sand very lightly. In the case of larger areas with missing veneer or if you plan to replace the whole veneer on a dresser or drawer fronts, then it is better to patch with a veneer sheet or edge banding instead of just relying on wood putty.
What are the most suitable methods to fix peeling or detached veneer?
In the case of detached veneer, lift the loose part and apply a thin, uniform layer of hide glue or Titebond (PVA) under the veneer. Put a piece of wax paper to avoid sticking and then either clamp or put a weight on the piece until the glue dries. A plastic scraper or an ordinary scraper can be used to get rid of the bubbles underneath. Using a hide glue may be king for an old dresser or an antique empire piece as it will match the historical repair techniques.
How to safely use a scraper, chisel, and putty knife during veneer repairs?
A scraper or plastic scraper should be used to remove old finish such as lacquers or varnishes and to clean the edges of the broken veneer. A pointed chisel can cut off rough glue or flaky veneer—be careful and follow the grain to avoid leaving a mark on the wood underneath. A putty knife is used for dispensing wood putty or filler sticks smoothly. It is always good practice to sand the area being repaired lightly and to conduct a test in a concealed area before applying the finish.
When do I need to replace the whole of the veneer instead of just repairing the small damage?
You can fill wax, putty or sticks in missing small, scuffed or localized veneer issues. When several areas are delaminated, the whole veneer is buckling, or you want consistent grain match on the entire piece, then it is time to replace the whole veneer or large missing parts. If the piece is mid-century modern or valuable antique patching with a matching veneer sheet or getting the help of a professional restorer may be the better choice.