
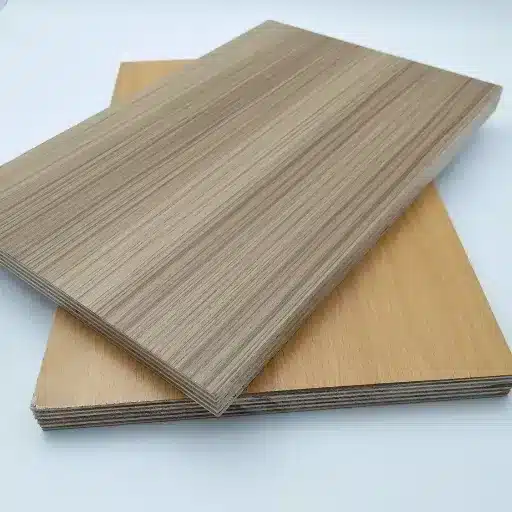
Melamine Plywood: Where It Actually Makes Sense (and Where It Doesn’t)
Most cabinetmakers and fit‑out crews don’t argue about whether to use panels anymore; they argue about which ones will survive five years of abuse. Melamine plywood sits in that sweet spot where you want a clean, hard‑wearing factory finish but still need the screw‑holding and rigidity of a proper plywood core, so the choice you make here quietly decides whether your shelves sag, chip, or just keep doing their job.
What Is Melamine Plywood, Really?
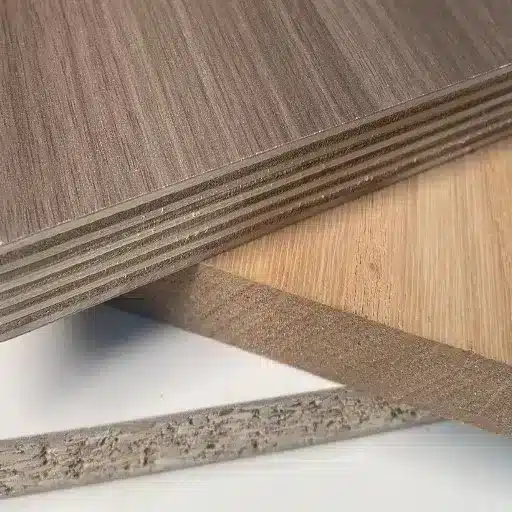
Melamine plywood is just plywood that shows up to the job already dressed. You’ve got a conventional plywood core in the middle and a hard, resin‑saturated melamine layer bonded to one or both faces under heat and pressure, so you’re pairing structural strength with a prefinished skin instead of raw veneer. That face isn’t “paint” in the casual sense; it’s a thermoset surface that shrugs off coffee rings, mild cleaners, and the kind of shopping‑bag drag you see inside wardrobes and kitchen carcasses almost every day. In a 2.38 m tall wardrobe side, you’d notice immediately that the surface feels more like a laminate counter than a sanded birch panel.
Core structure: base panel + melamine layer
At the heart of Melamine Plywood is the base panel, typically a multi‑ply core in poplar, eucalyptus, birch, or mixed hardwood, chosen for its balance of stiffness, weight, and cost in your market. Over that, manufacturers lay decorative papers impregnated with melamine formaldehyde resin, then press them under heat until the resin cures and locks into a hard, scratch‑resistant surface. Think of it as building a sandwich: structural plies for muscle, melamine skin for armor and aesthetics. On a decent board, you’ll see consistent glue lines and minimal telegraphing of core imperfections through the face; on the cheap stuff, core voids and rough sanding show up as faint waves or dull patches once the melamine is on. That’s where the difference between “spec sheet good” and “installer approved” really lives on site.
How it differs from plain plywood and melamine MDF
Plain plywood gives you a wood veneer face that wants sanding, sealing, priming, or clear finishing before it can go anywhere near a client’s kitchen or closet. Melamine plywood skips that entire finishing workflow, so you go from saw to edge‑bander to install with no spray booth time, which is exactly why shopfitters love it on fast turnarounds. Compared to melamine MDF, you’re trading a heavier, more homogenous but weaker core for something that holds screws better at edges, spans longer without sag at 600–700 mm shelf spacing, and copes a bit more gracefully with minor moisture mishaps. Melamine MDF still wins where you need dead‑flat, ultra‑smooth machining for routed profiles or very small radii, but for tall carcasses and load‑bearing shelves, the plywood core is usually the safer, less “don’t call me in 18 months” choice.
3 Situations Where Melamine Plywood Shines
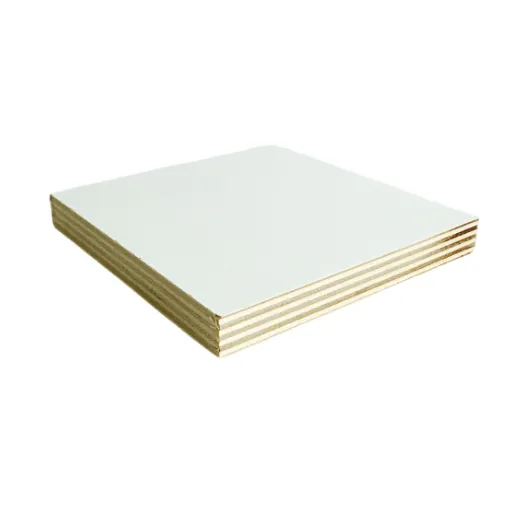
Melamine Plywood earns its keep in projects where finish quality and abuse resistance matter more than romance about “real wood.”
Kitchen and pantry carcasses under real‑world moisture
Kitchens punish panels in quiet, boring ways: steam creeping out of a dishwasher, a slow leak under the sink, a damp mop parking against a base cabinet. Raw plywood can handle a bit of this, but it wants sealing; melamine MDF looks great until the edges sip water and swell. With Melamine Plywood, you’ve got a sealed, wipeable face on a core that tolerates those day‑to‑day humidity swings without ballooning at every screw hole.
Think about a tall pantry: 2.3 m side panels, 450 mm deep, loaded with jars and appliances. A plywood core keeps the carcass rigid and the hinge plates biting properly, while the melamine face shrugs off the inevitable spice spills and greasy fingerprints you miss during cleaning. You still need to treat cut edges properly and avoid standing water, but in a normal family kitchen, this combo gives you a much better failure profile than plain melamine particleboard. It’s the difference between “door sag after 18 months” and “still fine when the client calls you back for a new island.”
Commercial interiors (shops, clinics, offices)
Commercial spaces ask a different question: how many touches per day can this surface take before it looks tired. Reception desks, retail shelving, clinic storage and file walls all get more contact in six months than a typical bedroom wardrobe sees in five years. Here, Melamine Plywood hits that useful balance of hard, cleanable skin and a core stiff enough for long spans and tall partitions without dense steel framing behind everything.
In a pharmacy fit‑out, for example, you might run 600 mm deep shelving in long bays, loaded with boxed stock. A melamine MDF shelf can work, but at those spans you start to worry about long‑term creep; plywood core gives you a bit more confidence when the client inevitably overloads the “temporary” stock bay. Offices are similar: printer stations, archive cabinets, hot‑desk dividers. They want consistent color and texture across batches, easy cleaning, and the ability to move things around without fasteners tearing out every time you adjust a hinge or bracket. Melamine Plywood handles that kind of churn just a bit more gracefully.
Utility furniture and rental units
If you build for rentals, you design for “user error.” Tenants will stand on shelves, slam doors, and drag boxes across surfaces you thought were safe. In that world, Melamine Plywood is a pragmatic choice for wardrobes, shoe cabinets, laundry storage, and general utility furniture where you don’t want to repaint or refinish between every tenancy. The melamine face hides a multitude of sins, and the plywood core means that even if someone drives a screw a touch too close to the edge, it’s less likely to explode the way cheap particleboard does.
Think of a basic 1.2 m wide wardrobe in a student unit: two doors, hanging rail, one or two fixed shelves. You want something you can assemble on site, disassemble if needed, and not worry about the bottom panel blowing out when someone drops a 27 kg suitcase in there. Melamine Plywood gives you that “install and forget” quality; not bulletproof, but robust enough that you’re not budgeting for full replacements every few years. For property managers, that alone is a strong argument in its favor.
Melamine Plywood vs MDF vs Particleboard: What Actually Changes On Site?
On paper these three look like minor variations of the same panel idea; on site they behave like completely different species.
Weight, handling, and edge durability
Melamine Plywood usually lands in the middle on weight, and that’s a good thing. A 2440 × 1220 × 18 mm melamine MDF sheet can feel like dead weight when you’re carrying it up a tight stairwell, while a comparable plywood‑core sheet is noticeably easier to pivot into a hallway without taking out the paintwork. Particleboard is often similar or slightly lighter than MDF in the same thickness, but it feels more brittle at the corners, so one bad bump off a doorway and you’re crumbling a chunk out of the edge instead of just bruising it.
On the trestles, edge durability is where the differences really show. With Melamine Plywood, you can accidentally tap the edge against a metal trestle and you’ll usually just get a small dent in the core that the edge band will still cover. Do the same with melamine particleboard and you’re more likely to blow off a 12 mm chip that ruins the edge line. MDF is tougher than people think in the middle of the sheet, but its edges are still prone to “mushrooming” when hit, and once moisture gets into that damaged area it puffs up, so your crisp line disappears. On a job with 27 carcasses to install, that difference turns into real rework time.
Screw holding and hardware reliability
If you’re hanging doors, building tall carcasses, or anchoring heavy shelves, screw behavior isn’t a detail, it’s the whole story. The cross‑laminated core of Melamine Plywood gives mechanical bite in multiple grain directions, so confirmat screws, Euro hinges, and rail brackets tend to hold better over time, especially when clients overload shelves or slam doors more than they admit. You still need to respect edge distances, but you have more margin before things split or strip out.
MDF, particularly good‑density boards, can hold screws decently when you pre‑drill properly, yet it’s unforgiving near edges. Drive one hinge screw a touch too aggressively and you get that tell‑tale bulge instead of a clean countersink. Particleboard is the worst offender for tear‑out: once a screw spins in it, the fibers crush and you’re into bigger plugs, special anchors, or moving the hardware a few millimeters and hoping nobody notices. This is why a lot of fit‑out shops spec Melamine Plywood at least for hinge sides, even if they’re cost‑cutting elsewhere — it reduces call‑backs when a 600 mm pantry door starts to sag.
On wall‑hung units, those differences compound. A 1.2 m wide cabinet with heavy contents hanging off two or three brackets in particleboard is far more likely to loosen at the fixings over a few years than the same unit built from Melamine Plywood. Not dramatically so on day one, but enough that you can feel it when you gently lift the front of an older cabinet and feel the play.
Surface finish, color options, and repairability
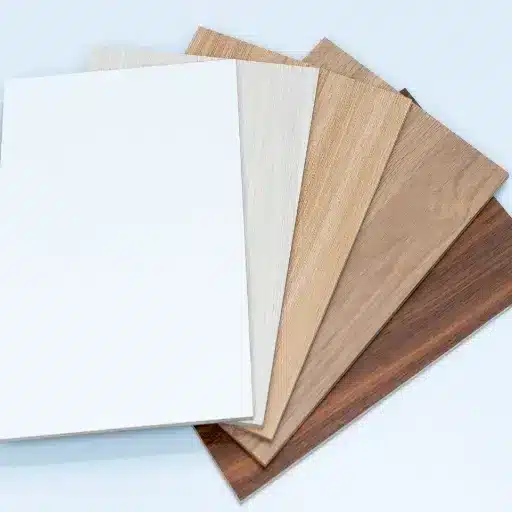
On the face, all three look similar because you’re basically staring at melamine. Color libraries, textures, and gloss levels come from the melamine supplier, so white, light grey, oak, walnut, textile patterns — you’ll find them across plywood, MDF, and particleboard lines. If a décor exists in one core, there’s a decent chance the same factory or a sibling plant is pressing it on the other cores too, even if your distributor doesn’t stock every combination.
Where Melamine Plywood pulls ahead is how the surface and core age together. The melamine skin itself is hard and reasonably scratch‑resistant on all three, but when you do break through — a sharp impact on a counter edge, a dropped tool on a shelf front — what’s underneath matters. Chip the face on plywood, you get a dent you can sometimes fill, sand locally, and disguise with a color‑matched pen plus a bit of creativity. On MDF, you hit that soft brown core that soaks up any repair attempt and stays visibly different in sheen. On particleboard, you expose chips and voids that are almost impossible to make look “not broken” without a full edge replacement.
Small touch‑ups tell the same story. Hairline scratches in melamine can sometimes be warmed and blended slightly, or at least visually knocked back with wax sticks and pens. That’s workable on all cores. But when a tenant slams a chair into the side of a wardrobe and caves in a corner, you’ll be a lot happier if that carcass is Melamine Plywood. You might get away with a sand, fill, and band; with cheap melamine particleboard, the corner often just disintegrates enough that you end up rebuilding the unit or living with an ugly fix. For a landlord or facilities manager watching dozens of units, that’s not a small difference.
Choosing the Right Melamine Plywood for Your Project
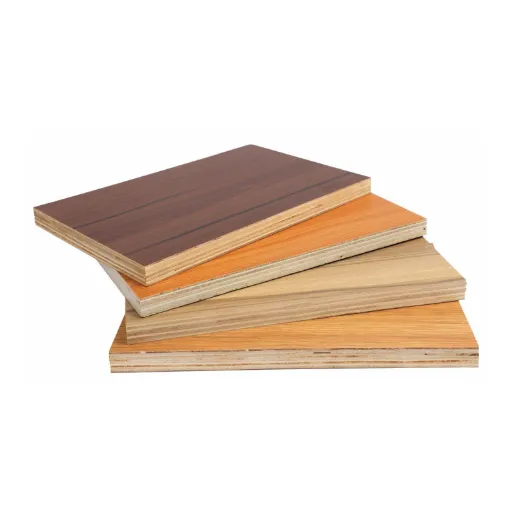
Good Melamine Plywood is about matching the panel to the load, the span, and the abuse level — not just grabbing whatever 16 mm white sheet is on promo that week.
Thickness and span: when 16 mm isn’t enough
16 mm is the default in a lot of shops because it keeps weight and cost down. For vertical carcass sides and light‑duty shelving at 400 mm depth, it’s usually fine. But once you push shelves out to 500–600 mm, stack books or dinnerware, and stretch spans past 800–900 mm, that “standard” thickness starts to show its limits: you’ll see a gentle sag line if you sight along the front edge after a year or two, especially in rental or family kitchens that get overloaded.
So you treat thickness as your main lever. Go to 18 mm for general kitchen and wardrobe work where spans hit that 800–1000 mm range, and don’t be shy about 25 mm tops or shelves when you know someone is parking a 28 kg microwave or archive boxes there. Think about the base as a little beam: longer, heavier, more important to stay straight? Bump the thickness, or tighten supports, or both. It’s cheaper than swapping out sagging shelves later.
Core quality, voids, and face smoothness
Two sheets can both be sold as Melamine Plywood, yet behave very differently once you cut into them. Core quality is the big hidden variable. On a decent board, you’ll see tight, even plies with minimal voids when you rip a strip off the side. On a cheap one, you’ll hit air pockets, overlapping veneers, or glue‑starved joints that show up instantly when you drill for dowels or hinge cups. That’s when you get screws that suddenly have nothing to bite into on one carcass side but not the other.
So you don’t just read the label; you do a quick autopsy in the shop. Slice a 50 mm strip off the edge, look straight at the core, and run a hand over the melamine face at a grazing angle under good light. You’re checking for telegraphing — those faint ripples where a rough core or poor sanding pushes through the finish — and for color uniformity across the sheet. If the face looks wavy or you can feel little ridges, that’s a sign the core and sanding line aren’t great, and those sins will show when you line up a bank of tall doors. The better mills charge more for a reason: tighter cores, more consistent density, cleaner faces that edge‑band smoothly without those tiny “steps” at the glue line.
Moisture resistance and where you still need caution
Melamine Plywood is more forgiving around moisture than melamine‑faced particleboard, but it isn’t a magic “waterproof” board. The melamine face itself is highly resistant to splashes and normal cleaning; you can wipe down a sink base or pantry interior without worrying every time someone dribbles water along the bottom shelf. The real vulnerabilities are the edges, cutouts, and fixings. Any exposed core — even on a so‑called moisture‑resistant or exterior‑grade variant — can still wick water if left unsealed.
So you treat wet‑adjacent zones as a special case. Under‑sink cabinets, laundry rooms, vanities, and anything tight to a slab or balcony door need belt‑and‑braces: sealed edges, proper silicone at transitions, maybe an upgraded core rated for higher moisture exposure if the manufacturer offers one. You still wouldn’t use standard Melamine Plywood for a shower interior or an open, unsheltered balcony cabinet; for that, you’re into true exterior ply or cementitious products. The melamine face is your armor, but the battlefield — real‑world water paths and cleaning habits — still decides how long the piece stays looking and functioning like it did on install day.
Working With Melamine Plywood Without Destroying the Edges
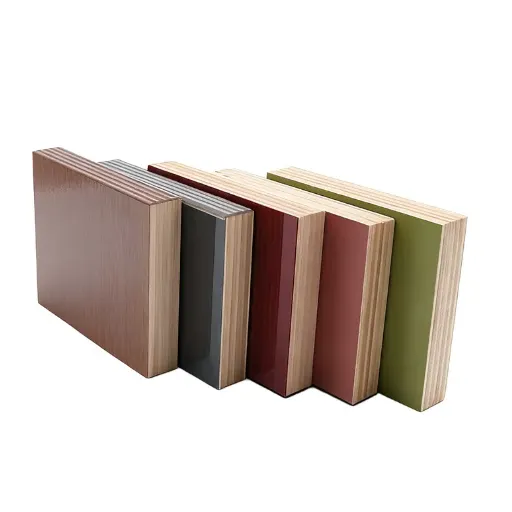
Melamine Plywood behaves beautifully once it’s installed, but on the saw and edge‑bander it’s ruthless; if your setup is off, it tells on you in tiny chips all along the cut.
Saw blades, feed speed, and scoring tricks
Clean cuts start with the right blade, not a “general purpose” one that’s been hanging on the wall since the last laminate job. You want a high‑tooth‑count, triple‑chip grind (TCG) blade designed for panels, usually in the 60–96 tooth range on a 300 mm blade, with a negative or low positive hook angle so it shears the melamine instead of ripping at it. Run that on a saw with minimal runout and you’re already halfway to chip‑free edges.
Feed speed is where a lot of crews get caught. Too fast and you blow out the exit side of the sheet; too slow and you burn the edge and give the teeth more time to vibrate and chip the face. On a decent panel saw you’ll find that “just right” speed where the motor sounds steady and the offcut doesn’t chatter — often a bit slower than you’d push plain plywood, but not by much. On site, cutting Melamine Plywood with a track saw, you treat it like laminate: sharp fine‑tooth blade, sacrificial backer under the sheet, and good support right up to the cut line so the offcut doesn’t sag and tear the last 50 mm.
Scoring is your insurance policy when you’re pushing for really clean edges. A proper scoring unit on a panel saw, set a hair wider than the main blade, practically erases chipping when it’s dialed in. Without one, you can fake a score cut with a shallow first pass — 1–2 mm deep — then a full‑depth pass on the same line. It costs you time, but if you’re cutting visible door and drawer fronts from Melamine Plywood, that extra minute per cut is cheaper than re‑making a whole set because the client spots a chipped corner on handover.
Edge banding that doesn’t peel in two years
Edges are where people judge your work. The board can be perfect; if the banding is wavy, cracked, or peeling at 27 months, that’s what they remember. For Melamine Plywood, you’re usually choosing between PVC/ABS, melamine tape, or thicker veneer edges, and the decision is about impact, heat, and how “furniture‑grade” the piece needs to feel.
Glue choice and temperature do most of the heavy lifting. On an edge‑bander, keep your glue pot clean and your temperature in the manufacturer’s sweet spot so the adhesive wets both the band and the melamine properly instead of sitting on it like beads. Too cold and you get starved joints that peel when someone hooks a fingernail under a corner; too hot and the glue skins over or burns, losing bond strength. It’s worth actually checking a banded offcut: snap it and see whether the failure happens in the glue line or tears fibers from the core — that little test tells you more than any spec sheet.
Prep matters too. Trim cuts should be clean and square, with any dust blown off right before banding; even a light film of dust on the melamine can weaken the bond. On PVC edges, set your pressure rollers so they press firmly without crushing the plywood core, and keep your end trimming knives sharp so you don’t bruise the corners. For parts near heat or steam — dishwasher surrounds, appliance housings, vanity fronts — consider a better glue system (PUR if your setup allows it) and slightly thicker edge material. Clients won’t know the spec, but they’ll notice that their doors still look tight when the cheaper cabinets down the street are curling at the corners.
Frequently Asked Questions (FAQ)
-
Is melamine plywood good enough for kitchen cabinets, or should I stick with regular plywood?
Melamine plywood is a solid choice for kitchen carcasses because you get a prefinished, wipeable surface and a stronger core than melamine particleboard. I’d still use solid or veneered fronts for the doors, but for the boxes behind them, 18 mm melamine ply holds hinges well and shrugs off day‑to‑day spills in a busy family kitchen with kids slamming drawers. -
Will 16 mm melamine plywood shelves sag if I put heavy dishes on them?
At 16 mm, you’re fine for short spans and lighter loads, like 400 mm deep pantry shelves with cereal boxes and jars. Once you go 800–900 mm wide and start stacking plates and cast‑iron pans, you’ll see deflection over time. In that case, step up to 18 mm melamine plywood and/or add a front lipping strip — you’ll notice a much stiffer shelf when you load it. -
Can I use melamine plywood in a bathroom vanity where it might get damp?
You can, but only if you treat it properly. Melamine faces handle splashes well; what kills the board is water getting into raw edges and cutouts around the basin. Seal every exposed edge, silicone the basin cutout carefully, and avoid leaving standing water in the cabinet. In a small flat with a single, heavily used vanity, that bit of fuss is what keeps it from swelling at the base after a year. -
What’s the difference between melamine plywood and melamine MDF for wardrobe interiors?
For a wardrobe, melamine MDF gives you a very smooth, heavy panel that machines cleanly, but it’s weaker at screw edges. Melamine plywood is lighter and stiffer, which helps on tall 2.4 m sides and wide shelves carrying folded clothes. If you’re installing sliding doors and lots of hardware, I’d lean toward melamine plywood so hinge and rail fixings don’t chew out the core when someone over‑loads a hanging rail. -
How do I cut melamine plywood at home without chipping the surface?
Use a track saw or circular saw with a fine‑tooth blade designed for laminates, and support the sheet fully. Tape along the cut line with painter’s tape, cut with the good face down (for most blades), and feed steadily rather than forcing it. On a 2.44 × 1.22 m sheet in a garage, I like to throw it on a stack of rigid foam sheets so the offcut doesn’t drop and tear the last few centimeters.
References
-
Composite Panel Association. (2011). Technical Bulletin: Particleboard and MDF for Shelving. https://www.compositepanel.org/wp-content/uploads/Technical-Bulletin-Particleboard-MDF-for-Shelving.pdf
-
APA – The Engineered Wood Association. (2010). Load-Span Tables for PS-1 Plywood. https://www.socomi.com/wp-content/uploads/APA_LoadSpanTables.pdf
-
Wood Research Journal. (2018). Contrastive Analysis of Screw Withdrawal Resistance Between Different Wood-Based Panels. https://www.woodresearch.sk/wr/201806/14.pdf
-
Cerne Journal. (2017). Screw and Nail Holding Properties of Plywood Panels Reinforced with Glass Fiber Fabric. https://www.scielo.br/j/cerne/a/srgsGNJQvtLXwtTZrvq6ggz/?lang=en