
Natural Wood Veneer: How Pros Choose, Specify, and Use It
Most people hear “veneer” and think cheap, fake wood – but natural wood veneer is the exact opposite. It’s the same species and grain you’d get in solid stock, sliced thin so you can wrap cabinets, doors, and wall panels with far more control over movement, matching, and yield than you’d ever get by building everything out of solid lumber.
What Exactly Is Natural Wood Veneer in Real Projects?
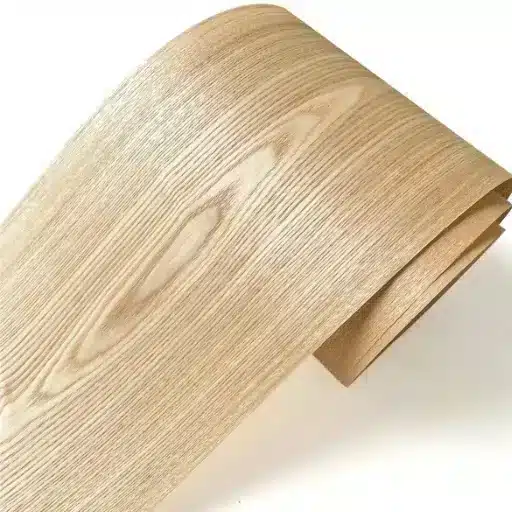
Natural wood veneer is simply real wood, sliced thin and laid onto a stable substrate so you can get the look and grain of solid lumber without wrestling with its movement every season. You’re still dealing with oak, walnut, maple, ash – not a print, not a photo, not plastic – just in fractions of a millimetre instead of a 25 mm board.
How it differs from laminates and printed foils
With natural wood veneer, every sheet is unique because the log it came from was unique. You’ll see cathedrals run a bit off‑center, a slightly darker streak on the third door in a run, or the way the grain tightens near what used to be a branch. Laminates and printed foils, by contrast, repeat on a fixed pattern; once you’ve seen the knot on one wardrobe side, you’ll spot the same knot on the next three doors in exactly the same place and it starts to look “off” in a large room. That’s fine in budget retail fixtures. But on a high‑end lobby wall or a 9‑meter reception counter, that repetition gives the game away instantly.
There’s also the way they behave under tools. Natural wood veneer will blunt a knife like real wood and take stain differently along earlywood and latewood; HPL and printed foils just don’t respond the same when you sand through an edge, or when a carpenter has to ease a door on site. So you spec veneer when the visual story and repairability matter more than absolute abuse resistance, and you lean on laminates when you know the surface will be treated like a cutting board by the end user.
Natural vs engineered veneer in day‑to‑day use
Natural wood veneer is “log‑true”: the color variation, grain swing, and occasional pin knot are part of the package. Engineered (reconstituted) veneer is built from fast‑growing species, dyed, glued, and re‑sliced to imitate a very regular pattern, so a run of 287 wardrobe doors can look almost eerily consistent from one room to the next. That’s a blessing when you’re doing chain hotels or office fit‑outs with strict brand standards, but it can feel a bit too perfect in a bespoke residential project where the client actually wants the oak to look like a tree again.
In the workshop, the difference shows up when you’re matching faces and edges. With natural wood veneer, your team will spend time sorting flitches, picking which sheets sit at eye level, and deciding where to “hide” that slightly wilder grain in a tall bank of panels. With engineered veneer, matching is faster but less forgiving aesthetically: the pattern is so regular that any small layout mistake or flipped sheet jumps out because the rhythm breaks unnaturally. So the choice between natural and engineered isn’t about good vs bad; it’s about whether the project calls for character and authenticity, or strict visual control across a big run of parts.
5 Situations Where Natural Wood Veneer Just Makes More Sense
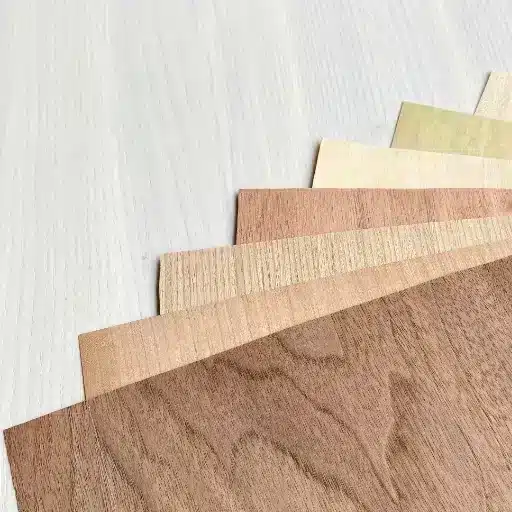
There are moments where using anything other than natural wood veneer is just making life harder. This is where it quietly earns its keep.
When you need the look of solid wood without the movement headaches
Solid wood moves. You know this already from the 2.7 mm gap that shows up on a panel joint every dry season, then almost disappears when the humidity spikes again. On wide cabinet fronts or long stiles, that seasonal expansion and contraction can twist doors, open up hairline cracks at joints, or telegraph right through a painted finish if someone tried to cheat the construction. Natural Wood Veneer lets you park that movement inside the substrate instead of on the surface where the client can see it.
So instead of a 2200 mm wardrobe door built from solid staved oak, you’re bonding an oak veneer face onto a stable core and letting the substrate do the heavy lifting. The door still looks like solid oak, still takes stain and clear finishes the way oak should, but the panel behaves more like a piece of engineered board than a live plank. You get the visual language of timber without babysitting it for the next five winters.
Large wall panels and doors where weight matters
Once panels get big, weight stops being an abstract number and becomes two installers swearing in a corridor. A full-height wall panel in solid hardwood can easily push past what one person can safely maneuver, and on a run of, say, 17 panels down a corridor, that adds up fast. Hinges, tracks, and fixings all get oversized just to cope with the dead load.
Natural wood veneer on a lighter, engineered core cuts that weight dramatically while keeping the same face species and grain story. You can run 3‑meter wall cladding, oversized pivot doors, or tall closet fronts without needing structural carpentry on the back just to keep them hanging straight. That also means less stress on hardware over time, which matters when you’ve got heavy traffic or a facility manager who does not want to be rehanging doors three years into a hotel’s life.
Matching grain and color across many components
The bigger the project, the harder it is to keep wood looking consistently “related” without it turning into a visual mess. On a small custom joinery job, you might hand‑select boards from a couple of packs and live with some variation; on a 196‑room hotel, that approach falls apart immediately. You can’t realistically buy and process that much solid timber from the same few logs and expect doors, headboards, wardrobes, and paneling to all feel like they belong to each other.
With natural wood veneer, you’re working from flitches sliced from the same log or set of logs, so you can sequence‑match faces across door runs, line up grain across wardrobe pairs, and keep color within a tight band on everything that sits in the same sightline. The layon shop can bookmatch, slip match, or sequence panels so the grain flows across multiple components, even when those components were pressed weeks apart. You end up with corridors where every door and frame feels intentionally related, not like a patchwork of “close enough” pieces.
Specifying Natural Wood Veneer Without Regretting It Later
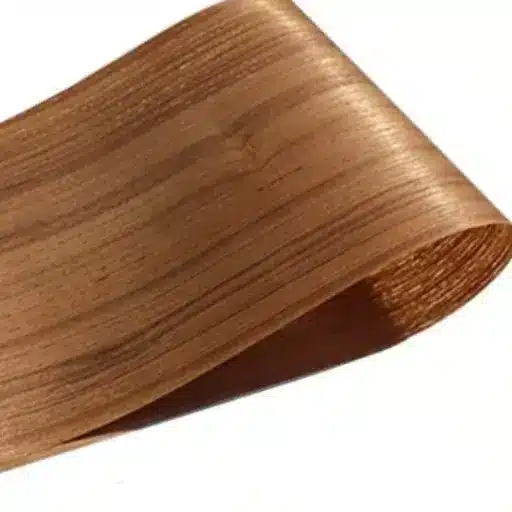
Bad veneer specs don’t usually fail on paper; they fail on site, under downlights, with a client running their hand along a joint. So the goal here is to make decisions that survive real light, real humidity, and real usage, not just look tidy on a drawing.
Species, cut, and matching (the three decisions that change everything)
Start with species, because that’s your whole visual language. Natural Wood Veneer in oak feels forgiving and familiar; you can get rift, quartered, or crown, and most clients already “see” it in their head before you show a sample. Walnut will swing harder in color and mood, from pale sap streaks to deep chocolate, and if you don’t specify sapwood limitations, you can end up with a wardrobe where one door looks almost grey and the next almost purple. Maple, ash, and beech give you a lighter, cleaner canvas but also show handling marks and finishing issues more clearly if the shop gets casual.
Cut is where you decide how calm or dramatic the surface should be. Quartered or rift cuts give straight, linear grain that behaves nicely on long doors and wall panels; it hides joints better and feels more “architectural” than big cathedral patterns. Crown cut gives you that classic, rolling cathedral in each leaf, which is great for feature panels but can look restless if you run it across 14 doors in a corridor. If you know the interior is already busy with patterns and textures, lean on straight grain and specify it clearly instead of leaving it to “vendor choice.”
Matching turns raw veneer into a coherent surface. Slip match is the workhorse: sheets laid in sequence, all face up, giving a subtle, orderly flow with minimal “butterfly” patterns. Book match flips every other sheet like a book page, creating mirrored cathedrals and more drama; good for feature walls, less ideal if you’re trying to hide door leaf joints. Sequence matching across multiple panels lets you carry the grain from panel 1 to panel 7 so the wall reads as a single composition rather than seven unrelated rectangles. If that matters to you, write it into the spec, don’t assume the shop will guess your intent.
Face grade, backing type, and thickness
Face grade is where aesthetics meet economics. If the space is a high‑end lobby or boardroom, you don’t want obvious knots, mineral streaks, or wild color shifts right in the center of a feature panel, so call for a higher face grade and define what’s acceptable. For back‑of‑house or secondary spaces, you can relax this and use lower grades that still press fine but tolerate more visual noise. The key is not just naming a grade, but aligning it with the actual use of the room, the sightlines, and the lighting. Downlights and grazing light will exaggerate every imperfection; plan for that.
Backing type decides how well the veneer behaves during and after pressing. Paper‑backed veneers are great for wrapping profiles and doing flexible applications, but they can telegraph substrate imperfections if the prep isn’t right. Fleece or phenolic backings give more stability and help with balancing panels, especially on doors and larger surfaces where you’re worried about tension and warp. In some cases, you’ll want a true balance construction: veneer on both faces with similar thickness and species so the panel stays flat instead of curling toward the denser side over time.
Thickness is one of those details that comes back to haunt you only after the first repair. Ultra‑thin face veneers might look fine out of the press, but you have almost no sanding allowance; one aggressive pass with a wide‑belt sander or a heavy‑handed on‑site repair and you’re through to the substrate. Spec a practical face thickness that allows for sanding, finishing, and at least minor on‑site touch‑ups without instant burn‑through. It doesn’t have to be excessive, just enough that your finisher doesn’t break into a sweat every time they see a scratch.
Moisture, substrate choice, and glue system
Moisture is the quiet saboteur in veneer work. If the substrate, veneer, and shop environment are all at different moisture contents, you’re pre‑loading the panel with stress before it even leaves the press. You’ll see this as gentle cupping, micro‑cracks along the grain, or glue line issues months later, especially if the project goes into a climate very different from the fabrication shop. So insist on a basic moisture regime: materials acclimatized, shop within a reasonable humidity band, and no rushing panels from press to site without proper conditioning.
Substrate choice should be driven by where the piece will live and how it will be used. MDF gives you a flat, smooth substrate that takes Natural Wood Veneer beautifully for painted or clear‑finished cabinetry and wall panels, but it’s heavier and doesn’t love repeated moisture exposure. Plywood cores handle screws and fixings better, perform well in doors and carcasses, and cope with moderate moisture and handling abuse, though they demand more care to avoid telegraphing core voids or face irregularities through the veneer. For high‑humidity zones or near wet areas, moisture‑resistant or exterior‑grade cores with appropriate sealing are worth the slight cost bump.
Glue system ties the whole construction together and is too often left as “manufacturer to select.” Interior, low‑stress environments can run on standard interior‑grade adhesives, but once you’re dealing with higher humidity, temperature swings, or exterior‑adjacent conditions, step up the specification. Use water‑resistant or boil‑proof (where appropriate for the core) systems and make sure the press cycle is matched to the adhesive requirements, not just whatever the shop usually does. Strong glue lines, correct spread, and proper press time and temperature are what keep veneer from bubbling, peeling, or releasing right at the worst possible moment—like 18 months into a hotel’s life, with every room booked.
If you pull all these levers deliberately—species, cut, matching, grade, backing, thickness, moisture, substrate, and glue—you end up with Natural Wood Veneer that looks intentional and stays that way. That’s really the whole point.
Common Failure Modes (and How to Avoid Them)
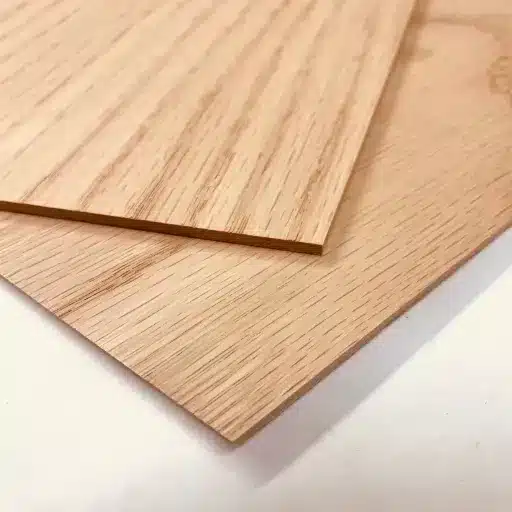
Most Natural Wood Veneer failures trace back to prep and process, not the veneer itself. The problems show up months later when nobody remembers the press schedule or the site conditions, only that “the veneer failed.”
Telegraphing, cracking, and edge chipping
Telegraphing is the classic “ghosting” of what’s underneath. Core voids, sanding grooves, or a slightly proud joint on the substrate will show as faint lines or dips in the veneer once the finish goes on and the light hits at a shallow angle. You see it a lot on tall wardrobe doors where the stiles were jointed in a rush or on panels where someone spot‑filled instead of properly fairing the surface. The fix is boring but effective: dead‑flat substrates, no voids on faces, and a sane sanding sequence before pressing; if you can feel it with the back of your hand, it’s going to telegraph.
Cracking is usually about stress and movement. Veneer that’s too dry going onto a “wetter” core, or panels shipped straight from a humid shop into a dry, air‑conditioned building, will start to show hairline cracks along the grain or at glue lines. You’ll notice them first where downlights rake across a panel, not in the shadows. To avoid this, keep veneer and cores in a similar moisture band, let panels condition after pressing, and don’t park them right under HVAC blasts or direct sun during installation. Think of the whole assembly as a laminate that wants to move together, or not at all.
Edge chipping tends to show up on doors and cabinet fronts the first time someone bumps them with a trolley or vac. Ultra‑thin faces taken right to a sharp arris, then just kissed with a bit of sealer, are almost guaranteed to chip. So you round edges slightly, protect them with edging (solid lipping, edge banding, or at least a micro‑chamfer), and avoid running the veneer right up to a vulnerable outside corner without protection. If the project calls for “crisp” edges, you can still keep the geometry sharp in plan, but ease it enough in section that the finish and veneer have some support instead of hanging on a knife.
Color shift, fading, and finish issues
Color shift is where clients get nervous, because it sneaks up on them. Natural Wood Veneer will change tone under UV and visible light; cherry, beech, and some walnuts can darken or mellow, while certain light species can yellow or amber more than expected. Put a menu or a picture frame on a veneered counter for a few months, then remove it, and you’ll see the original tone preserved underneath. You can’t stop change completely, but you can choose finishes with UV inhibitors, manage direct sun with glass specs and shading, and set realistic expectations at handover.
Fading and patchiness often come down to inconsistent sanding and stain application. If some panels were sanded to 180 grit and others to 220, they won’t take stain the same way; throw in a slightly different stain dwell time on site and you end up with two doors side by side that “read” as different colors even though the spec says they’re identical. The cure is process discipline: lock in a sanding grit, test and document a finishing schedule, and make sure site teams follow the same system instead of freelancing with whatever they have in the van that day. A good shop will keep a control sample from the approved mock‑up and compare every batch to that, not to memory.
Finish issues also show up as witness lines, orange peel, or poor build on edges. Thin edges and outside corners tend to get less finish build because sprayers are trying not to overload them, so they wear through faster with hand contact. The quick win is to plan for that: spec a slightly more robust finish system on touch surfaces, insist on proper edge sealing, and, where possible, design hardware and handling points so users aren’t constantly grabbing the same sharp veneered corner. Natural Wood Veneer can last a very long time, but only if the finish is treated as part of the system, not an afterthought sprayed on at 5 p.m. before delivery.
Natural Wood Veneer vs Other Options: A Quick Reality Check
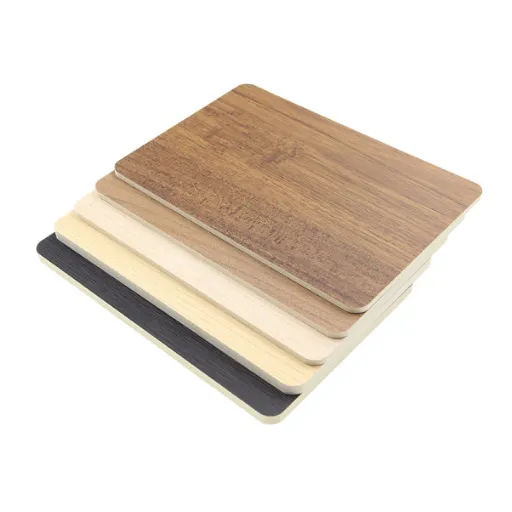
There are only a few real competitors to Natural Wood Veneer in most projects: solid wood on one side, and HPL/laminate on the other. Everything else is just a variation on those themes.
Veneer vs solid wood on cost, stability, and repair
If you’re trying to stretch a species across a lot of surface area, veneer wins on yield every single time. One good log can skin an entire reception area, a bank of built‑ins, and a run of doors, where the same log in solid might barely cover the key pieces before you’re into a visibly different batch. That translates into lower material cost per square meter of finished surface and far tighter visual consistency, especially on large projects.
Stability is where veneer really pulls away. A veneered door leaf or wall panel on a decent engineered core will stay flatter and move less than a wide solid board glued up from staves, so you fight fewer twisted doors, open joints, and seasonal cracks. You can run 2.4‑meter and 2.7‑meter faces without building in elaborate frame‑and‑panel gymnastics just to keep the thing from misbehaving. In day‑to‑day use, cleaners, maintenance teams, and humidity swings are much kinder to a well‑built veneered construction than to a big slab of solid.
Repair is the one area where solid wood still has the upper hand. You can sand, patch, and refinish solid more aggressively; if you’ve got a deep scratch, you’ve usually got enough thickness to work with. Veneer repair demands more finesse: localized touch‑ups, careful sanding, and sometimes partial re‑veneering if someone really abuses a surface. So the trade is clear—veneer gives you scale, stability, and access to expensive species; solid gives you more “elbow room” for severe repairs, at the cost of movement and material spend.
Veneer vs HPL/laminate for commercial interiors
When the brief is pure durability on a tight budget—student housing closets, back‑of‑house service corridors, heavy‑abuse worktops—HPL and laminates are hard to beat. They shrug off cleaning chemicals, luggage, and housekeeping carts better than a fine open‑grain veneer, and you can replace panels without worrying about grain matching too much. They’re the safety boots of surface materials: functional, tough, not pretending to be couture.
But in front‑of‑house spaces, repeated laminate patterns give themselves away fast. You’ll see the same “knot” at exactly the same height on every door down a corridor, and once your eye catches it on the third door, you can’t unsee it. Natural Wood Veneer gives you the warmth, depth, and randomness of real timber, which matters a lot in lobbies, meeting rooms, restaurants, and guest rooms where people are meant to feel like they’re in a considered environment, not a catalog set.
Where veneer needs more respect is in detailing and protection. You design with slightly more generous edge protection, better hardware positioning, and a finish system that suits the traffic level. Do that, and veneer holds up very well in commercial interiors, while delivering a feel that laminates simply can’t imitate, no matter how good the print is.
Frequently Asked Questions (FAQ)
-
How durable is natural wood veneer on kitchen cabinets?
Natural Wood Veneer holds up well on kitchen cabinets if you treat it as a system: stable substrate (usually MDF), decent edge protection, and a hardwearing finish. It’s not bulletproof like HPL, but in a typical family kitchen where people aren’t dragging cast‑iron pans along door fronts, it performs cleanly for years. The weak spots are unprotected edges near the dishwasher and sink, so detail those properly. -
Can I refinish natural wood veneer if it gets scratched?
Yes, but gently. Veneer faces are thin, so you’re spot‑repairing rather than doing an aggressive full sand‑back like you might on a solid oak tabletop. For a scratch on a veneered hotel nightstand, a good finisher will level the area with very fine paper, touch in color with stain or toner, then re‑build the topcoat locally. The trick is knowing when to stop sanding. -
Is natural wood veneer a bad idea in a high‑humidity environment?
It depends more on the core, glue, and sealing than on the veneer itself. In a spa or coastal apartment, you’d run veneer over moisture‑resistant MDF or suitable plywood, use a properly rated adhesive, and seal every face and edge. I’ve seen veneered locker doors survive fine in a gym changing room while “solid” doors next door twisted because nobody controlled moisture or finish on all sides. -
How do I avoid panels with obvious color mismatches?
Start by specifying species, cut, and matching clearly, then insist on flitch‑matched or sequence‑matched veneer for anything in the same sightline. On a corridor of 18 guestroom doors, for example, have the supplier pull from the same log set and lay out sample sequences before pressing. On site, don’t let installers mix panels from different batches into one area; keep each run together so the natural variation reads as intentional, not random. -
When should I choose laminate instead of natural wood veneer?
If you’re dealing with brutal traffic and zero maintenance tolerance—student dorm wardrobes, hospital utility rooms, rental furniture that gets banged around—laminate is the safer call. It shrugs off cleaning chemicals, suitcase impacts, and the odd housekeeping trolley. But the second you’re designing a reception desk, boardroom table, or a restaurant wall you actually want people to notice, Natural Wood Veneer usually gives you a better balance of warmth, perceived value, and long‑term repairability.
References
-
APA – The Engineered Wood Association. (2022). Standards & Accreditations: Structural Plywood and Wood-Based Panels. https://www.apawood.org/standards-accreditations
-
APA – The Engineered Wood Association. (n.d.). APA – The Engineered Wood Association: Home. https://www.apawood.org
-
AWI Quality Certification Program. (2024). A Guide to Wood Veneers. https://awiqcp.org/a-guide-to-wood-veneers/
-
WoodIndustryEd.org. (2016). Wood Industry Associations – Architectural Woodwork Institute and Veneer Associations. https://woodindustryed.org/wood-industry-associations/