

How to Install Wood Veneer Panels: A Complete Step-by-Step Guide
The installation of the wood veneered panel is a very essential entity because it properly defines the proper placement of it, the kind of adhesive, and even monitoring of conditioning and application of pressure. The installation of a wood veneered panel can breathe life into dull walls, storage cabinets, and furniture units with wooden warmth at a mere fraction of the environmental cost of solid lumber.
But here’s the real crux of the matter that most advice won’t reveal. The greatest difference between a beautifully finished veneer job and a real redo, often an expensive one, is about patience, not just skill.
A rushing-acclimation amateur tried to install a feature wall of 2,000 square feet in eight hours, but a commercial architect of Portland, named Marcus, observed moisture warping within three weeks. It cost his clients an extra $8.000 and two weeks. His fault was: He cut short the usual 72-hour acclimation period because he was behind schedule.
You don’t have to learn the hard way. In this guide, you’ll learn how to install wood veneer panels the right way. We’ll cover everything from choosing adhesives to troubleshooting bubbles, with practical tips that work for first-time DIYers and seasoned builders alike. We’ll also show you how proper installation practices honor the sustainable sourcing behind every panel.
Key Takeaways
- Let the wood veneer to stabilize without exposure at 65 to 75 degrees Fahrenheit and at 35 to 60 percent relative humidity for 48-72 hours.
- Different adhesives are supposed to match up with your type of veneer backings. For contact cement with paper-backed veneer, PVA glue for raw face veneer, and peel-and-stick for do-it-yourself projects.
- Be careful that no variation in level exceeds 1/16 inches over a distance of four (4) feet because this could show up through the thin veneer surface.
- When cutting, seal immediately to avoid moisture from seeping into the core and damaging the board, thus extending its use.
- The results show that veneer panels harvested from sustainable forests are 45 times more efficient in terms of usable output compared to board yields obtained from the same lumber.
What You’ll Need: Tools and Materials
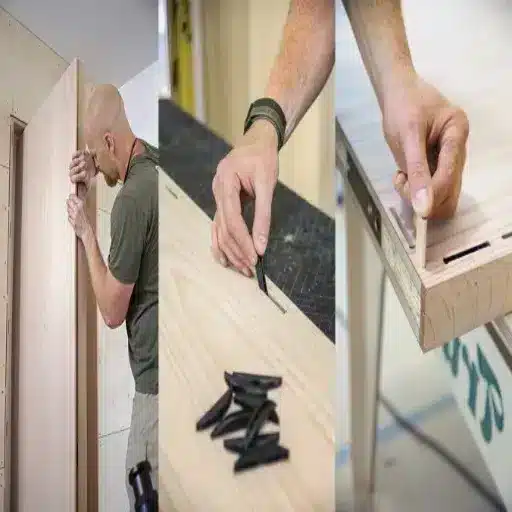
Before you begin your wood veneer panel installation, gather the right tools and supplies. Missing an item mid-project can lead to rushed decisions and compromised results.
Essential Tools
- Tape measure and carpenter’s square
- Fine-toothed carbide blade (80+ teeth) for your saw
- J-roller with a firm rubber surface
- Utility knife with fresh blades
- Router with flush-trim bit
- Sanding block with 120-grit, 220-grit, and 320-grit paper
- Level or laser level
- Chalk line
Adhesives and Supplies
- Adhesive matched to your veneer type (see comparison below)
- Clean rags and a tack cloth
- Wood filler matched to your veneer tone
- Edge banding or matching edge tape
- Painter’s tape for marking
- Safety equipment: respirator, gloves, and safety glasses
Optional but Helpful
- Vacuum press or clamps and cauls (for large panels)
- Moisture meter
- Dowels or slip sticks (for contact cement positioning)
- Gauge blocks for scribing
Pro tip from the field: James, a finish carpenter in Austin, keeps a dedicated “veneer kit” in his truck. His go-to addition? Plastic playing cards. He uses them as micro-shims when leveling substrates and as spacers during adhesive set-up. Simple tools often solve complex problems.
Pre-Installation Preparation
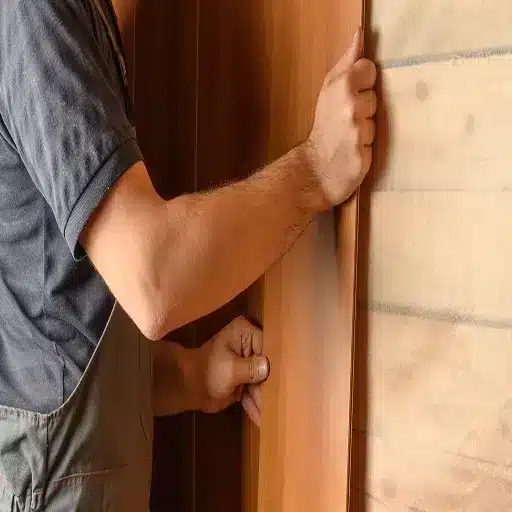
It is always better to check the finish of your installation before you actually get that first panel up. Skipping preparation is actually the number one cause of failure for wood veneer panel installation.
Acclimate Your Panels
Wood veneer changes density or swells and shrinks based on temperature and moisture. Panels that arrive warmer and damper than the job site will shrink into place afterward, and their seams will reopen, or surfaces will buckle.
Remove panels from the wrapper and store them the correct way up in the installation space. Keep conditions in the room at 65-75 degrees Fahrenheit with 35-60 percent relative humidity. Allow no less than 48-72 hours to elapse before you cut or install.
Deliver your material to an active jobsite. Block off your evaporator coil before delivery. Acclimate to the HVAC system. The control of heat or air conditioning is necessary for maintaining environmental stability for your investment. It is a practice particularly important for wood considered responsible, which typically has not undergone excessive drying or chemical stabilization as much as the mass-market alternatives.
Prepare the Substrate
The surface must be flat, clean, stable, and free of 1/16 inch over 4 feet height differential. Any bump, nail pop, or seam will telegraph through a thin veneer layer.
Sand the high spots using 120-grit paper; fill low spots with wood filler, sanding smooth; clean all dust, grease, and old finish from the surface. Since the best cleaning sequence is vacuum and tack cloth, it is important to remove all dust and discoloration.
Whenever working on new substrates, give your best shot at MDF and plywood, as these remain dimensionally stable. Whenever you finish setting up drywall, include a 1/2-inch plywood layer first. Standard drywall just does not offer the rigidity or screw-holding strength that quality veneer installation demands.
Plan Your Layout
Measure each side twice. There should be about a quarter of an inch in excess on the panels to be cut for a flush trim, with extra room on the face for the trim. Fit them dry to make certain you have all grain and a one-direction pattern matching properly oriented.
Draw the starting mark with a level chalk line. When you leave the first panel slightly out of plumb, every panel you hang after it will simply magnify the problem. Lay down a reference line and get it leveled out before you apply adhesive to it.
Choosing the Right Installation Method
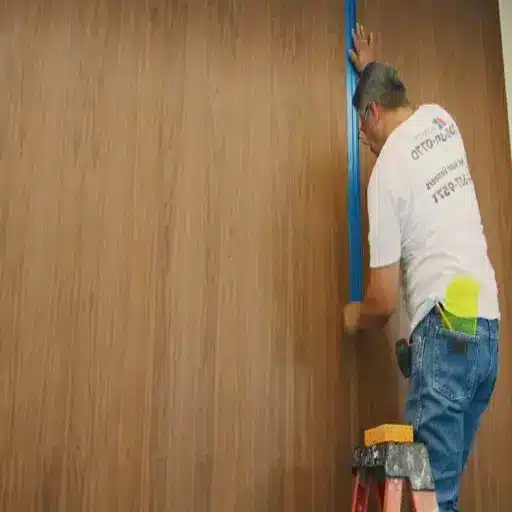
Not all veneer panels install the same way. The method you choose depends on the veneer type, the project location, and your skill level.
| Veneer Type | Best Adhesive | Skill Level | Best For |
|---|---|---|---|
| PSA (Peel-and-Stick) | Pre-applied pressure-sensitive adhesive | Beginner | Small projects, furniture refacing, DIY feature walls |
| Paper-Backed | Contact cement | Intermediate | Wall panels, cabinetry, and commercial applications |
| Raw Veneer | PVA wood glue or hide glue | Advanced | Fine furniture, curved surfaces, custom work |
| 2-Ply Wood-on-Wood | PVA or urea-formaldehyde | Intermediate | Large panels, high-traffic areas, balanced construction |
Direct-Glue Application
Direct-gluing is the most commonly employed technique for installing wooden veneer panels on walls and cabinets. The installation is achieved through the application of adhesive to the backsides of both the panel and the substrate. When the adhesive has already hardened a little, the panel can then be stuck in place. A bond should be created to last long and should be permanently bonded.
Peel-and-Stick Method
In terms of initiation, the peel-and-stick veneer panels may be termed as the most accessible device for DIYers. With the pressure placed on the self-adhesive pre-applied to the veneer, surfaces are treated with rubbing alcohol, and the backing is pulled away with condensation as edges are pushed down firmly using the J-roller. Keeps pry sticks as spacers in place for separation to ensure the adhesive remains apart from the substrate until you are ready.
Mechanical Clip Systems
For high-end architectural installations, concealed clip systems like Fastmount eliminate visible fasteners. The clips self-index, which removes measurement errors and creates perfectly consistent reveals. This method is increasingly popular in commercial spaces where panels may need future removal for access.
Batten or Frame Mounting
Mounting panels on wooden battens creates an air gap behind the veneer. This improves acoustic performance and allows wiring or insulation to run behind the surface. It also reduces direct moisture transfer from exterior walls.
Step-by-Step Installation Process
Now that your panels are acclimated, your substrate is prepared, and your adhesive is selected, follow these steps for a professional-quality installation.
Step 1: Cut Panels to Size
Use a smooth finish hand saw to reduce chipping. Observe the line when it is possible to cut with the grain neatly off. For table saw cuts, put the finished face up. For circular saw cuts, put the finished face down.
Scoring the cutting lines of a sharp utility knife before sawing, it would prevent tear-out on the finished side. Oversize the sheets slightly for a router trim.
Every panel is cut to a precise size before starting, by Elena, a Denver homeowner, installing her first veneered feature wall. On the last wall, there was a 3/8-inch gap due to accumulated measurement errors up to one-eighth of an inch. Lesson learnt was to cut slightly large and then trim for fitting after installation.
Step 2: Apply Adhesive
For contact cement: Apply a thin, even coat to both the panel back and the substrate. Allow it to become tacky, usually for 15 to 30 minutes. Test by pressing kraft paper against the surface. If it pulls away clean, you’re ready.
For PVA glue: This should be smeared onto the surface of the substrate only. Apply it evenly and fast, as you only have between 10 and 15 minutes after opening.
For PSA panels: Accomplish this by peeling the backing as you stick the panel. Don’t take the adhesive close to the substrate until and unless placement is perfect.
The sides of the panel should be free from any adhesive, as this prevents any excess from coming out. It is advisable to keep away for about 1/2 inch on all four sides.
Step 3: Position and Align
To install contact cement, lay dowels or slip sticks across the substrate. Next, put the stranded panel in the right place and work systematically. As the sticks are taken out one at a time, beginning from the center, pressure should be put on the panel.
To install PVA glue, you should be working within a time frame right ahead of the panel’s catching with the adhesive. Proceed with caution as you work through panel after panel, checking your alignment to chalk lines after every panel.
Step 4: Press and Secure
Use a J-roller and tighten up overlapping strokes. Start working from the center outward, paying plenty of attention to edges and corners. Apply steady pressure across the panel.
To get glued together with PVA glue, one can use clamps, cauls, or a vacuum press. Cold press requires 15-25 psi of uniform pressure for 30-60 minutes. Hot pressing at 200 to 250 degrees Fahrenheit is faster but requires special equipment for curing.
Installing panels in a kitchen or bath? See how wood veneer panels transform kitchen cabinets with moisture-resistant cores and durable finishes designed for high-use areas.
Step 5: Trim and Finish Edges
As soon as the adhesive has properly set, trim the excess veneer by using a router and a flush cutter. It is better to cut the veneer first along the exact edge with a sharp knife. Sand the side clean with 220-grit paper.
Immediately seal all cut edges with primer or something else suitable for the purpose. Exposed MDF or particle board cores are porous and absorb moisture, discolor, and swell. Edge banding is applied using a hot iron. Use a heat gun for curving the edge banding material.
Edge Banding and Finishing
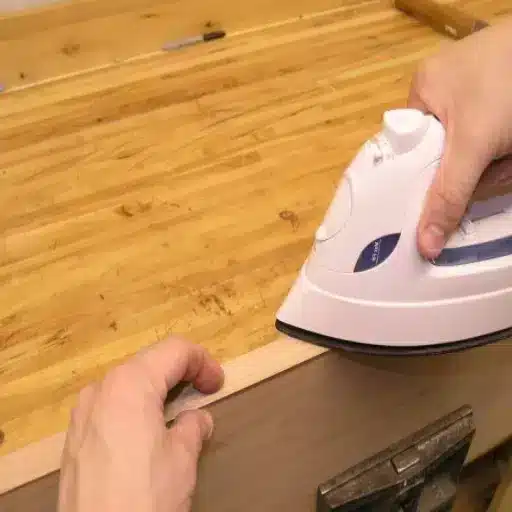
The edges of veneered panels typically show the core of the substrate, which seems unfinished and compromises its durability. Edge treatment will complete the finishes of a properly installed piece in a manner that will provide some protection to the work done.
Sealing Cut Edges
Apply wood edge banding for a perfect visual match. This hot-melt adhesive banding can be applied to the plastic right at home using a household iron and then trimmed with a utility knife. For commercial or damp environments, PVC is the top pick for such purposes since it is highly resistant to moisture and chemicals.
Applying Finish Coats
Lightly sand the whole surface using sandpaper of 320 grit. Veneer usually ranges from 0.5 to 3.0 millimeters thick; therefore, it will not require too much sanding because the substrate might be cut through.
Use a tack cloth to remove all dust. Then, pre-treat the wood with a pre-stain conditioner specifically for staining. Afterwards, apply 3-4 coats of only thin-level finishes and gently sand them with a 400-grit paper in between coatings. Polyurethane, lacquer, or a hardwax oil could be used, depending on the final shine and durability desired.
Troubleshooting Common Installation Issues
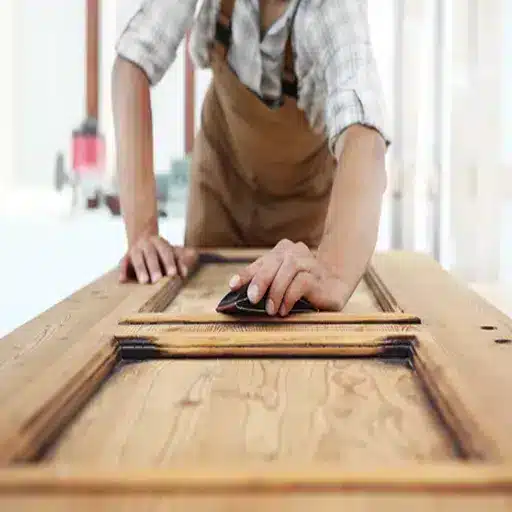
Problems may crop up in the most competent installer’s work. Knowledge of how to fix these glitches will save time and materials.
Bubbles and Lifting
Small bubbles on veneers are created when hot air is trapped beneath the veneer, or when adhesion is incorrect or missing in a specific area.
For a bubble less than 1 inch, place a wet cloth over the bubble and apply a hot iron for 10 to 15 seconds, pressing firmly as it cools. For bigger bubbles, make a small slitting along the grain of the bubble using a very sharp knife, inject with wood glue using a syringe, press it down flat, and clamp it overnight.
Peeling Edges
Peeling edge usually comes with a dry, unglued edge, water saturation, and most typically results from an impact. Reapply a genomic adhesive under pressure and firmly press where the edge peeled back. For iron-on edge banding, reheat with a cool iron to reactivate the adhesive.
Warping or Buckling
Warping takes place most often due to irregularities caused by moisture or humidity changes between veneer and substrate or because one side of an element is not balanced properly with the other side. Prevention is far easier and much more efficient than repair. Always acclimate, always check moisture content, and always veneer both sides of a freestanding panel.
Color Mismatch
Wood darkens with time due to ultraviolet rays and oil-based finishes. Most species will amber over a period of 6-12 months. If you refit a damaged sled panel, it will not match the new piece, which will start off looking light. For less noticeable contrast, shop replacement panels away from direct sun exposure for several weeks before installation.
Maintenance After Installation
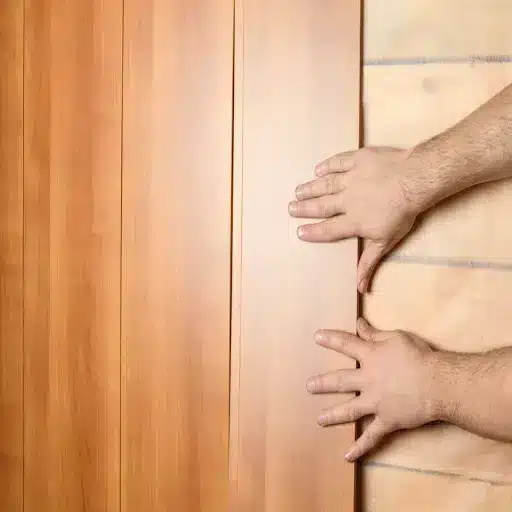
Proper maintenance extends the life of your veneer installation and preserves its appearance.
Humidity Control
Keep the humidity indoors to about 35%, hydro-stress-free all year long, while life-long adhesive bonding opens and closes are prevented. Sup-in king-of scary moisture, including winter-specific humidity, and in summer, so fresh air and a dehumidifier.
Cleaning and Re-Coating
Dust it off with a soft, dry cloth. Just keep water out of seams because it can swell the substrate. For cleaning in-depth, try a lightly damp microfiber cloth, and used with another dry cloth instantly after rolling over it.
It is required for oiled finishes to reapply paste wax or any protective oil after 6 to 12 months. Finishes in polyurethane and lacquer materials will typically need to be touched up after 3 to 5 years in high-traffic areas. The deeper cleaning and repair techniques see our guide to wood veneer panel maintenance and longevity.
When to Hire a Professional
DIY wood veneer panel installation is achievable for motivated homeowners and small projects. However, some situations call for professional expertise.
Consider hiring a professional if your project involves:
- Large commercial spaces with fire rating requirements
- Curved or complex geometries beyond straight wall applications
- Integration with pivot doors, hidden panels, or millwork systems
- LEED or WELL certification documentation requirements
- AWI Quality Certification Program compliance
The installation crews typically charge between $3-$5 per square foot for the most basic installations, $5-$10 for complex layout installations, and $10 or more for specialty materials and high-end architectural grade finishes. Most of the subcontractors bill per project, so the installation would range from $500-$1,000 per project.
When James, a contractor in Chicago, installed FSC-certified walnut veneer panels for a LEED Gold office lobby, the specifier required a documented chain of custody from forest to finish. Working with a supplier who provided certification numbers and environmental product declarations made compliance straightforward. Explore the different types of wood veneer panels we offer for sustainable projects, from natural oak to reconstituted exotic species.
Frequently Asked Questions
How long should wood veneer panels acclimate before installation?
Return time to lie flat in the installation area for 48-72 hours and keep them under 65-75°F with 35-60 percent relative humidity. This will eliminate the risk of warping, buckling, and seam separation after finishing new installations.
What is the best adhesive for wood veneer panels?
The best adhesive is determined by the veneer type. Regarding paper-backed veneer, contact cement is used. For raw veneer and 2-ply panels, PVA wood glue is employed. Pressure-sensitive adhesive comes pre-applied on peel-and-stick panels. In high-humidity areas, urea-formaldehyde or cross-linked PVA could both prove more moisture-resistant.
Can I install wood veneer panels over drywall?
Yes, but it is highly recommended that you use a 1/2″ plywood substrate. Drywall does not have the rigidity or screw-holding strength you need for the adhesion to last. Also, it will show the imperfections present in the drywall through thin veneers.
How do I prevent bubbles when installing veneer panels?
Evenly apply the adhesive across the entire surface. Use a J-roller with firm oscillatory movements extending from the center outwards. Arrange this work systematically, checking the surface before the adhesive curing, and take away any air pockets.
Do wood veneer panels need expansion gaps?
Wood is going to expand and contract with humidity changes. Some small perimeter gaps and gapping between sheets will be necessary as applicable. Use trim, molding, or scribe panels to fit tightly against adjacent surfaces to hide gaps.
How do I fix peeling veneer edges after installation?
Apply a new adhesive under the peeling part and press it firmly. Re-heat hot adhesive on the iron-on edge banding by ironing at low heat with a hot iron.
Conclusion
Be patient and prepare well, particularly during the installation of wood veneer panels. These steps are simple, not difficult, but each is crucial in itself. Acclimate your panels. Prepare your substrate. Choose the right adhesive. Press with purpose. Finish with care.
The proper fitting of veneer panels sourced sustainably, however, enhances the production of a surface; it also aids in extending the lifespan of a resource known to be one of the most efficient forest resources. A single log can yield 45 times more veneer than solid lumber. Proper installation is a fraternity to this efficiency, ensuring that the product performs for decades.
At VitalWood Global, we believe the best installations start with the best materials. Our veneer panels come from certified sustainable forests with full chain of custody documentation. Whether you’re specifying for a commercial project or transforming a residential space, we’re here to help you choose the right product and install it with confidence.
Ready to start your veneer panel project? Browse our collection of premium, sustainably sourced wood veneer panels and request a custom quote tailored to your specifications.