
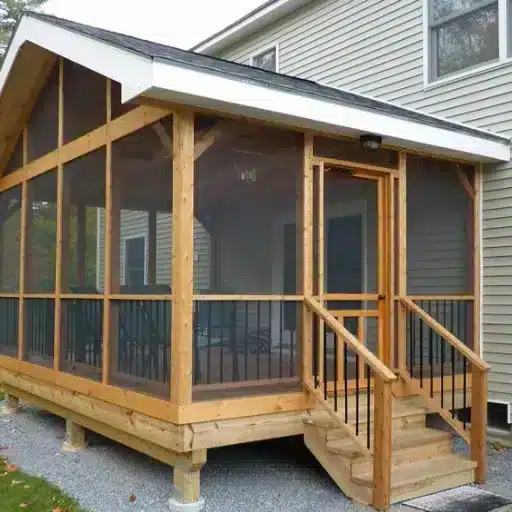
How to Enclose a Screened Porch (Without Creating Headaches Later)
If you’ve lived with a breezy, open porch for a few seasons, you’ve probably hit that point where pollen, rain, or cold snaps make it useless half the year—and that’s usually when you start wondering how to enclose a screened porch without wrecking what you love about it. Maybe you want something as simple as snap‑in panels you pop out in summer, or maybe you’re eyeing a full glassed‑in room that feels like real interior space, but the path you choose will dictate everything from cost and permits to how often you actually use the room.
Step 1 – Check if Your Screened Porch Can Handle It
Before you price windows or call a sunroom company, you need to know if the current structure is actually a good candidate. A screened porch that’s rock solid as an open space can be wildly underbuilt for the snow load, wind uplift, and racking forces you introduce when you start adding rigid walls and glass. So this stage is part triage, part forensic inspection.
In practice, that means slowing down and looking at the bones: posts, beams, roof connections, and the way the floor system meets the house. You’re asking, “If I turn these lightweight screen bays into heavier wall sections, what changes?” If the answer involves long, springy spans, undersized corner posts, or creative DIY brackets, you treat that as a structural problem to solve, not something you’ll “work around” with caulk and trim.
Structural basics: posts, beams, and roof load
Think of the existing porch like a frame that was designed to carry a roof and a bit of screen, not a set of walls. The posts may be spaced widely—say 8 or 9 feet on center—because screen has almost no weight and doesn’t resist wind the way glass panels do. Once you start dropping in window units, knee walls, or even full-height infill framing, those posts and beams suddenly have to handle different loads and load paths.
So you look for a few tells. Are the posts properly bearing on footings, or do they disappear into a concrete slab with no visible base hardware? Do you see any sag in the beam when you sight along it, or hairline cracks in the ceiling where the porch meets the house? If you push laterally on a corner post and feel noticeable sway, that’s your cue the structure relies heavily on the screening for bracing, which vanishes the moment you demo it. In that case, part of “how to enclose a screened porch” is actually “how to stiffen this frame before it gets heavier.”
Roof framing matters too. A light shed roof with minimal overhang might be fine for screens but marginal for the added weight of sheathing, shingles, and snow in some climates, especially after you tighten the envelope and change how wind loads hit the structure. You don’t need to run full calculations yourself, but you do need to recognize when spans and member sizes look optimistic for what you’re planning.
Floor, foundation, and moisture issues people gloss over
The floor system is where a lot of conversions go wrong. A porch slab might be uninsulated, slightly sloped for drainage, and poured right up against the house foundation. That’s okay for a wet‑tolerant outdoor space; it’s less okay when you start layering in framing, finishes, and furnishings that don’t like constant damp. You’ll often see that faint white line of efflorescence along the edges or dark staining where water has been wicking in after storms—that’s the kind of tiny detail that tells you the slab has a moisture story.
If it’s a framed floor, crawl underneath if you can. Check for rim joists that were never properly flashed to the house, open screen below the decking, or evidence of past rot repairs. Once you enclose, you change airflow patterns and can trap moisture in ways the original builder never anticipated. So you ask: does this floor system stay reasonably dry now, and can it support additional dead load if I add subfloor, insulation, and interior finishes? If the answer feels shaky, part of the project becomes upgrading or isolating that floor before you worry about windows.
Thermal comfort ties in here as well. An uninsulated slab or deck will radiate cold straight into the space. You can still enclose, but you temper expectations: you’re building a 3‑season room unless you’re willing to address insulation and possibly add a thermal break. It’s better to acknowledge that now than to discover in January that your “new room” is only comfortable on a sunny afternoon.
When you absolutely need a contractor or engineer
There are clear lines where this stops being a confident DIY job and needs professional eyes. If you’re planning to remove or modify structural posts, cut into the existing beam, or tie new rafters into the main house roof, you’re in “engineer or experienced contractor” territory. Any sign of settlement—doors in the house near the porch that stick, visible cracking where the porch meets the siding, noticeably out‑of‑level floors—deserves at least a professional site visit before you add more load.
You also bring in help when the project crosses from “porch with panels” into “habitable space” in the eyes of your building department, because now you’re dealing with egress rules, safety glass in specific locations, and sometimes energy code requirements once you enclose and heat the room. If you’re not comfortable reading plans, interpreting span tables, or talking through load paths, paying for a few hours of a structural engineer’s time up front is cheap insurance compared to ripping out a non‑compliant build later. And if a contractor or engineer walks the porch and immediately points out concerns you hadn’t even noticed, that’s usually your sign you made the right call.
Choosing Your Enclosure Style (Glass, Vinyl, or Hybrid?)
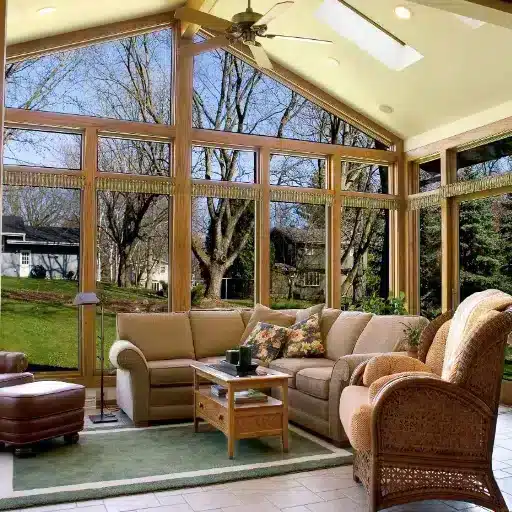
The biggest fork in the road with how to enclose a screened porch is choosing what kind of enclosure you’re actually building. You’re not just picking a product line; you’re choosing how the space will feel in March rain, July heat, and that weird shoulder season week when it swings 27 degrees in a day. Get this wrong and you end up with something you technically “enclosed” but rarely use.
So think in tiers: light-touch storm panels, more versatile vinyl or acrylic window systems, or a full framed-wall conversion that behaves like interior space. Each tier has a distinct price band, different code implications, and a different impact on resale. And each one has a sweet spot—where it makes perfect sense—and a misuse pattern you see again and again.
Option 1 – Simple storm panels and removable inserts
Storm panels and removable inserts are the gentlest way to enclose a porch. You’re basically clipping or screwing clear panels over the existing screen openings to block wind, rain, and some pollen, then pulling them off when the weather turns nice. Think of it as giving the porch a light raincoat rather than a full winter parka.
This approach shines when the structure is sound, the screen framing is reasonably square, and you just want to extend the usable season on the shoulders—say, late March through early November in a mild climate. You can buy off‑the‑shelf clear acrylic or polycarbonate panels, or have tempered glass storms made to size, and fasten them with clips, tracks, or surface‑mounted stops. The work is straightforward carpentry; if you’re comfortable measuring a rough opening to the 1/16″, you’re in the right skill band.
There are downsides. Panels have to go somewhere when they’re off the porch, and eight or nine full‑height units eat storage space faster than people expect. They also don’t seal like real windows. You’ll cut drafts dramatically and keep out driven rain, but you’ll still feel some air movement on windy days and you’re not solving deep-winter comfort. Still, when you’re pricing how to enclose a screened porch for someone who’s allergic to big structural changes, this option often lands in the “we can do that this year” bucket.
Option 2 – Vinyl / acrylic window systems for 3‑season use
If storm panels are a raincoat, vinyl and acrylic porch window systems are a proper shell jacket with zippers, vents, and a hood that actually fits. These systems use lightweight panels—often clear vinyl in aluminum tracks or acrylic sashes—that slide, stack, or pivot so you can open up 60–75% of the opening on a good day, then close everything tight when the weather turns. The big appeal is flexibility: wide‑open breeziness when you want it, contained space when you don’t.
This is where most homeowners land when they say they want “three‑season” use. The better systems have decent gasketing and hardware, so you get a notable bump in comfort and wind protection over simple storms. Some are engineered specifically for porch retrofits, meaning they’ll adapt to the slightly wonky openings you get on a 15‑year‑old structure without rebuilding every bay. From a build perspective, you’re doing some light framing tweaks, maybe adding a knee wall or proper headers in each bay, then installing the manufacturer’s units per spec.
There are tradeoffs. Vinyl can cloud or scratch; acrylic is clearer but can still show its age if abused. You will see some panel movement in heavy wind—you’d notice the flex on a strong gust—and you’re still limited by whatever insulation (or lack thereof) is under your feet and over your head. This is not a code‑defined conditioned room in most jurisdictions, which is good for permits but means you set expectations properly: comfortable spring through fall, marginal in a true cold snap unless the sun is doing you a favor.
Option 3 – Framed walls, insulation, and a true room conversion
Building framed, insulated walls and installing proper windows is where the project stops being “porch enclosure” and becomes “addition-lite.” You’re treating the porch perimeter like any other exterior wall: pressure‑treated bottom plates where needed, stud framing, sheathing, housewrap, insulation, and interior finishes, plus real windows sized and installed to code. The end result, when done right, is a space that visually and thermally reads as part of the house.
This path is right when the owner is chasing four‑season usability, wants to tie into the home’s HVAC, and is comfortable with the idea that the tax assessor might treat that area as new conditioned square footage. It’s also often the only honest option if the existing porch structure was already halfway to being a room, with a solid floor system, decent roof, and clear load paths. In that case, you’re just finishing the thought rather than fighting the original design.
The stakes are higher. You’re into permits, inspections, and more serious structural review. You have to plan for things like safety glass near the floor, ledger connections, insulation R‑values, and potentially foundation upgrades. The budget typically jumps into a different bracket—enough that on a 14×12 porch, it can be the difference between “we’ll knock this out this fall” and “we need to phase this over two years.” But when someone asks how to enclose a screened porch so it truly feels like part of the house, this is the play you’re really talking about.
Matching the enclosure choice to climate and budget
Climate and budget are what keep all of this honest. In a mild zone where winter lows hover just below freezing and you get maybe three or four real snow events a year, a good vinyl or acrylic system plus a space heater may cover 80% of what the homeowner actually wants. In a place that sees sustained single‑digit temps and serious snow load, anything short of framed, insulated walls is a compromise you should label clearly.
Budget is the other filter. Think in rough tiers, not promises. Storm panels and inserts are the “I can cash‑flow this in one season” option. Vinyl and acrylic porch window systems move you into a midrange investment that still leverages the existing structure heavily. Framed walls and a full conversion are long‑horizon, higher‑ROI moves that align more with remodel projects than with “porch upgrades.”
So when you’re sitting at a table with someone and walking through how to enclose a screened porch, you’re really helping them map three variables: how many months of comfort they expect, how tightly this space needs to match the rest of the house, and whether they’re ready for code and tax consequences that come with doing it “like a room.” Once those three are clear, the choice between glass, vinyl, or hybrid usually makes itself.
Code, Permits, and the Boring Stuff That Can Kill a Project
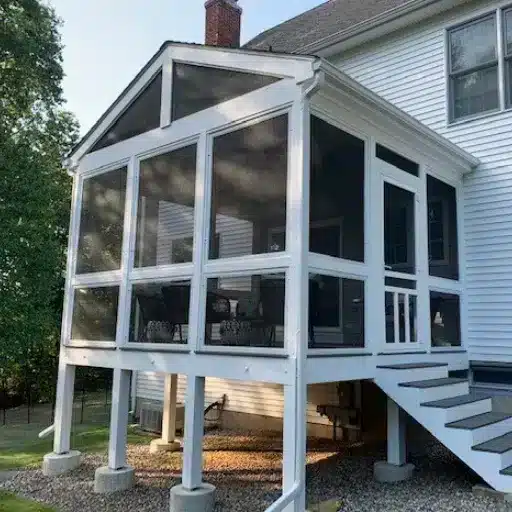
The fastest way to blow up a porch project isn’t bad carpentry—it’s ignoring how your city classifies the space. You can get every detail of how to enclose a screened porch right on paper and still end up stalled because the inspector sees “new room” where you saw “simple upgrade.”
So you start by treating this like any other change to the building envelope. Any time you add fixed glazing, new walls, or permanent heat, you’re stepping into regulated territory. Some jurisdictions will look the other way on clip‑in storm panels; others want a permit if you so much as add a roof over an existing deck. It’s worth a 10‑minute call or a quick visit to the counter with photos and a sketch just to hear how they describe what you’re doing.
When enclosing becomes a “new conditioned space” in the eyes of the city
From the city’s perspective, the line usually gets crossed when the space is both enclosed and intentionally heated or cooled. Once you add insulation, proper windows, and a permanent heat source—like extending your ductwork, adding a mini‑split, or installing baseboard heaters—you’ve created a “conditioned” room in building‑department language. That label drags in energy code, minimum insulation values, and often different window performance requirements.
So if the plan is framed walls, fiberglass batts, and tying into the home’s HVAC, expect to be treated just like a small addition. You’ll likely need drawings, permits, and inspections for framing, electrical, sometimes mechanical, and a final sign‑off. That said, if you’re staying in the three‑season lane—no insulation, removable panels, portable space heaters that aren’t hard‑wired—many departments will still see it as an accessory porch or sunroom and keep the rules lighter. The trick is to describe honestly what you’ll really do, not just what sounds simpler on the form.
There’s also a tax and zoning angle lurking in the background. Once a space is officially conditioned and code‑compliant, assessors in many areas will treat it as new finished square footage, which can nudge property taxes upward. It’s not an automatic deal‑breaker, but it’s something owners appreciate hearing before they commit to the full “room conversion” path.
Common inspection red flags: egress, safety glass, outlets, heaters
Inspectors tend to focus on a familiar set of issues when a porch turns into something more enclosed. Think of it as their mental checklist. If you address these on the drawings and in the field, the process goes a lot smoother.
Egress is one of the big ones. If the porch is off a bedroom or on a primary exit route, they’ll look for door widths, clear paths, and sometimes window sizes that meet emergency escape standards. A beautiful bank of fixed glass where a code‑required egress door should be will stop the inspection cold. So you make sure at least one door remains code‑compliant, swings the right way, and isn’t blocked by built‑ins or steps.
Safety glass near the floor is another common sticking point. Any time you drop glass close to walking surfaces, in doors, or near stairs, you’re in “tempered or other safety glazing” territory by most modern codes. Install standard annealed units in a spot that should be tempered and you’ll either be replacing them or living with a permanent red tag. When you order windows, you call out tempered wherever the code diagrams would require it, even if the homeowner hasn’t heard the term before.
Electrical layout gets attention too. A space that was never wired or only had one porch light suddenly wants outlets, sconces, and maybe a ceiling fan plus heater. That triggers spacing rules for receptacles, GFCI protection in many climates, and sometimes AFCI, depending on how your local code has adopted the latest updates. Running one orange extension cord from the interior out to a plug‑in heater is not going to fly once you’ve “officially” enclosed the area.
Heat sources themselves are the last big red flag. Hard‑wired electric heaters, gas heaters, or any appliance that vents into or through the new space will be looked at carefully. Inspectors want proper clearances, listed equipment, correct venting, and no open‑flame solutions shoved into a tight, low‑ceiling porch. If the owner insists on a specific heater, you get the cut sheets early and let the inspector weigh in before you frame around it.
Treat all of this as part of the design phase, not an afterthought. If you’re walking a client through how to enclose a screened porch, you’re also walking them through where the project crosses into “real room” territory in the eyes of the city. Getting that agreement up front is what keeps your timeline from blowing up halfway through.
5 Practical Build Paths (From Easiest to Most Involved)
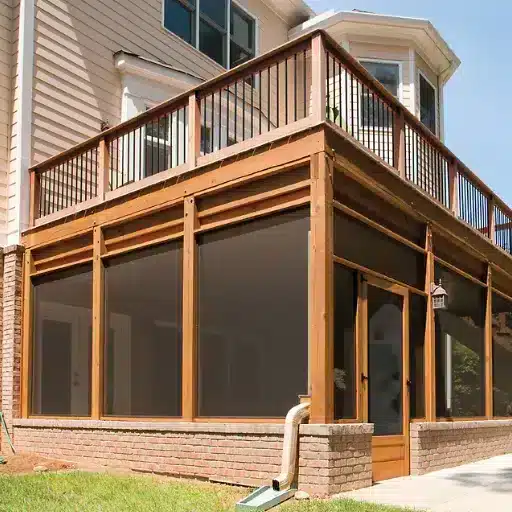
Most people don’t struggle with the idea of how to enclose a screened porch—they struggle with picking a build path that actually fits their structure, climate, and budget. So it helps to think in clear rungs on a ladder, from “light touch, almost no carpentry” up to “this is essentially a new room on the house” (which is where inspectors and tax assessors get interested). The five paths below cover 90‑plus percent of real projects you’ll see in the field.
1. Seasonal storm panels on the existing frames
This is the “snap on, snap off” approach. You keep the screened porch structure intact and add clear panels—acrylic, polycarbonate, or glass—that mount over each screen opening for the cold or windy months, then remove and store them when the weather turns.
In practice, that means you’re templating each bay, ordering panels cut to size, and installing simple clips or stops around the perimeter. On a 13‑foot wall with three openings, you might end up with six to eight manageable panels instead of three huge ones, just so one person can handle them without a wrestling match. Some systems, like purpose‑built storm panel kits, are designed specifically to fit existing screen frames within about 1/8″ tolerance and can move a porch into what manufacturers like to call a “3 to 3½‑season room” without major framing changes.
The upside is cost and speed. You can often do the whole thing with a weekend of careful measuring and a day or two of install once the panels show up. The downside is storage and handling: a stack of nine 42″ x 54″ panels eats garage space fast, and you’ll notice every ding if the acrylic gets shoved behind a lawnmower. This is ideal for owners who want shoulder‑season protection but are not ready for code‑heavy upgrades.
2. Track‑based vinyl window systems
Track‑based vinyl or acrylic systems are the next step: think roll‑up clear curtains or vertical four‑track windows that slide so you can open most of the wall on a nice day and close it tight when the wind picks up. Some products roll into a compact header cassette, almost disappearing when not in use; others use vertical tracks and stacked sashes that give you 50–75% open area when deployed.
Here you’re usually installing aluminum or PVC tracks inside each opening, squaring up the framing a bit, and then hanging the panels. The better systems handle uneven existing framing and still seal reasonably well, so a porch that was slightly out of square in 2009 doesn’t derail the project. From a build standpoint, you’re doing light carpentry and fastener work, not reframing the whole perimeter.
The feel of the room changes more noticeably with this option. When everything’s closed, the space behaves like a dedicated three‑season room: wind goes away, rain stays out, and with the sun on the glass you can see a 10–15 degree bump in comfort on cool days without any active heat. But it’s still fundamentally an “enclosed porch” in terms of code—no full insulation, no permanent HVAC—so you set expectations honestly: March through November comfort in many climates, with some bonus days outside that window when the weather cooperates.
3. Partial wall infill with upper glazing
Partial wall infill is the middle ground between a light enclosure and a full conversion. You frame solid knee walls or lower sections—often 24–36 inches high—then install glass or panel systems above, keeping the existing roof and main structure. It looks more like a room, gives you more surface area for outlets and finishes, but still reads as a porch in many plans.
On a practical level, this might mean framing a 30‑inch wall around the perimeter, sheathing and siding the exterior to match the house, insulating that lower band in some cases, and then setting window units, four‑track panels, or fixed glass above. It’s a nice way to hide the “ugly bits”: base plates, wiring, and any water‑tolerant but not pretty finish materials live in the lower wall, while the upper section stays all about light and view.
This route works well when the existing railing height and proportions already suggest a natural break point. You’re also gaining a bit of thermal and acoustic buffer from the solid lower wall. Yet you’re not into full addition territory, so in many jurisdictions it’s still permitted as a porch or three‑season enclosure rather than a formal conditioned room, assuming you’re not tying in HVAC or going crazy on insulation.
4. Full wall build‑out with insulation and HVAC tie‑in
Here’s where the project stops pretending and becomes a small addition. You’re converting the open screen bays to fully framed, insulated walls, installing proper exterior windows and doors, and tying the space into the home’s heating and cooling—either by extending ductwork or adding a dedicated mini‑split or similar system. In many contractor guides, this is classified right alongside four‑season rooms and sunrooms in terms of code and performance.
From the field perspective, the workflow looks like any other addition shell: structural review and adjustments, wall framing, sheathing, weather barrier, window installation, insulation, interior drywall or paneling, trim, and then mechanical and electrical rough‑in. The porch floor may need attention too; an uninsulated slab might call for a thermal break or a raised insulated floor system if the goal is true year‑round comfort.
This is the answer for homeowners who keep saying “I want it to feel like part of the house.” It’s also the point where you have to be blunt about permits, inspections, and long‑term costs. Once it’s insulated and conditioned, most cities treat the space as standard living area, which means energy code compliance and potential reassessment on square footage. Done right, though, it delivers real utility—office, breakfast nook, playroom—rather than just “a nicer porch.”
5. Demolish and rebuild as a purpose‑built sunroom
Sometimes the most honest path is to admit the existing porch isn’t a good foundation for what the owner wants. The footings are inadequate, the roof framing is marginal, or the layout fights every design idea on the table. In those cases, tearing the porch off and building a purpose‑designed sunroom or four‑season room can be cleaner, faster, and safer than endless retrofitting.
A purpose‑built sunroom is engineered from the ground up: proper foundation, structural framing sized for the roof and glass loads, high‑performance windows, full insulation, and an HVAC strategy planned from day one. Good examples emphasize large glass areas, daylight, and integration with the main house circulation so it doesn’t feel like a bolt‑on box.
Owners usually balk at the word “demolish,” but when you show them the math—how much structural correction, reframing, and piecemeal upgrading the old porch needs—starting fresh can make more sense. The budget lands at the top of the range, no question, yet the end product is a true four‑season space with predictable performance and a clean paper trail with the building department. If someone’s long‑term plan is to treat this as full‑fledged living space, not just a dressed‑up porch, this is the option you at least put on the table when you talk through how to enclose a screened porch.
Details That Make Enclosed Porches Feel “Finished”
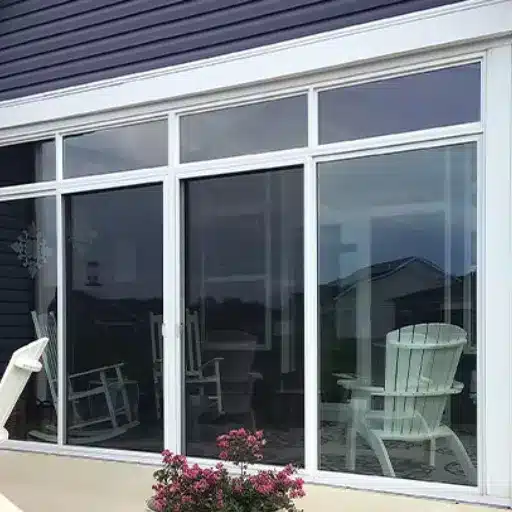
What separates a “that’s nice” porch from a space people actually live in is rarely the big structure—it’s the floor under your feet, how the windows are trimmed, and whether the lighting and heat match how the room really gets used. When you’re mapping out how to enclose a screened porch, this is the layer that either makes it feel like a true room or like a dressed‑up breezeway.
Flooring choices that survive tracked‑in water
Porch floors still get wet. Even fully enclosed, you’ll have blown‑in rain on bad days, melted snow off boots, and the occasional tipped planter. So you pick materials that shrug off that abuse instead of trying to pretend it’s a dry interior hallway.
On slabs, that usually means tile rated for exterior or “wet” areas, sealed concrete, or a floating LVP that’s explicitly OK with minor moisture and temperature swings. The detail that often gets missed is the transition: a 7/16″ lip at the door where you built up a new finish can be just enough to catch every chair leg. On framed floors, you make sure the assembly is stiff and dry before you cover it—fix any bounce, address ventilation—then use something like porcelain tile or a tight‑lock LVP, with a decent mat at the entry to handle grit. If someone insists on site‑finished hardwood, you have the condensation and seasonal movement talk right then, not after the first winter.
Trims, sills, and how you handle condensation
Water on the glass is inevitable in shoulder seasons. Warm interior air, cool glass, and suddenly you’ve got condensation beading on the lower few inches of a pane. That’s where sill and trim details matter more than whatever brochure language the window manufacturer used.
You want sloped interior sills that actually shed water back toward the glass and down, not flat 1x boards that hold a puddle right against the joint. A simple 8–10 degree slope is often enough that you’d notice droplets moving instead of sitting. Use materials that tolerate the occasional wetting—stable species, good primer on all sides, or even composite in the highest‑risk spots—and don’t bury the bottom of the frame in caulked‑tight trim where it can’t dry. On the exterior, head flashings, end dams, and proper integration with your WRB keep bulk water out so the only moisture you’re dealing with inside is that predictable seasonal fogging.
Lighting, outlets, and heating that actually get used
A finished‑feeling porch has light where people sit, outlets where they plug in laptops and phone chargers, and heat where cold air pools. That sounds obvious, but it’s amazing how many enclosures end up with one lonely fan/light combo in the center and a single outlet by the door.
So you start with the furniture plan. If this is a coffee‑and‑laptop space, you pull outlets into those corners, not just “every 12 feet.” A floor lamp behind the main chair, a sconce by the reading nook, maybe under‑sill strip lighting for a low, warm wash—those little moves keep the room from feeling like a converted patio. For heat, think about where cold glass meets floor; a slim electric baseboard or a low‑mounted convector along the main glazed wall can make the difference between “we use this nine months a year” and “we gave up on it in January.” If you go the mini‑split route, you pick a head location that doesn’t just blow straight at someone’s face on the couch.
Get these details right and the structure almost disappears. People just feel like they’re in a room that happens to have a better view—and that’s usually the real goal when they ask how to enclose a screened porch.
Frequently Asked Questions (FAQ)
-
Can I enclose my screened porch without rebuilding the whole thing?
Yes, if the structure is solid. For example, a 12×14 porch with straight posts, no beam sag, and a sound slab can often take storm panels or vinyl window systems with only light framing tweaks. But once you start adding insulated walls or heavy glass, you may need new footings or bracing to satisfy both basic engineering sense and local code expectations. -
What’s the most budget‑friendly way to enclose a screened porch for winter?
For many homeowners, clear storm panels or vinyl curtains clipped over the existing screens are the cheapest move. On a small 10×10 porch, you might be looking at custom acrylic panels and fasteners you can install in a weekend, then store in the garage in spring. You won’t get full four‑season comfort, but wind and sideways rain drop off dramatically. -
Do I need a permit to turn my screened porch into a sunroom?
If you’re adding framed walls, insulation, and tying into HVAC, treat it like an addition and assume you’ll need a permit. Cities usually shift the space into “conditioned” territory once you hard‑wire heat or extend ductwork. A quick trip to the building counter with a sketch and a couple of photos can save you from tearing out non‑compliant work later, especially around windows, outlets, and egress. -
Can I DIY enclosing a porch, or should I always hire a pro?
You can DIY lighter options—like track‑based vinyl systems or storm panels—if you’re comfortable measuring to the 1/16″, using a level, and dealing with the occasional out‑of‑square opening. Once the plan includes removing structural posts, changing the roof tie‑in, or converting to a full four‑season room, bring in at least an engineer or experienced contractor for the structural and code‑critical pieces. -
What’s the best enclosure option if I live somewhere with cold winters and hot summers?
In a climate that swings from freezing to 90‑plus, a three‑season vinyl window system is often a good middle ground if you can’t justify a full sunroom. You can open 60–70% of the wall on breezy days, then close it tight for shoulder seasons. If you want true January comfort and lower condensation risk, though, a framed, insulated wall system with proper windows and a mini‑split or tied‑in HVAC is the more honest solution.
References
-
U.S. Department of Energy. (2023). Windows, Doors and Skylights – Energy Efficiency & Comfort. https://www.energy.gov/energysaver/windows-doors-and-skylights
- Click here to read more.