
How to Remove Water Stains from Wood Veneer: A Complete Guide
You can remove most white water stains from wood veneer using gentle heat, oil-based treatments, or mild abrasives. Dark stains are harder because water has reached the wood fibers, and the veneer is too thin for aggressive sanding.
Emma set her coffee mug on her walnut veneer side table during a video call. An hour later, a pale ring stared back at her. She reached for a scrub sponge, then stopped. Veneer is not solid wood. The same fix that saves an oak tabletop can sand straight through a paper-thin walnut layer. This guide is part of our complete resource on how to remove water stains from wood. By the end, you will know how to diagnose veneer stains, choose the right method, and avoid the mistakes that turn small rings into permanent damage.
If your veneer is beyond repair and you need replacement material, explore VitalWood Global’s custom wood solutions for responsibly sourced veneer and paneling options.
Key Takeaways
- White or cloudy stains sit in the finish; dark stains have reached the wood fibers.
- Veneer is typically 0.5–2 mm thick, so aggressive sanding can ruin it quickly.
- Start with the gentlest method and test every treatment in a hidden spot.
- Heat, mayonnaise, baking soda paste, and vinegar with olive oil work on many white stains.
- Dark stains often need light sanding, oxalic acid, re-staining, and resealing.
Why Veneer Needs a Different Approach
What wood veneer actually is
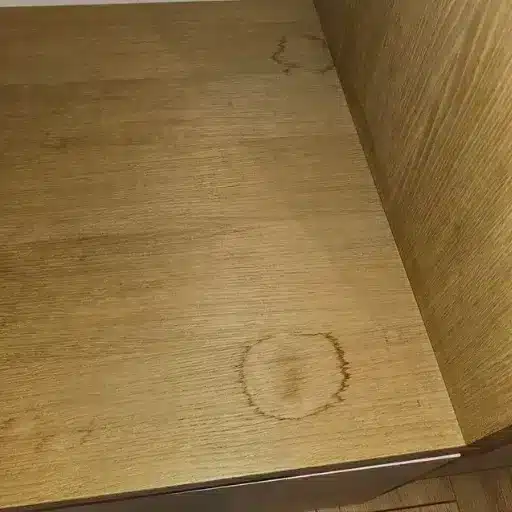
Wood veneer is a thin slice of real wood glued to a substrate, usually particleboard, MDF, or plywood. The decorative layer can be as thin as 0.5 mm and rarely exceeds 2 mm. That gives veneer the beauty of solid wood at a lower cost and with less environmental impact, but it also leaves very little material to work with.
Because the usable wood layer is so thin, sanding is risky. Sand through the veneer and you expose the substrate beneath. At that point, the only fix is patching or replacing the veneer. That is why most veneer stain removal relies on lifting or displacing moisture rather than removing wood.
How water damages veneer
Water affects veneer in three ways. First, it can become trapped in the finish layer, creating a white or cloudy haze. Second, it can seep through cracks or edges and reach the wood fibers, causing dark or black marks. Third, it can weaken the adhesive, making the veneer bubble, lift, or crack.
The damage path matters because each stage needs a different response. A finish-level haze responds to gentle treatments. A dark tannin stain needs bleaching and refinishing. Bubbling or delamination usually requires re-gluing or replacement.
When to repair vs. replace
Repair is worth trying when the veneer is still flat, firmly attached, and the stain is limited to a small area. Replacement is the better choice when the veneer is bubbling across a wide area, the substrate is swollen, or the piece has sentimental or monetary value that justifies professional restoration.
A good rule of thumb: if the damage is smaller than the palm of your hand and the surface is still smooth, try a repair. If the substrate feels soft or the veneer is peeling on its own, stop and assess replacement.
Diagnose the Stain Before You Treat It
White or cloudy stains
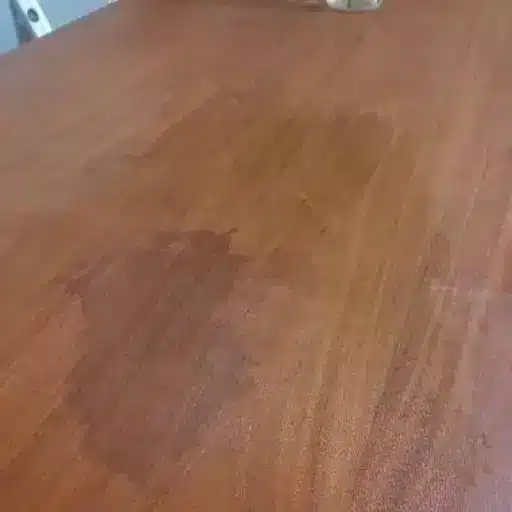
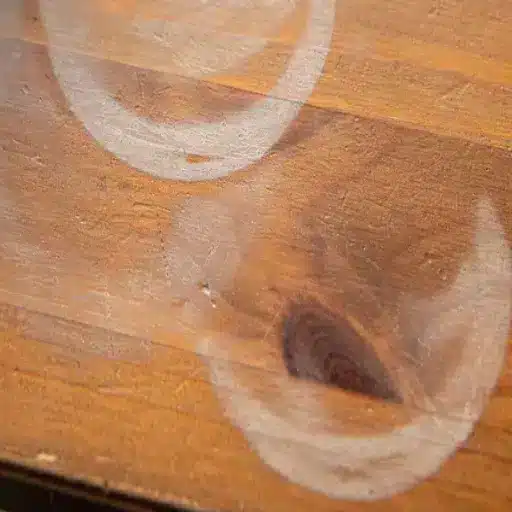
White stains look like pale rings, hazy patches, or foggy areas. They mean moisture is trapped in the finish, not the wood. These are the easiest stains to remove on veneer because you do not have to reach the wood fibers. For a deeper look at these marks, see our guide to how to remove white water stains from wood.
Run your fingertip across the stain. If it feels smooth and level with the surrounding surface, the finish is intact and the moisture is underneath it. That is a good candidate for heat- or oil-based removal.
Dark or black stains
Dark stains mean water has reached the wood or the substrate beneath. On oak, walnut, and other tannin-rich species, this often shows as gray or black discoloration. The stain may feel rough or raised if the finish has been compromised.
Dark stains are harder to fix because the discoloration is inside the wood, not on top of it. You may need to remove some finish, apply a wood bleach like oxalic acid, and re-stain the area. In some cases, the stain is too deep for a perfect match.
Raised, rough, or bubbled areas
If the stained area feels raised, gritty, or bubbly, the finish or the veneer itself has been damaged. Raised grain can sometimes be smoothed after drying. Bubbles mean the adhesive has failed, and the veneer is lifting. These problems are beyond simple stain removal and fall into repair territory.
Tools and Materials You Will Need
For gentle stain removal
- Clean, lint-free cloths
- A hair dryer or clothes iron with no-steam setting
- Thick cotton towel or t-shirt
- Mayonnaise or petroleum jelly
- Olive oil and white vinegar
- Baking soda
- Non-gel white toothpaste
- Small soft-bristle brush or old toothbrush
For advanced repair
- 220-grit and 320-grit sandpaper
- Wood bleach (oxalic acid crystals or prepared solution)
- Baking soda and water for neutralizing
- Matching wood stain or touch-up marker
- Clear finish: lacquer, shellac, polyurethane, or oil
- Small artist brushes
- Disposable gloves, safety glasses, and N95 mask
For veneer edge and bubble repair
- Wood glue
- Syringe or thin applicator
- Wax paper
- Heavy books or clamps
- Matching veneer patch (if needed)
Method 1: Gentle Heat
How heat removes white stains
Heat re-expands the finish and evaporates the trapped moisture. It is one of the safest first-line treatments for white stains on veneer because it does not involve chemicals or abrasives.
Using a hair dryer
Set the hair dryer to low or medium heat. Hold it 4–6 inches from the stain and move it in slow circles. Do not hold it in one place. After 30–60 seconds, stop and wipe the area with a soft cloth. Repeat two or three times if the stain fades gradually.
This method works best on fresh stains where the moisture has not had time to bond with the finish. Older stains may need oil or mild abrasive help after heat.
Using a clothes iron
Place a thick cotton towel or folded t-shirt over the stain. Set the iron to low heat with the steam turned off. Press the iron on the cloth for 3–5 seconds, then lift it. Check the stain. Repeat five to ten times, moving the cloth slightly between presses.
Emma tried the iron method on her walnut side table. After four presses, the pale ring had almost disappeared. She finished by buffing the area with a dry cloth. The table looked normal again.
Caution: Never use high heat or steam. Excessive heat can blister the finish or loosen the adhesive under the veneer.
Method 2: Oil-Based Treatments
Mayonnaise or petroleum jelly
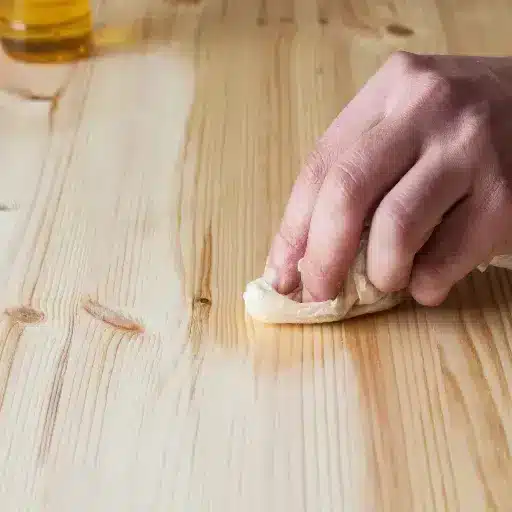
Mayonnaise and petroleum jelly work by displacing moisture and re-oiling the finish. They are especially useful for older white stains that heat alone did not remove.
Apply a thick layer of mayonnaise or petroleum jelly directly over the stain. Let it sit for at least one hour; overnight is better for stubborn marks. Wipe away the residue with a clean cloth, then buff the surface. If a slight haze remains, repeat the process.
Some people mix a pinch of baking soda into the mayonnaise to add a very mild abrasive action. This can help, but use it gently to avoid scratching the finish.
Vinegar and olive oil
Mix equal parts white vinegar and olive oil. Dampen a soft cloth with the mixture and rub it over the stain in the direction of the wood grain. Let it sit for a few minutes, then wipe away the excess and buff dry.
The vinegar helps lift the discoloration while the olive oil conditions the surface. This is a good option for finished veneer that looks dry or dull along with the stain.
Method 3: Mild Abrasives
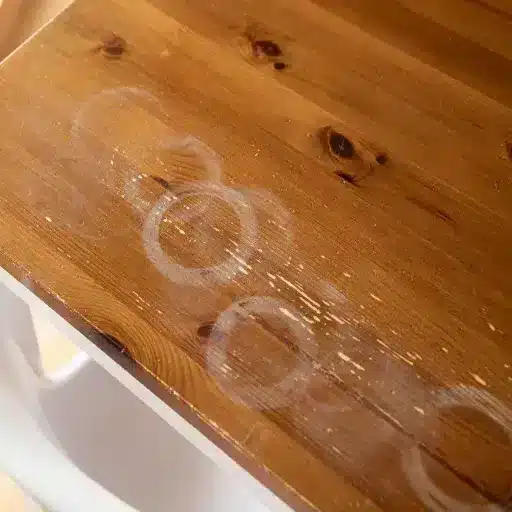
Baking soda paste
Mix baking soda with a few drops of water to make a soft paste. Dab it onto the stain with a soft cloth and rub gently in circular motions. Work lightly and check your progress often. Wipe clean with a damp cloth, then dry immediately.
Baking soda is only slightly abrasive, so it is safer than commercial scouring powders. Still, too much pressure can dull or scratch the finish. Think of it as polishing, not scrubbing.
Non-gel white toothpaste
Non-gel white toothpaste can act as a mild polish for damaged finish. Apply a small amount to a soft cloth, rub the stain gently, then wipe clean. This works best on white stains where the finish itself has a slightly rough texture.
Avoid whitening toothpastes with baking soda crystals or peroxide. They can be too aggressive and may lighten the finish around the stain.
Method 4: Solvent Techniques by Finish Type
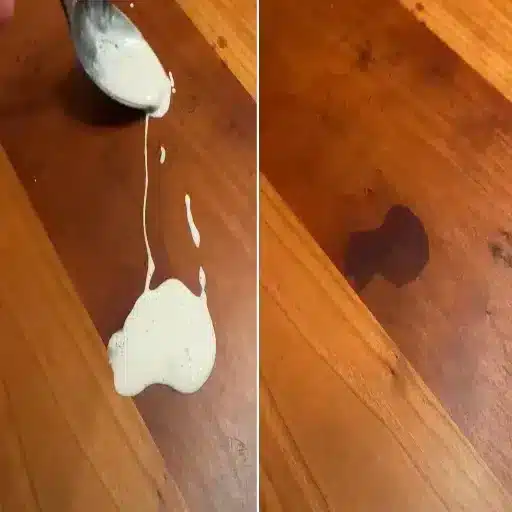
Why finish identification matters
Not all finishes respond to the same solvents. Using the wrong solvent can dissolve the finish, spread the stain, or leave a bigger mark than the one you started with. Before using any solvent, identify the finish.
Test in a hidden area first. Dampen a cotton swab with denatured alcohol and rub a small spot. If the finish softens or dissolves, it is shellac. If it does not react, try lacquer thinner. If neither solvent affects it, the finish is likely polyurethane, varnish, or a modern catalyzed finish.
Shellac and lacquer finishes
Shellac and nitrocellulose lacquer are common on older and mid-century furniture. They respond well to solvent amalgamation. Moisten #0000 steel wool with denatured alcohol for shellac or lacquer thinner for lacquer. Rub the stained area very gently along the grain, blending outward. The solvent softens the finish and allows the steel wool to level the damaged layer.
This technique requires a light touch. Work in a ventilated area, wear gloves, and stop frequently to check your progress.
Polyurethane and varnish finishes
Polyurethane and varnish do not dissolve with alcohol or lacquer thinner. On these finishes, stick to heat, oil, and mild abrasives. If the stain is in the wood beneath the finish, you will need to remove the finish in that small area, treat the wood, and reapply a matching clear coat.
For guidance on refinishing after deeper damage, see our guide to how to refinish water-damaged wood.
Method 5: Sanding, Bleaching, and Refinishing Veneer
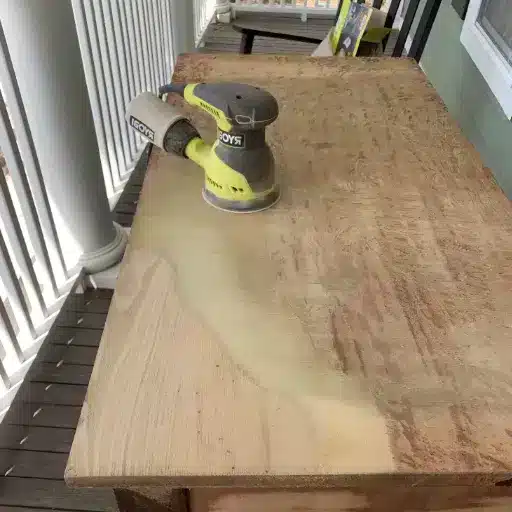
When to sand veneer
Sanding is a last resort for veneer. You should only sand when the stain is dark, the finish is already damaged, and gentler methods have failed. Use the finest grit that will do the job, and stop the moment the raw wood begins to show evenly.
The light sanding protocol
- Let the veneer dry completely for at least 48 hours.
- Mask the area around the stain with painter’s tape.
- Fold 320-grit sandpaper and sand lightly along the grain.
- Check frequently. Stop when the finish is removed and the stain is exposed.
- If the stain is still visible, move to oxalic acid.
Using oxalic acid on dark stains
Oxalic acid is a wood bleach that works especially well on tannin-based dark stains. Mix the crystals with water according to the product instructions, usually about one tablespoon per cup of warm water. Apply the solution to the bare wood and let it dry completely. The stain should lighten as it dries.
Neutralize the area with a baking soda solution, then rinse with clean water and let it dry. Sand very lightly with 320-grit paper to smooth the grain, then apply a matching stain and finish.
Safety note: Always wear gloves, eye protection, and a mask when working with oxalic acid. Work in a well-ventilated area and keep the solution away from children and pets.
Re-staining and sealing thin veneer
Choose a stain that matches the surrounding veneer. Test it on a hidden area or scrap piece first. Apply the stain with a small artist brush, feathering the edges outward. Wipe off the excess and let it dry.
Seal the repair with a clear finish that matches the original sheen. For small repairs, shellac or a wipe-on polyurethane is easier to control than spray finishes. Apply thin coats and sand lightly between them with 320-grit paper.
Repairing Water-Damaged Veneer Beyond Stains
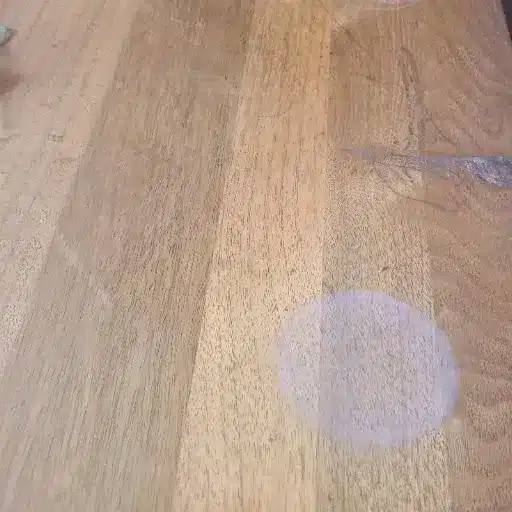
Re-gluing lifted edges
Water often enters veneer at the edges or seams, weakening the glue. If the veneer is lifting but not cracked, you can re-glue it. Use a syringe or thin applicator to slide wood glue under the lifted section. Press the veneer down, cover it with wax paper, and weigh it with heavy books or clamp it gently. Let it cure for 12–24 hours.
Wipe away any glue that squeezes out before it dries. Dried glue will block stain and finish, leaving a pale line.
Filling small chips
For tiny chips in the veneer, use a wood filler that accepts stain or a wax fill stick matched to the wood color. Press the filler into the chip, level it with a putty knife, and let it cure. Touch up with stain or a furniture marker, then seal.
Patching missing veneer
If a piece of veneer is missing, you can patch it with a matching veneer piece. Cut the patch slightly larger than the damaged area, shape it to fit, glue it in place, and clamp it. Sand the seam flush and stain to blend. This is a more advanced repair and is often best left to a professional for valuable pieces.
Common Mistakes to Avoid
Sanding too aggressively
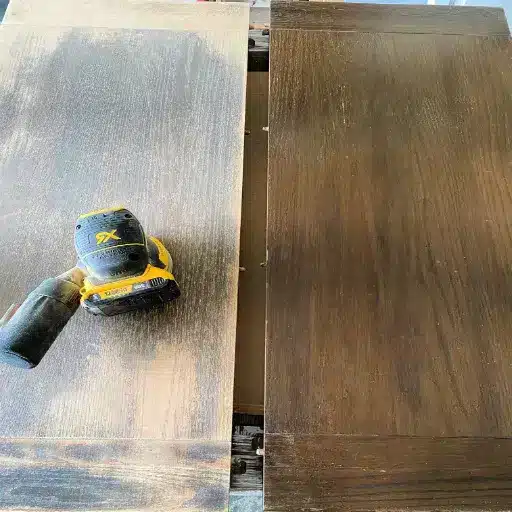
The most common mistake is treating veneer like solid wood. Power sanders, coarse grits, and heavy hand pressure can remove the veneer layer in seconds. Always start with 320-grit or finer, and check your progress after every few strokes.
Using too much water
It sounds strange when the goal is removing water stains, but adding more water can make things worse. Soaking the area can swell the substrate, loosen the adhesive, and create new stains. Use damp cloths, not wet ones, and dry the surface immediately.
Skipping the finish test
Using lacquer thinner on shellac, or alcohol on polyurethane, can destroy the finish around the stain. Always test solvents in a hidden spot and wait a few minutes to see how the finish reacts.
Applying heat without protection
Direct contact between a hot iron and veneer can blister or burn the finish. Always use a thick cotton cloth as a buffer, keep the heat low, and lift the iron frequently.
When to Call a Professional
Valuable or antique pieces
If the furniture is antique, heirloom, or high-value, call a professional restorer. They have access to matching veneers, specialized finishes, and techniques that hide repairs far better than most DIY efforts. The cost of professional restoration is often less than the loss in value from a botched repair.
Widespread damage
When water damage covers a large surface, involves multiple bubbles, or has warped the substrate, DIY repair becomes impractical. A professional can assess whether re-veneering the entire piece is the most cost-effective solution.
Matching complex finishes
High-gloss lacquer, catalyzed finishes, and dyed veneers are difficult to match at home. If your piece has one of these finishes, professional help will give a cleaner result.
Tom found a water stain on his teak veneer credenza from the 1960s. The finish was a glossy catalyzed lacquer, and the stain sat right on the front edge. He tried mayonnaise and heat with no success, then realized the risk of damaging the vintage piece. A local restorer fixed the stain and refreshed the finish for a fraction of the credenza’s value.
Prevention Tips
Use coasters, placemats, and trivets
The best way to deal with veneer water stains is to prevent them. Use coasters under drinks, placemats under plates, and trivets under hot dishes. Heat and moisture together are especially damaging because they open the finish and drive moisture deeper. For marks caused specifically by hot cups or dishes, see our guide to how to remove heat stains from wood.
Wipe spills immediately
Do not let water sit on veneer. Wipe spills with a dry or slightly damp cloth as soon as you see them. Dry the surface afterward with a clean cloth.
Maintain the finish
A well-maintained finish resists moisture better than a dry or cracked one. Apply furniture wax or a compatible oil polish every few months, depending on the finish type. Avoid silicone-based sprays, which can build up and make future refinishing harder.
Seal edges and seams
Water often enters veneer through edges, seams, and damaged corners. Inspect these areas regularly and touch up any worn finish. For long-term protection, read our guide to how to prevent water stains on wood.
FAQ
Can you remove water stains from wood veneer?
Yes, most white or cloudy water stains can be removed from veneer using heat, oil-based treatments, or mild abrasives. Dark stains are harder because water has reached the wood fibers, and veneer is too thin for aggressive sanding.
How do you get white water stains out of veneer?
Start with the gentlest method. Use a hair dryer on low heat or a low-heat iron over a cotton cloth. If that does not work, try mayonnaise, petroleum jelly, or a baking soda paste. Always test in a hidden spot first.
Does mayonnaise really remove water stains from wood?
Mayonnaise can remove white water stains because the oils displace trapped moisture in the finish. It is not a guaranteed fix for every stain, but it works well on many light, fresh rings on finished wood.
Can you sand water stains out of veneer?
You can sand very lightly on veneer, but only as a last resort. Veneer is thin, usually 0.5–2 mm, so aggressive sanding will cut through it. Use fine grit paper, check often, and stop when the stain is exposed or the finish is removed.
How do you fix dark water stains on veneer?
Dark stains usually require removing the finish in the affected area, applying a wood bleach like oxalic acid, neutralizing, re-staining, and resealing. For detailed steps, see our guide to how to remove dark water stains from wood.
Is it safe to use a steam iron on veneer?
No. Steam adds moisture, which can worsen the stain and loosen the adhesive under the veneer. Always turn the steam setting off and use a dry cotton cloth as a buffer.
How do you repair water-damaged veneer edges?
Slide wood glue under the lifted veneer with a syringe or thin applicator. Press the veneer down, cover it with wax paper, and weigh or clamp it for 12–24 hours. Wipe away excess glue before it dries.
When should you replace veneer instead of repairing it?
Replace or re-veneer when the damage covers a large area, the substrate is swollen or soft, the veneer is bubbling across a wide surface, or the piece is valuable enough to justify professional restoration.
Conclusion
Removing water stains from wood veneer takes patience and a gentle hand. Start by diagnosing whether the stain is white or dark, then choose the least aggressive treatment that fits the damage. Heat and oil-based methods handle most white stains. Dark stains may need light sanding, oxalic acid, and careful refinishing. Bubbling or lifting veneer moves the problem from stain removal into repair territory.
The thin nature of veneer is both its charm and its weakness. It gives furniture the look of solid wood with less material, but it leaves almost no margin for error. Work slowly, test every method in a hidden spot, and know when to stop.
For more help, explore our complete guide to removing water stains from wood, plus related guides on heat stains, white water stains, dark water stains, furniture water stains, commercial removers, refinishing water-damaged wood, and prevention.
Ready to restore or replace your veneer with quality, sustainable materials? Get in touch with VitalWood Global for custom wood solutions and expert guidance tailored to your project.