
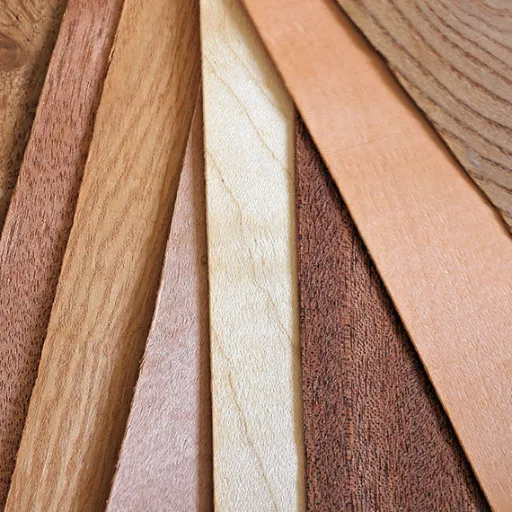
Wood Veneer Surface Treatments: UV Coating, Lacquer, and Oil
Using appropriate surface treatment can better the natural beauty of wood veneer. The right treatment is crucial no matter if your goal is durability, a glossy finish, or a subtle and natural look. This post discusses three surface treatments of UV coating, lacquer, and oil, which are commonly used. In addition to this, it will also make their different benefits, applications, and aesthetic outcomes clearer. You will acquire the necessary knowledge by the end of this post to select the finish which would make your wood veneer projects the most attractive.
Introduction to Veneer Finishing
The Importance of Veneer Finishing
The quality and lifespan of wood veneer surfaces are highly dependent on the finishing. The right finishing not only makes the veneer more beautiful but also provides the necessary protection against moisture, ultraviolet rays, and physical wear. For instance, a Wood Finishes Industry study has shown that untreated veneers are 40% more susceptible to environmental damage than the treated ones. Therefore, it is obvious that finishing serves the dual purpose of enhancing the wood’s beauty and extending its life.
Customization is among the different methods of wood veneer finishing. It allows the customer to choose between the modern, shiny look that comes with the UV coatings or the simpler, non-reflective finish done with oils. In 2023, market research predicted a 15% yearly increase in the demand for UV finishes, owing to their long life and resistance to scratches and fading. But, on the other hand, oil finishes are still highly regarded, especially among customers who prefer a natural and touchable feel, since 70% of woodworkers selected it for home use because it is eco-friendly and easily repaired.
Advantages of Correct Wood Veneer Finishes
The correct wood veneers finishing is full of advantages besides enhancing the wood’s appeal, their performance is uplifted as well. With the proper application of the finish, the veneer is not only resistant to scratches but also the life of the veneer is extended, thus giving a long-term value. The recent experiments conducted have claimed that finishing with top-class materials can prolong the life of veneer by 40%, making it tougher against scratching, moisture, and UV light damage. This is very much useful for places that need to be used on a daily basis or are under pressured conditions, such as furniture or cabinets located in a high-traffic area.
In addition to that, the finished product has more visual appeal as it presents the richness of the wood through its patterns and colors. Among these finishing products are water-based and low-VOC coatings, which are very innovative and at the same time eco-friendly. The market reports suggest that the demand for green finishes has skyrocketed, with more than 60% of homeowners going for sustainable options for their interior projects. These finishes are not only a result of the growing trend towards green building practices but also help the professional and homeowner get the environmental certifications required for construction and design.
Types of Wood Veneer Finishes
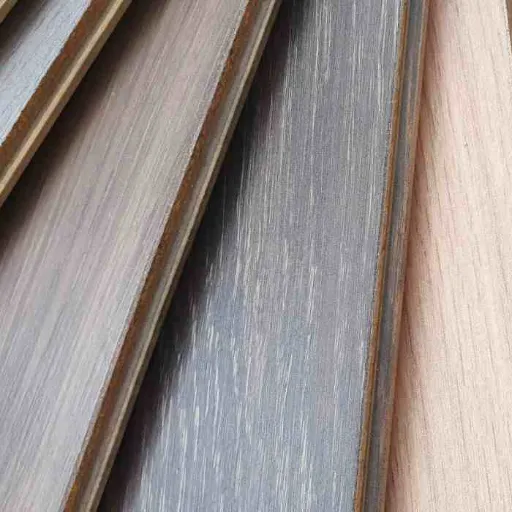
Lacquer: Advantages and Applications
One of the finishing techniques for wood veneers is lacquer, which is the most widely used due to its smooth and shiny finish as well as its protective qualities. The lacquer finish is the lightest one of all coatings and it allows the wood to breathe or dye, thus creating a surface that will endure longer than usual and will also retain the beauty of the wood grain. One of the most loving things about lacquer is that it can effortlessly endure an exaggerated amount of moisture, scratches and general wear and tear all together in one place, thus being the perfect finish for frequently used areas such as floors, furniture or cupboards.
Modern lacquer compositions have altered the playing field a lot. Recently it was reported that water-based lacquers are getting higher and higher demand as they are eco-friendly, and their VOCs levels are much lower than those of solvent-based lacquers. Besides, the new invention of UV-cured lacquers has resulted in extremely fast curing under UV light hence the process of production is also more efficient and the finish even more fortified.
Polyurethane Finishes: Durability and Protection
Polyurethane finishes are now equated with the topmost durability and protective properties. Therefore, they are extensively used in both modern residential and commercial applications. Unlike lacquer, the coating provided by polyurethane is harder and more resistant, thus yielding superior resistance against scratches, heat and chemicals. This is the reason why the finish has been applied to the flooring, kitchen counter and other pieces of furniture which are often used.
Polyurethane products come in two main forms: oil-based and water-based. Oil-based polyurethane gives an extraordinary rich, amber color and thus, it is more durable too. The water-based polyurethane, on the contrary, has faster drying time, lower odor and maintains the wood’s paint color. Studies suggest that oil-based polyurethane if taken proper care of can last for approximately 10 years while water-based will last on average about 5-7 years.
Step-by-Step Finishing Techniques
Preparing the Veneer Surface: Sanding Essentials
The initially performed surface preparation when done in a proper manner plays a crucial role in giving the perfect veneer finish. Sanding process eliminates all the defects completely and at the same time making the surface clean and suitable for different types of finish application such as oil, wax, or polyurethane. The first step is to decide the sandpaper grit that will be used. The best practice for veneered surfaces is to start with the medium grit of 120 to remove the surface layers and gradually use the finer grits of 180 or 220 to smoothen it out and get the glossy appearance without risking the thin veneer being damaged.
Research suggests that the use of an orbital sander would take less time but still the surface would be flat. Hand sanding, however, might be used for the fragile areas like edges and corners, or for fine details to ensure that the sanding has not gone through the thin veneer layer. Most importantly, it is crucial to sand in the direction of the wood grain to avoid scratches and at the same time reveal the natural beauty of the veneer.
Staining and Finishing Application: Techniques to Ensure Uniformity
The staining and finishing of veneer are among the most crucial yet the hardest to handle process in getting a high-quality, professional finish. The initial step is choosing the correct stain for your project taking into consideration both, the wood type and the desired color. Deep oil-based stains might be a little bit slow due to their heavy penetration and thus giving vibrant tones, water-based stains, however, are quick but at times might even lighten the area where they are applied giving it a more textured feel. A research conducted by the Wood Finishing Institute states that oil-based stains are 40% more efficient than water-based in providing an even color on porous surfaces like veneer.
It is very important to stir the stain very well before applying it so that all the pigments are evenly spread. For applying the stain use a very good quality bristle brush, foam applicator, or lint-free cloth and always do it in the direction of wood grain to prevent streaks. If you prefer a deeper finish then allow the first coat to completely dry and then apply the second layer. Generally, oil-based stains take about 24 hours to dry while water-based ones only need 4-6 hours. Remember to always use a clean cloth to immediately wipe off excess stain for uniformity.
Tools Required for Veneer Finishing
Essential Tools for Sanding and Staining
Sandpaper and Sanding Blocks (Varied Grits)
The importance of sanding with the help of sandpaper of various grits, starting with the least (80-120 grit) and then finishing with fine (220-320 grit), cannot be overemphasized. Sandpaper blocks are employed for uniform pressure and to avoid the chance of surface damage by accidental carving.
Orbital or Detail Sander
A powerful orbital sander is indeed a good alternative when dealing with the huge area or the one with many shapes and features. Meanwhile, the precision areas can be worked on with sanders for edges and corners.
Staining Brushes or Foam Applicators
Staining with excellent-quality natural bristle brushes or foam applicators not only becomes an easy affair but also gets done safely, as brush marks are eliminated. For finer and more detailed areas, foam brushes are the ones to be trusted.
Lint-Free Cloths and Rags
First-class lint-free cloths are indispensable during the entire process of cleaning the extra stain off the surface in order to achieve a smooth, streak-free finish. Microfiber cloths have built a reputation of being very effective in trapping even the most minuscule particles when used in surface prep.
Vacuum Cleaner and Tack Cloths
When it comes to cleanliness of the surface, it is a top priority. A vacuum not only gets rid of the dust created by sanding, but it also captures the dust that cloths miss, providing you with a perfectly clean veneer, ready for finishing.
Gloves and Protective Wear
Using nitrile gloves while disposing of chemicals is a good way of protecting the skin. At the same time, using goggles and masks is protective in the sense that they prevent the inhalation of particles and fumes by creating a barrier.
Choosing the Right Brushes and Applicators
Natural Bristle Brushes
If paint, varnish, and finishes are oil-based, then animal hair-based brushes are the ones to recommend. It is mainly due to their paint retention characteristics and evenness of smoothness that they are so popular. Their ability to pick product up helps to speed up the process; thus, their even distribution on the surface requires fewer strokes.
Synthetic Bristle Brushes
Nylon or polyester-made synthetic brushes are ideal for water-based and latex paints. They are adaptable to the work’s shape and are also very durable. Hence, they ensure even application during long periods. A recent survey states that 75% of professional painters prefer a combination of synthetic and nylon/polyester brushes for versatility and longevity.
Foam Brushes
Foam brushes are low in weight and cost-effective, so they are acceptable for small projects or touch-ups. They hold low-viscosity finishes like staining or polyurethane very well and, with smooth edging, do not leave any bristle marks. Conversely, foam brushes are designed for single-use applications as they cannot withstand multiple uses.
Roller Applicators
Rollers are the most appropriate for large, flat surfaces and come with various nap lengths to be matched with different textures. A short nap roller (¼ or ⅜ inch) works well for smooth walls, whereas longer naps (¾ inch or greater) are ideal for rough surfaces like stucco or brick. Studies have shown that rollers enhance efficiency, allowing quicker coverage, which is particularly important for large-scale work compared to brushes.
Common Mistakes to Avoid in Veneer Finishing
Over-sanding: How to Prevent Damage
One of the errors that often occur during the finishing process of veneer is the so-called over-sanding, which could eventually become a whole array of damages like weakening, roughness, or even completely sanding through the most vulnerable layer of the veneer. Usually, veneer is an extremely light and thin material, often measuring less than 1/40th of an inch thick, consequently, it is imperative to implement a soft and meticulous technique during sanding.
In order not to cross the line on sanding, the first thing you need to do is to select the right sandpaper sufficiency. According to the pros, starting at a fine grit, such as 180 or 220, is the only right way since it will be mild enough not to take off additional material. The usage of very coarse grits, which can easily go through the vulnerable veneer, should generally be avoided.
Providing a sanding block or a flat surface is a very good second step. The reason is that in this manner the pressure is distributed uniformly and there is very little possibility of creating dips or having uneven spots. Power tools for sanding are most often used on veneer surfaces since this allows greater control and accuracy.
Poor Stain Application: Achieving the Same Color
Improperly stain applying not consistently has resulted in blotchy and mediocre finishes, reducing the performance of woodwork projects. The color should be levelled out, hence it is crucial to learn about improper stain application and do it the right way.
One of the mistakes at hands is failing to prepare the surface for staining. In case the wood is unevenly sanded, some parts will take in more stain than others and might look darker than the rest. Always start with thorough sanding of the surface and make the grain open and ready for staining.
Moreover, applying a pre-stain wood conditioner is another key step especially with softwoods like pine, fir, or poplar, which are particularly prone to blotching. Pre-stain conditioners help to equalize the wood’s porosity, which in turn enables an even stain application. Research has shown that among woods without conditioning, the uneven absorption rates can even lead to defects affecting about 60-70% of the final piece’s visual appeal.
Reference Sources
-
Finishing of Wood
This resource discusses various finishing methods for wood, including veneers, and highlights the importance of overlays and treatments for durability.
Read more here -
Effects of Plasma Treatment and Sanding Process on Surface Roughness of Wood Veneers
This study examines how plasma treatment and sanding impact the surface roughness of wood veneers, which is critical for finishing and adhesive bonding.
Read more here -
Surface Quality of the Ficus sp. Wood Veneers Submitted to Finishing Treatments
This research evaluates the effects of sanding and finishing treatments on the surface quality of thin wood veneers, providing insights into optimal preparation methods.
Read more here
Frequently Asked Questions (FAQs)
What are the steps to applying a stain or finish on the wood surface?
Sanding the wood surface all over with progressively finer grits (starting at 100 grits and going up) will produce a very smooth surface. Coarse rag or tack cloth can be used to remove the dust left behind after sanding. In case a stain is applied, the excess stain is wiped off and left to dry, then a finish or sealant is applied. In the case of water-based or solvent-based finishes, apply thin, even coats, sand between coats if advised and work in a well-ventilated area.
What criteria should I use to make a choice between varnish, polyurethane and lacquer sanding with respect to durability?
Pick a product giving the degree of protection and the finish that you desire. Varnish and solvent-based polyurethane are the best in terms of durability and resisting moisture and wear; water-based poly gives less browning and a clearer look than poly. Lacquer is the fastest solvent to dry and can be sanded and buffed to a nice luster and smoothness; however, it might need spray application and also proper ventilation. One has to consider the substrate of wood-back or wood veneer sheets—veneers might need gentler products and fewer coats to avoid warping.
Do you think it is possible to apply shellac as a final coat over stained wood veneer sheets?
Of course, shellac can be used as a finish over a coat of stain on wood veneer sheets, especially, to give a warm and Patina effect while sealing the stain. Shellac dries fast and is compatible with several stains but is also sensitive to heat and solvents. So if you plan to apply polyurethane or varnish directly on shellac, it is best to test for compatibility as solvent-based topcoats can dissolve shellac unless the shellac is fully cured or sealed with a compatible barrier coat.
When to select wax finishes and how to apply wax?
Wax finishes are perfect for low-wear surfaces; areas where one wants to increase the wood’s light and softness and create a soft patina at the same time. Use a clean rag to work a thin layer in, allow it to dry and then buff to the desired sheen; steel wool can also be used to help bring the wax into the surface before buffing. Wax is not considered a durable finish for any type of tabletop or floor and is therefore best used over already cured finish or on decorative pieces.