
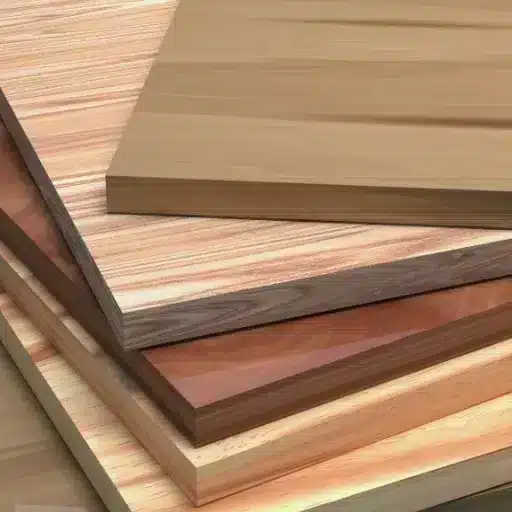
Wood Edge Banding: Getting Clean, Durable Edges on Modern Panels
If you work with panels long enough, you eventually get into an argument about edges. Wood edge banding is where those arguments show up in real life: it’s the thin, often overlooked strip that decides whether a kitchen run looks custom or cheap, whether a hotel headboard survives housekeeping, and whether your plywood build actually feels like solid wood when someone runs a hand along the front.
What Is Wood Edge Banding, Really For?
Wood edge banding exists to trick the eye and protect the board at the same time. It turns an exposed plywood, MDF, or particleboard edge into something that reads as intentional – visually “solid,” tactilely warmer, and less prone to chipping or soaking up moisture the first time a cleaner hits it a bit too hard. When you run your finger along a cabinet front and it feels like one continuous piece of wood instead of a sandwich of layers, that’s the edge banding doing its job.
How it differs from PVC and ABS edges
PVC and ABS edges are plastic armor; wood edge banding is a skin that wants to blend in. Plastics are incredibly forgiving on high‑volume lines, with wide processing windows and consistent behavior across batches, but you never fully escape the “wrapped panel” look when light hits those edges at a shallow angle. With real wood, the grain, pores, and micro‑color shifts line up with the face veneer, so a run of 47 doors can read like they came out of the same plank when it’s specced and applied properly.
On the glue line, plastics tend to accept slightly more aggressive trimming, and they hide minor machining sins better. Wood is less tolerant: take one pass too many with a hand trimmer and you’ve rounded that edge just enough that a designer will notice the shadow line change. But wood also finishes with the same system as your face – stain, clear, oil, 2K – so you don’t get that jarring mismatch between a rich walnut face and a flat, uniform plastic edge that looks “almost” right but not quite.
Thermally and mechanically, PVC/ABS shine in hard‑knock environments: schools, budget office furniture, rental units. Wood edge banding is more about perceived value and repairability. You can sand and touch in a dinged wood edge with a bit of tinted putty and a quick spray; try that on a bright white PVC and it rarely disappears cleanly. So when the brief says “cost‑driven, heavy abuse,” plastics usually win. When it says “warm, natural, upmarket,” you know which way the spec should lean.
Where wood edge banding still wins in 2026 (and where it doesn’t)
In 2026, wood edge banding still owns the higher‑end residential and hospitality space where the client is paying for the feeling of real timber, even if the core is engineered. A hotel corridor with rift white oak doors and perfectly matched edges still signals “premium” in a way a wrapped plastic edge just can’t fake, especially under warm LED grazing light. Same story in custom kitchens, boutique retail fixtures, and any project where the architect has written “natural wood veneer” three times in the spec and expects the edges to follow suit.
It also wins whenever you need flexibility on finish. Change the stain system mid‑project because the client suddenly wants a cooler tone? With wood edge banding, you can usually retune color across face and edge together; with PVC, you’re locked into whatever color chip you ordered three months earlier. For small and mid‑size shops, being able to hold a modest stock of neutral species like maple or birch and push them into different color directions is a quiet but real advantage.
Where doesn’t it win? High‑volume, price‑squeezed carcass work, institutional furniture, and any environment where impact, cleaning chemicals, and zero‑maintenance requirements dominate the conversation. If you’re running a big edgebander hard all week on melamine carcasses for student housing, the throughput and durability of PVC or ABS will usually beat the handling time and sensitivity of wood. That said, the moment someone asks, “Can we make this feel less like office furniture and more like a real piece of joinery?”, wood edge banding is back on the table.
5 Key Types of Wood Edge Banding You Should Actually Care About
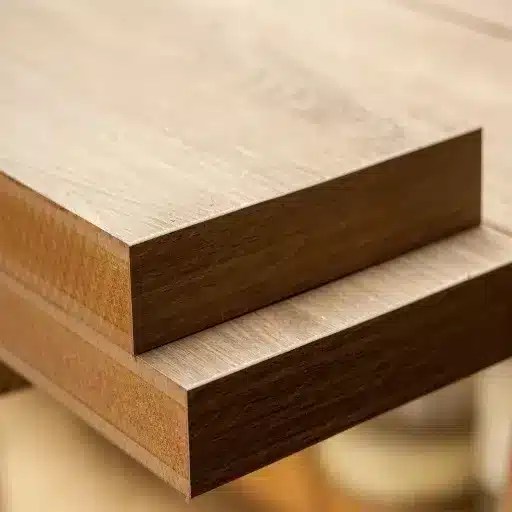
Most of the noise around edge materials doesn’t matter; a few workhorse types cover 90% of real projects if you spec them properly. The trick is knowing where each one shines so your panels don’t fight you at the press, the trimmer, or on site.
Veneer edge banding rolls (pre‑glued vs non‑glued)
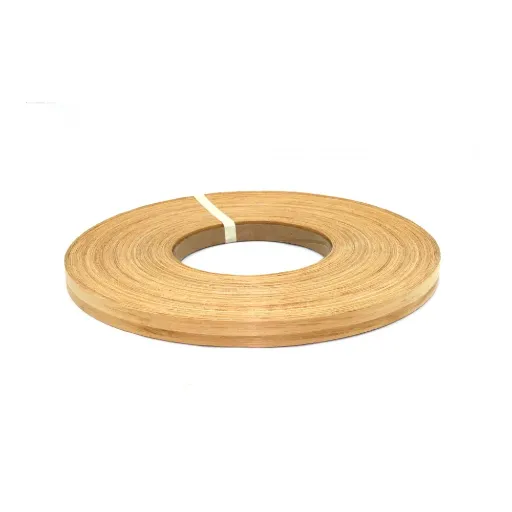
Veneer rolls are the everyday backbone of wood edge banding on carcasses, shelves, and “good but not boutique” fronts. Thin real wood, usually around 0.5 mm, on a paper or fleece backing lets you wrap kilometers of edges with a relatively forgiving material that still reads as wood once it’s finished. On a run of 137 cabinet sides, this is what you want feeding through the machine without drama.
Pre‑glued rolls are built for speed and simplicity. Heat the edge with a small edge bander or even an iron, press, trim, done. They’re ideal for small shops or on‑site touch‑ups where you don’t want to drag in a full glue system, and they save a surprising amount of setup time over a week of short runs. The trade‑off is control: you’re stuck with the factory glue line and melt profile, which can be a bit “thick” if you’re picky about that seam.
Non‑glued veneer rolls push the glue decision back to your process, which is exactly what bigger shops want. You choose EVA, PUR, or another adhesive system, dial in spread rate and temperature, and keep the line behavior consistent with your PVC/ABS settings. It’s one more variable to manage, but if you care about glue line visibility and long‑term bond, this is where you take the reins.
Solid wood edge strips for premium fronts
Solid wood strips are what you spec when someone is paying real money for the front view. They’re thicker – 2 mm, 3 mm, sometimes up to a full lipping – and that extra material lets you ease edges, put a micro‑chamfer or radius on them, and still have “meat” left after sanding. On a walnut sideboard where the designer wants a crisp 1 mm break and zero hint of a core, veneer just can’t match what a solid strip will do.
Glued properly, a solid strip lets the edge behave like real wood under dents and repairs. You can steam small marks, sand deeper, and refinish without burning straight through to MDF in one pass. That said, they demand better machining: your substrate edge needs to be straight and square, your clamps or presses need even pressure, and your trimming operations can’t be sloppy or you’ll telegraph every inconsistency.
Where these really earn their keep is on visible tables, thick doors, and any place where the human hand lands first. Run your fingers along a 22 mm panel with a 3 mm solid edge, and you get that weighty, furniture‑grade feel that makes the whole piece feel more expensive than the material cost difference suggests.
Prefinished vs unfinished: when time beats flexibility
Prefinished wood edge banding exists for one reason: to keep your finishing bottleneck from killing lead times. The banding arrives with a UV‑cured or similar coating already applied, gloss level set, often matched to a face program from the same supplier. You run it, trim it, maybe kiss the edge with a Scotch‑Brite, and ship. On a contract job where 420 shelves all need the same natural oak look, that time saving is not theoretical; it’s the difference between a one‑week and a two‑week schedule.
The downside is obvious if you’ve lived through a spec change. Once the banding is on, you’re locked. Any on‑site adjustment, color tweak, or sheen change is painful, because the edge and face are no longer finishing together. You also need your machining spot‑on, since you can’t sand aggressively without burning through that factory finish.
Unfinished edge banding is the opposite trade. You accept the extra steps – sanding, staining, sealing, topcoating – in exchange for full control. You can tune color, correct minor mismatches between batches, and adjust sheen late in the process when the client inevitably says, “Can we go just a bit warmer?” For many custom shops, that flexibility is worth far more than the time saved by prefinished stock, especially when the job has even a hint of design uncertainty built in.
Matching Edge Banding to Your Panels (Without Guesswork)
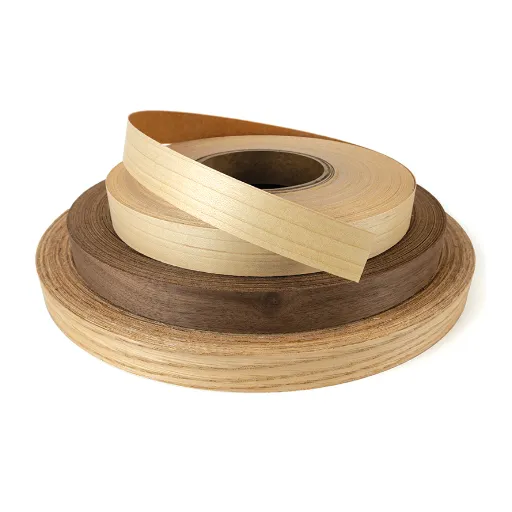
The edge isn’t neutral – the core you choose quietly dictates which wood edge banding will behave and which will fight you. Get that match wrong and you’re chasing glue lines, chip‑out, and weird shadow lines that no amount of finish really hides.
Plywood, MDF, particleboard: what changes at the edge
Plywood gives you the friendliest structure but the least forgiving cosmetics when it’s exposed. Structurally, it takes staples, screws, and clamping pressure well, and it holds a solid wood strip without the “mush” you feel on MDF. Visually though, if you’re using a thin veneer band and the core is a mixed hardwood plywood, any small misalignment will show as a faint step or a change in reflection along the edge; on a run of 53 cabinet ends you’d notice the one that’s off.
MDF behaves like a dense sponge in comparison. It machines cleanly with sharp tooling, so thin veneer edge banding sits on a smooth, uniform surface, and you rarely get voids or unpredictable hard spots telegraphing through. But MDF edges are thirsty, so your glue spread and open time matter more; starve the bond and that band will peel at the most inconvenient corner in a high‑use kitchen.
Particleboard is the fussiest of the three. It’s cheap and stable enough, which is why it’s everywhere in casework, but the edge is full of chips and voids that love to crush under pressure. With veneer banding, you often need a light pre‑seal or at least a clean, calibrated cut or you’ll see micro‑dips under the glue line. That’s also why a lot of shops bump up to a slightly thicker band or even a solid lipping on exposed particleboard fronts – it gives you a bit more material to bridge those inconsistencies.
So the rule of thumb is simple: clean, consistent substrate edges if you want thin veneer to disappear; more robust, thicker banding when the core is rough, open, or destined for abuse.
Species, grain direction, and color variation in real projects
Matching species is the obvious part; matching how that species behaves in the real world is where people slip. A plain‑sliced oak panel with strong cathedral grain wants an edge band that doesn’t suddenly go all straight‑grain “rifty” right at eye level on a door run. You can get away with more variation on a vertical grain design, but on a bank of fitted wardrobes the mismatch between face and edge grain stands out in the first 30 seconds of the client walk‑through.
Grain direction matters physically too. Run long grain edge banding along the length of shelves and tall doors where you expect impacts and hand contact; save cross‑grain effects for intentional design moves, not accidental offcuts. That way, when someone drags a chair or a vacuum nozzle across the edge, the fibers have a fighting chance instead of chipping out in little chunks.
Color is its own game. Even within a single species, a bundle can swing warmer or cooler, or a couple of shade steps lighter, depending on the log and the veneer run. On large jobs, smart shops will pull edge banding and face veneer from the same production batch and do a quick dry‑fit comparison under the actual site lighting before committing. In a hotel corridor with 41 doors, that small check keeps you from alternating “slightly too red” and “slightly too grey” edges down the entire hallway.
The practical takeaway: when you spec wood edge banding, you’re not just picking “oak” or “walnut.” You’re aligning substrate behavior, grain pattern, and batch color so the edge stops being a liability and starts reading as part of one coherent surface.
Installation: From “Good Enough” to Shop‑Grade Results
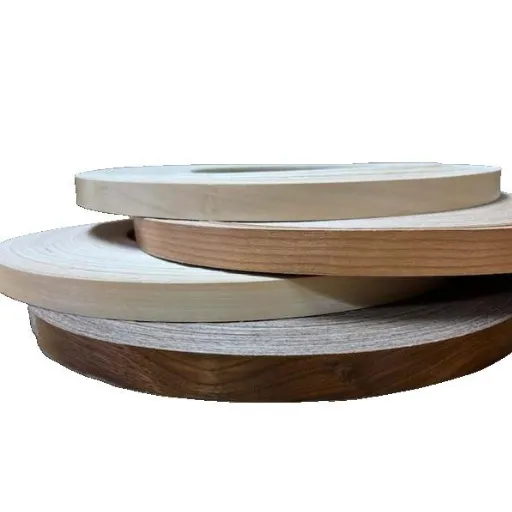
Clean edges don’t come from magic materials; they come from a process that doesn’t cut corners in the boring steps. Wood edge banding is unforgiving enough that any laziness in heat, pressure, or trimming shows up right at eye level, usually on the most visible door in the room.
Iron‑on, hand tools, or full edge banding machine?
Iron‑on is the gateway drug. It’s fine for one‑offs, maintenance work, or a small shop doing the occasional shelf run. A domestic iron, a pre‑glued veneer band, a hardwood block as a roller – that’s your basic kit. You can absolutely get decent results, but you’re juggling three variables by hand: keeping the iron moving, keeping the glue hot enough, and pressing before it skins. Miss one and you get bubbles or weak spots that peel when someone hooks the edge with a fingernail.
Hand‑tool workflows sit in the middle. Maybe you’re applying non‑glued banding with a small glue pot or a compact benchtop edgebander, then doing all trimming with hand‑held trimmers and block planes. This is where a lot of 5–8 person shops live. You gain more control over the glue and the feed, but you still rely heavily on the operator’s feel. A good tech can keep a stack of parts moving with surprisingly tight quality; a distracted one can give you 27 panels that all need rework on the front edges.
A full‑size edge banding machine is about consistency and throughput, not just speed. You feed parts in, and the machine handles pre‑milling, glue application, banding, trimming, scraping, and buffing in a controlled, repeatable sequence. When it’s dialed in, your only real variables are board quality and operator discipline. That said, it’s not a magic box: if you skip calibration or run dull tooling, it will happily produce a whole shift’s worth of mediocre edges faster than you can fix them.
Glue choice, temperature, and pressure that actually hold
Glue is where “it should be fine” turns into call‑backs six months later. EVA hotmelt is the standard for a lot of wood edge banding work; it’s forgiving, easy to run, and cheap to keep in inventory. For normal kitchen and office furniture use, a well‑applied EVA line holds up better than the hardware ever will. PUR hotmelt steps in for tougher environments – higher heat resistance, better moisture performance, and a stronger bond that’s much harder to re‑activate once cured.
Temperature is where people get lazy. If the glue pot isn’t truly at its working range, you either smear half‑molten glue that never wets the wood properly, or you scorch it and lose open time. Both failures look the same later: random peeling at corners, especially on the handle side of doors. You want a steady, verified temperature, not a guess based on the old dial sticker that’s half worn off.
Pressure closes the deal. On a machine, that means pressure rollers set correctly for panel thickness and banding type, not cranked to the max “just to be safe.” Too little and you get a visible line; too much and you can crush particleboard edges or distort thin panels. By hand, it’s the difference between a quick pass with a random block and a deliberate burn‑in along the full edge, from one end to the other, while the glue is still genuinely hot.
Trimming and sanding so you don’t round everything over
Most “this looks cheap” complaints trace back to trimming and sanding, not the banding itself. When you over‑trim, you either undercut the veneer and expose the core, or you create a small flat on the edge that catches light differently. Hand trimmers work, but you have to keep the blades sharp, take light passes, and keep the tool flat; rocking it even slightly rounds the edge just enough that you’ll see a soft line instead of a crisp junction.
On machines, trimming stations need to be tuned to your band thickness and panel material. Aggressive top and bottom cutters might save you a second per part, but they also increase the risk of chatter and micro‑tearout, especially on cross‑grain ends. If you ever see little white flecks or torn fibers against a dark veneer, that’s your sign to slow the cut and sharpen or swap tooling.
Sanding is where many good edges die. The goal is to break the arris, not to “blend” the band into the face. A couple of hand strokes with a fine block at 45 degrees is usually enough. Sit in one spot with a random orbital for three seconds too long and you’ve rolled the edge; the panel suddenly feels soft, and the banding line creeps up onto the face. On a run of 61 doors, that tiny roll‑over turns into a very visible difference between the first batch and the last, and clients really do notice when they walk a corridor.
When to Specify Wood Edge Banding in Your Drawings and Quotes
You only get the edge you want if you draw it and price it like it matters. If wood edge banding lives in the “assumed” bucket, it will get value‑engineered, mis‑matched, or quietly swapped for something cheaper somewhere between the RFQ and installation.
Calling out thickness, species, and grain on shop drawings
On drawings, “edge band” as a generic note is almost useless. Call out the thickness, species, and grain intent right where the part is detailed: “3 mm solid oak edge banding, long grain, to all exposed fronts” tells your shop or outsource partner what you actually expect in both look and durability. If you want veneer, say so; if you want a solid lipping, spell out the dimension and which edges get it versus which can stay thin.
Grain direction is worth a line of its own. A simple arrow and note—“edge band grain to follow door height”—prevents someone from wrapping cross‑grain around tall doors because it was faster or used up offcuts. On a bank of wardrobes or a 14‑meter reception run, mismatched edge grain shows up immediately when the light grazes the fronts.
It also helps to distinguish visible vs non‑visible edges. Use a key: “EB‑A: visible fronts, species‑matched; EB‑B: carcass edges, same or compatible species, thinner band acceptable.” That lets estimators price correctly and production knows where they can run fast veneer roll vs where they need to slow down and fit heavier material. You’re essentially telling everyone, “These 6 mm of edge are part of the design, not just protection.”
Talking to suppliers: questions that prevent expensive surprises
Conversations with suppliers should be as specific as your drawings. Instead of “We need wood edge banding for walnut panels,” ask, “Can you match this rift walnut veneer program, long grain on 22 mm fronts, with a 2 mm band? What’s the shade tolerance from batch to batch?” That’s how you find out whether they’re pulling banding from the same veneer stock or just sending “close enough” from generic inventory.
Ask about glue and processing assumptions too. Do they expect you to run EVA or PUR, at what temperature window, and have they had issues with your core type on wider bands? If they’re honest, they’ll tell you whether their standard product behaves differently on MDF vs particleboard, or if you should step up to a thicker band on high‑impact edges. Those small details are the difference between a smooth run and 37 doors coming back with chipped corners.
Lead time and continuity are another quiet trap. It’s worth asking, “Can you guarantee this exact species/grade/band spec for the full project, including possible extras six months later?” If the supplier hesitates, you know you either need to lock in more material up front or accept that the last two replacement doors might not match the first 120 perfectly. Better to price that risk and talk about it now than explain it on site with the client staring at two slightly off‑color edges.
Get those answers early, put them into your notes and quotes, and wood edge banding stops being a vague line item and starts behaving like a controlled part of the system.
Frequently Asked Questions (FAQ)
-
Is wood edge banding durable enough for a busy family kitchen?
Yes, if it’s applied and finished properly. Use a good EVA or PUR hotmelt, band all exposed fronts (doors, drawer fronts, end panels), and seal the edge with the same lacquer or 2K finish as the face. In a typical family kitchen where kids slam drawers and wipe with multipurpose cleaner, correctly bonded 2 mm wood edge banding holds up for years without peeling or chipping. -
Should I use wood edge banding or PVC on melamine wardrobe carcasses?
For standard white melamine carcasses that are mostly hidden, PVC usually makes more sense: it’s fast to run, forgiving on particleboard edges, and cheap. If the wardrobe sides are exposed in a walk‑in and you’re using oak or walnut doors, then matching wood edge banding on visible carcass edges helps the whole installation feel coherent, especially around open shelving and end panels. -
What width wood edge banding do I need for 18 mm (3/4″) plywood shelves?
Typically you spec banding slightly wider than the panel, so for 18 mm shelves a 22 mm veneer or solid strip works well. That gives you a bit of overhang to trim cleanly without risking a flush‑cut that dips into the plywood. On long bookcase shelves, this small oversize margin also helps you hide minor saw tolerances from the cutting list. -
Can I apply wood edge banding with just a household iron and still get good results?
You can, within reason. Use pre‑glued veneer banding, set the iron just below cotton, and keep it moving so you don’t scorch the wood. Press immediately with a hardwood block or J‑roller while the glue is still glossy. It’s fine for a small home office desk or a couple of shelves, but for 40 kitchen doors you’ll want at least a small edge banding machine for consistency. -
How do I match wood edge banding to an existing oak kitchen door color?
Start by identifying whether the doors are plain‑sliced or rift/quarter oak, then take a physical sample to your supplier or compare directly under the same lighting. Order a small length or a couple of 5‑meter rolls in the closest match and do a test on one door edge before committing. In many cases you can tune the final tone with your stain system so the banding and face land within the same “family” on site.
References
-
PRI Edgebanding. (2023). The Ultimate Guide to Edge Banding. https://priedgebanding.com/the-ultimate-guide-to-edge-banding/
-
Plastivar. (2022). Edge Bonding Handbook. https://plastivar.com/wp-content/uploads/2022/04/edge_bonding_manual.pdf