
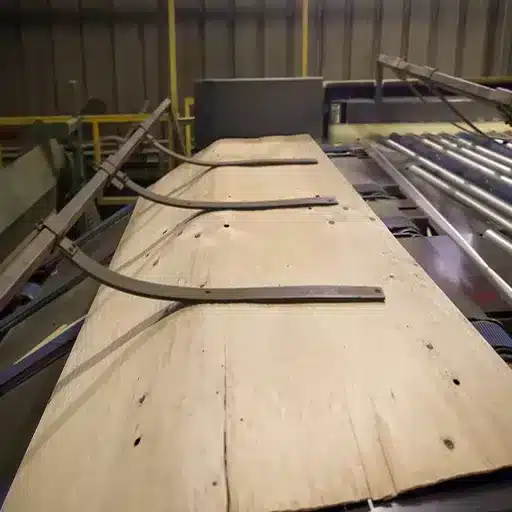
Wood Veneer Manufacturing: From Log Yard to Finished Sheet
Most people only think about veneer when they see a finished door or cabinet face, not the log yard, blades, and dryers behind it. Wood Veneer manufacturing is where those quiet decisions about species, cutting method, and moisture control decide whether a project looks premium or patchy. And once you’ve seen a batch go wrong, you stop treating veneer as a simple surface and start treating it like a process you need to understand.
Why Wood Veneer Manufacturing Still Matters in 2026
Wood products are getting more expensive to make, but clients still expect flawless surfaces and tight budgets. That’s exactly where Wood Veneer manufacturing keeps earning its place on the production line. When you’re trying to push 3,400 identical hotel room doors through a plant schedule, solid lumber isn’t just costly, it’s unpredictable in grain, movement, and yield from one batch of boards to the next. Veneer lets you spread high‑value species over stable cores, dial in thickness to tenths of a millimeter, and get a level of visual consistency you’d struggle to maintain with solid stock at scale.
Solid wood vs veneer: when manufacturing efficiency wins
Solid wood makes sense when the part has to carry structural load or take heavy machining, but it’s a blunt tool if all you need is a high‑end face. With veneer, the same log that might yield a limited run of solid panels can turn into thousands of square feet of matched faces, book‑matched and sequenced so a lobby wall reads as one continuous surface instead of a patchwork. You’re also not fighting the same warping and cupping issues that show up when solid boards move across seasons on wide components. That said, veneer isn’t “cheap wood”; it’s a way to convert scarce, high‑grade logs into repeatable, manufacturable surfaces that behave predictably on presses, CNC lines, and finishing systems.
Where veneer actually shows up: furniture, doors, panels, interiors
If you walk through a modern office fit‑out, you’re looking at veneer more often than not. Door skins, conference tables, wall cladding, cabinet fronts, even elevator interiors are built on some form of veneered panel rather than solid boards. In furniture factories, veneer allows you to run large, flat components through automated lines without constantly sorting around knots, wild grain, or density swings that cause tool chatter and finishing headaches. And in architectural interiors, designers can push bolder veneer layups—rifts, quarters, engineered patterns—knowing a good manufacturing setup can repeat that look from the sample board all the way to the final container, not just for one project, but for the next roll‑out down the line.
Step‑by‑Step: How Wood Veneer Is Manufactured
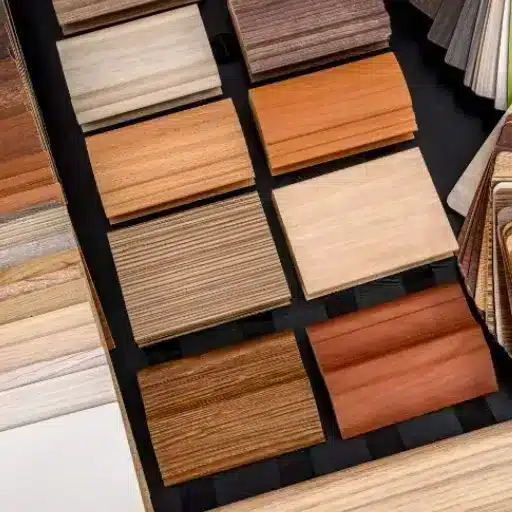
Wood Veneer manufacturing looks clean and simple when you’re staring at a finished sheet on a sample board; on the factory floor it’s a long chain of small decisions that either protect yield or quietly destroy it. You don’t see the 3–5% that disappears in the dryer, or the extra operators cutting out checks and overlaps at the repair stations, but they’re there on every shift. So it’s worth walking the process step by step, the way you actually see it in a plant.
1. Log selection, conditioning, and debarking
Everything starts in the log yard, usually with logs already sorted by species, diameter class, and intended product. For veneer, you’re chasing straight, knot‑free sections with good form and minimal sweep, because every bend in that log wants to show up later as uneven thickness or wavy sheets. In practice, that means a buyer will prioritize veneer‑grade peeler blocks or saw logs and send the lower grades to other product lines.
Conditioning is where a lot of folks underestimate the impact. Logs are brought up to a target core temperature in hot water vats or steam chambers so the fibers cut cleanly instead of tearing; you’ll often see setpoints in the 50–70 °C range and soak times that run several hours depending on diameter and species. If the center is too cold, the first 80–120 mm of veneer off the core can be a mess of splits and rough grain, and you’re just watching money fall into the waste system. Debarking after conditioning is mostly about protecting the knife and ensuring consistent contact against the pressure bar or nosebar—any residual bark or grit becomes a knife‑dulling abrasive.
There’s also a workflow detail people sometimes miss: keeping conditioning batches grouped by species and end use, so you’re not constantly retuning the line and chasing temperature lag between a dense hardwood and a lighter softwood on the same shift. That’s where you see operators quietly fighting quality problems that are actually scheduling problems.
2. Slicing vs rotary peeling – choosing the cut
The cut is where the visual story gets written. Slicing is what you do when the architect expects a certain face—quarter‑sawn white oak, for example, with those long straight grain lines that have to repeat across 60 office doors. The flitch is clamped and passed over a stationary knife, and you get sheets with strong, repeatable grain and figure, but you pay for it in yield and throughput. Rotary peeling, by contrast, is the workhorse: the log spins against the knife, and you unwind it like a roll of paper, which is fantastic for volume, core veneers, and many standard faces.
So the decision isn’t just aesthetic, it’s economic. If a customer is chasing a premium appearance and is willing to accept a higher cost per square meter, slicing earns its keep. If the order is 9,600 m² of core veneer for panels that will never be seen, rotary peeling wins on cost, speed, and yield. Yet even in rotary, there are choices: stay‑log vs spindleless lathes, different pressure bar settings, variable pitch peeling schedules. A small tweak in nosebar pressure or knife angle can be the difference between a clean ribbon of veneer and a run with persistent lathe checks that your finishing team will be cursing later.
Engineered veneer quietly sits between these two worlds. You’re taking fast‑growing species, slicing or peeling, then dyeing and reconstituting to mimic rarer woods; it’s a different type of optimization problem, one where consistency and sustainable sourcing matter more than showcasing the natural variability of a single log.
3. Drying, flattening, and stress management
Fresh‑cut veneer is useless until you get the moisture down and the stresses under control. Continuous dryers or multi‑deck dryers take those wet sheets and push them toward a target moisture content—often in the 6–12% range depending on species and end product—and if you overshoot or unevenly heat, you’ll see waves, checks, or brittleness show up. Think of the dryer as both a moisture tool and a stress‑setting tool; you’re not just drying wood, you’re deciding how it wants to move for the rest of its life.
Out of the dryer, the reality is never as neat as the spec sheet. You’ll see curl, twist, and edge splits on a portion of the run. Flattening presses, re‑humidification, and careful stacking routines are the unglamorous steps that convert “technically dry” veneer into material that can actually be laid up on a press without telegraphing defects. Some plants will let veneer sit in conditioning rooms for 24–36 hours to equalize before layup on more critical jobs, especially where tight flatness is needed for high‑gloss finishes.
Stress management also means watching the dryer recipe against actual species behavior. A schedule that works fine for beech can be too aggressive for something like walnut, which might start checking at the ends and edges if you run the same temperature and line speed. It’s the kind of nuance you only get when an operator knows, from experience, that this batch “looks a bit off” and dials back conveyor speed by a small but important margin.
4. Repair, jointing, and assembling veneer faces
Once the veneer is dry and reasonably flat, the process shifts from bulk handling to craftsmanship at scale. Individual sheets are clipped to remove edge defects and squared to the required width, usually on guillotine or rotary clippers. Then jointing comes in: edges are trimmed and glued, often on high‑speed veneer splicers, to build wider faces out of narrower strips. You’re joining the grain so it reads as intentional, not like a patchwork quilt.
Repair is where the plant decides how visible its standards are. Knots, splits, and small holes can be patched with veneer plugs, putty, or backer repairs, and the level of effort depends heavily on the grade being targeted. On premium architectural work, operators will spend significant time cutting out localized defects and inserting matched patches so the final face looks clean even under raking light. For utility grades, the approach is more pragmatic: stabilize what will cause structural or pressing problems and move on.
Assembling faces is the last big creative step. Veneer leaves are laid out in specific matching patterns—book match, slip match, random match—depending on the design intent and the constraints of the job. A 5‑panel door run for a boutique hotel might get carefully sequenced faces so the grain flows logically across adjacent doors and panels; a mass‑market cabinet line might prioritize efficient nest layouts over visual storytelling. Still, the best plants know that every decision here, from where you start the sequence to how you mark and stack the sets, shows up months later when someone walks a site visit and either feels the surfaces line up or senses, immediately, that something is off.
Sliced, Rotary, and Engineered Veneer: What’s the Real Difference?

Most of the arguments about Wood Veneer manufacturing come down to this simple question: what are you optimizing for—face quality, yield, or repeatability? Once you’re clear on that, the choice between sliced, rotary, and engineered veneer gets a lot less mysterious. You can almost stand on the mill floor, look at the order spec, and know which bucket it falls into before the log ever touches a knife.
Appearance and grain consistency (for architects and designers)
Sliced veneer is what designers usually have in their heads when they say, “I want that clean, quartered oak look across the whole lobby.” The log is broken down into flitches and pushed against a stationary knife, so you’re effectively taking thin “boards” off the cant; the grain reads like sawn lumber, with predictable figure, cathedral patterns if you want them, and strong directional flow. On a 42‑door corridor, that means you can sequence match so the grain climbs or falls in a controlled way, instead of wandering unpredictably from one leaf to the next.
Rotary‑cut veneer is more about coverage and structure than about perfectly composed faces. Because you’re peeling the log like a roll of paper, the grain swings around the growth rings, which can create bold, sometimes wild patterns on decorative faces, but more often ends up buried in cores, crossbands, and backers. It’s fantastic when the architect never sees it but relies on the panel behaving properly under laminate or paint. Yet there are rotary faces that become a design feature—think of those wide, flowing cathedral patterns you get when you hit the right section of a log; they’re less controllable, more opportunistic.
Engineered veneer takes a different route: consistency over romance. You start with fast‑growing, usually plainer species, slice or peel them, dye the leaves, and then reconstitute them into blocks that are re‑sliced to mimic something else—walnut, ebony, zebrano, whatever the spec demands. The upside is that a designer can lock in “this exact look” and repeat it across 18 floors of casework and a future rollout, without worrying about the quirks of natural log variation or long‑term availability of a particular exotic. You lose some of the one‑off magic of a special log, but you gain predictability and ethical sourcing that will actually stand up to scrutiny.
Yield, speed, and cost (for plant managers and buyers)
On the production side, the trade‑offs are much more ruthless. Sliced veneer is slower and throws away more wood per square meter of usable face. You’re working with flitches, you’re chasing around defects, and you’re limited by how you can position that knife relative to the grain. So it tends to live in higher‑margin applications: architectural panels, premium furniture faces, doors for projects where the veneer spec really matters and the job can carry the cost. A typical sliced run might send noticeably more volume into trim and waste compared to rotary, but the sell price per square meter covers it if the sales team has done their job.
Rotary peeling is the volume engine. Once the log is set, the line can run at high speed, and yield percentages on usable veneer are usually much higher because you’re not constantly squaring and reorienting the piece. For core veneers, underlayment, commodity faces, and anything where “good enough and flat” beats “visually perfect,” rotary wins day after day. That said, rotary isn’t free; pushing line speed too hard or running dull knives will buy you internal checks and surface defects that migrate downstream into press problems and finishing complaints, and the savings you thought you had get eaten in rework.
Engineered veneer sits somewhere in the middle economically but plays a different game. You get strong raw yield on the base species—you can use plantation material, smaller diameters, more uniform stock—but you add processing steps: dyeing, laminating, and re‑slicing the reconstituted blocks. The cost story becomes less about raw log yield and more about line uptime, batch size, and how efficiently you can run a given “design” before changing colors and layups. For a buyer, the appeal is often total cost of ownership rather than pure square‑meter price: consistent yield in the panel plant, fewer rejected batches, easier touch‑ups on site because the pattern is stable and repeatable.
So when a spec just says “veneered panel” without naming sliced, rotary, or engineered, it’s an incomplete instruction. The right choice depends on who cares more: the architect staring at grain under downlights, or the production manager watching how many good faces make it off the press per hour.
Inside the Factory: Defects, Quality Control, and Yield
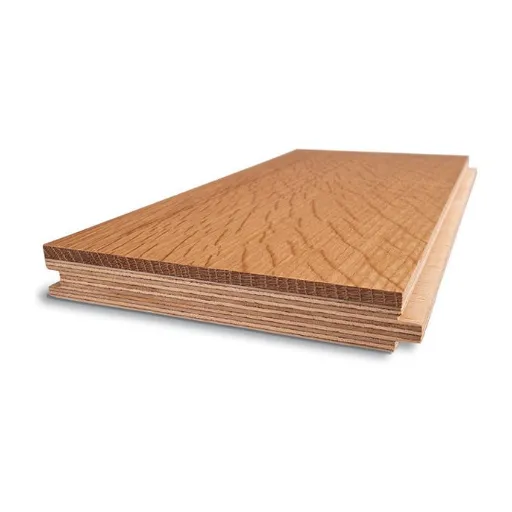
Most of the money in Wood Veneer manufacturing is won or lost after the knife. The log can be perfect, the slicing or peeling can look fine, and yet you still end up with panels that buyers push back on because of subtle defects, inconsistent grading, or yield that slips a few percentage points below what the spreadsheet assumed. That gap—between “technically okay” veneer and consistently profitable veneer—is what really defines a disciplined plant.
The defects that quietly destroy margins (splits, checks, overlaps)
The defects that hurt the most aren’t always the spectacular failures. They’re the hairline splits you only see under raking light, the fine checks from over‑drying, and the overlaps buried in a core that show up as telegraphing under a light-colored finish. Surface issues like cracks, overlaps, and veneer splits are well‑known pain points because they tank finishing quality and bump up rejection rates at the customer’s line.
Core problems are even more expensive because they’re hidden until something goes wrong. Overlaps in the core layer, voids, and crushed areas from mishandling or poor drying can all turn into local weak spots or visible ridges once the panel is pressed and sanded. You might get through your own QC with a panel that “looks fine,” only to have a buyer cutting it into narrow parts and suddenly seeing gaps or misalignment on every fifth piece. That’s when complaints escalate fast.
What makes these defects dangerous is how they compound. A bit too much moisture, a slightly aggressive dryer schedule, a press that’s running a touch hot, plus a shift that’s understaffed at repair—taken alone, each factor looks small. Put together over 19 or 21 loads in a week and you’ve just built a trend of panels that run “on the edge” of acceptable.
Grading systems, scanning tech, and human inspection
Quality control in veneer and plywood is a layered system: visual grading rules, automation, and people who actually know what they’re looking at. Standards like HPVA/ANSI HP‑1 or similar grading frameworks tell you what’s allowed on a face—how many patches, what kind of grain and color variation, what counts as an A grade versus B or lower. They give you the language to argue less and specify better.
But rules on paper don’t catch defects by themselves. Plants that invest in modern scanning and optimization systems—green‑end scanners, dry‑end veneer scanners, and clip optimization software—are essentially teaching machines to spot defects and suggest the best clip pattern for recovery and grade value. A good scanner setup can sort veneer by grade on the fly and push the right sheets toward faces, cores, or reject streams without relying solely on one operator’s judgment.
Still, none of that replaces trained eyes. Automated systems are great at consistent pattern recognition, but there are always borderline cases where human graders step in—things like subtle color shifts that will look worse under clear lacquer, or a recurring defect pattern that hints at a dryer, press, or knife problem upstream. Plants that run tight ship QC usually have inspectors at several points: after drying, after repair, sometimes again after layup and pressing, with the authority to stop a batch before it becomes a whole truckload of claims.
How top veneer plants think about yield, trim loss, and reworks
If you sit with a good production manager, they rarely talk about “waste” in vague terms. They talk about green veneer recovery, dry veneer recovery, trim loss, and rework rates as distinct buckets. Technical studies on veneer and plywood manufacturing often show dry veneer recovery in the 70–80% range of green veneer volume once you account for shrinkage, clipping, and panel trimming. On top of that, dry-end trim, sanding, and other finishing steps can add roughly another 9–10% loss before you have saleable panels. Those aren’t theoretical numbers; they shape real cost per square meter.
Top plants obsess over where each percent goes. Clip optimization is a big one—how you decide to cut sheets to both hit your face sizes and drop defects into scrap instead of into the middle of a panel. Modern systems let you tune the clipping strategy to prioritize either grade or volume, and the smartest operations adjust these settings by product mix or even by customer. Trim policy at the panel saw is another lever; 5 mm extra on every edge, multiplied over thousands of panels per week, is no joke.
Reworks are the silent killer. A sheet that has to be re‑repaired, re‑sanded, or even recut into smaller components might still “ship,” but it carries extra labor, extra handling damage risk, and often a lower final grade. Plants that track rework by cause—dryer issues, press parameters, handling damage—can feed that data back into process changes, not just yell at inspectors. You’ll often see their internal dashboards showing yield by log class, by veneer line, by shift, and by product, because they know a 2–3% swing in yield over a quarter can make the difference between a profitable contract and a marginal one.
So when someone says “we’re tightening QC” in veneer, the sophisticated version of that statement isn’t just more inspectors or a tougher checklist. It’s a closed loop: defect detection, root‑cause analysis upstream, and hard numbers on yield and trim to show whether the fix actually made money, not just prettier reports.
Moisture, Pressing, and Glue Lines: Getting the “Invisible” Parts Right
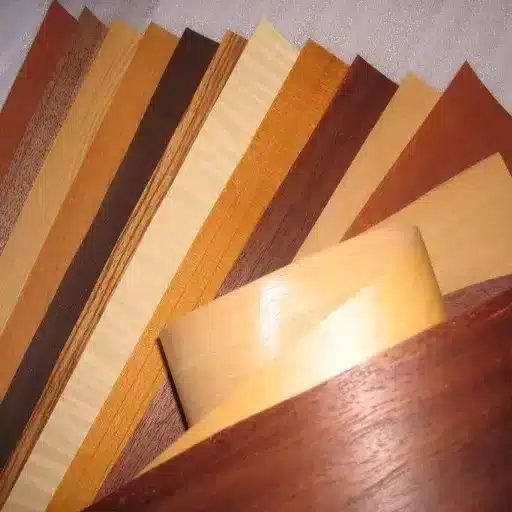
The part of Wood Veneer manufacturing that causes the most job‑site pain is the part nobody can see: moisture balance and glue lines. Panels can leave the factory looking perfect and still come back six months later with slight telegraphing, hairline ridges, or edge curling that wasn’t obvious on day one. So if you care about warranty claims and long‑term relationships, this is where you pay attention.
Moisture targets and drying schedules that actually work
Good veneer plants treat moisture content as a process variable, not a rough guess. For interior decorative work, they’ll typically target veneer moisture in a band around the equilibrium for the destination climate—often somewhere in the mid‑single to low‑double digits by percentage, depending on species and region—so the panel doesn’t start moving the minute it hits a conditioned space. Run it too dry and you invite checks, micro‑cracks, and brittle behavior under the press; run it too wet and you get steam blows, weak bonds, and panels that keep shrinking after machining.
A practical detail: the best operations don’t rely on one reading at the dryer exit. They’ll spot‑check stacks after conditioning, sometimes 12–18 hours later, to see if the veneer has equalized or if there’s a core‑to‑surface imbalance that needs a slower schedule next time. You’ll see small adjustments like dropping dryer temperature by a few degrees and extending line time by 30–40 seconds on species that are prone to checking, rather than just “turning the heat up” to chase throughput. It feels conservative in the moment, but it buys stability later when those panels are sitting in a warehouse at 45% relative humidity and then get installed in a building at 30%.
Moisture balance isn’t just veneer, either. Core material, backers, and faces all need to be in the same ballpark. If your face veneer is sitting at one range and your core is noticeably higher, the press is essentially forcing a negotiation between the two, and that tension shows up as warp, bow, or a subtle smile across a long panel edge that an installer will definitely notice.
Glue line quality and how it shows up months later
Glue lines are the other invisible decision with very visible consequences. The chemistry matters—UF, MUF, phenolic, and more specialized systems each have their own press temperature, pressure, and cure‑time sweet spots—but what really kills or saves a run is consistent spread rate, open time discipline, and press uniformity. Too little adhesive or excessive open time and you end up with starved bonds, especially on thirsty cores or porous veneers; too much glue and you risk thick, brittle lines that can print through under high‑gloss finishes or crack under movement.
You see the results later, not on the press. Six months down the road, a starved glue line may show as localized delamination at edges or around hardware cutouts, where machining and handling stress the bond the most. Panels that looked fine on delivery start to bubble slightly near grooves or V‑cuts because the adhesive film never fully wet the veneer, or cured under the wrong moisture conditions. On the flip side, over‑aggressive press temperatures meant to “speed things up” can create a cured skin on the glue line while the interior never fully crosslinks, especially on thicker constructions; the panel behaves like it’s well‑bonded until someone racks it hard or it sees a seasonal humidity swing.
The plants that stay out of trouble treat glue lines the way a good welder treats welds. They run regular bond tests, not just on new glue batches but on representative production panels. They log spread weight in real numbers rather than “two turns on the roller,” and they track press pressure and temperature with enough granularity to spot a drifting platen or a cold zone before it turns into a pattern of failures. It’s not glamorous work. But when the job is a 7,800‑panel fit‑out and those panels are going into a climate‑controlled building with critical lighting, getting the invisible parts right is what keeps your phone from ringing later.
Frequently Asked Questions (FAQ)
-
What’s the typical thickness range for wood veneer in manufacturing?
Most face veneers run in the 0.4–0.7 mm range, with 0.5–0.6 mm common on architectural panels; core veneers are often a bit thicker. A hotel door skin might use a 0.6 mm sliced oak face over an MDF or LVL core, while a low‑cost carcass panel could use thinner rotary veneer. Thicker faces help with sanding allowance and minor on‑site repairs. -
How does wood veneer manufacturing affect panel warping later on?
Warp usually traces back to moisture imbalance and mismatched constructions. If the face veneer is significantly drier than the core and backer when it hits the press, the panel will start to “smile” or “crown” as it equalizes. Think of a 2.4 m wardrobe side panel: a 1–2 mm bow across that length can make flat‑pack assembly a headache for installers. -
Is sliced veneer always better quality than rotary veneer?
Not automatically. Sliced veneer gives you more controlled grain and nicer figure, so it’s the go‑to for high‑visibility faces like boardroom tables or reception desks. Rotary veneer shines where structure and cost dominate, such as core layers and painted components. A kitchen manufacturer might use sliced walnut for visible doors but rotary poplar in the core, all in the same cabinet run. Different tools, different jobs. -
What kind of defects should I watch for when buying veneered panels?
Start with faces: look for fine splits, football‑shaped patches, and color mismatches between leaves, especially near edges and corners. Then sight along the panel length for subtle bow or twist. On a batch of 30 interior doors, check several randomly, not just the top one—small overlaps or core voids can hide until the carpenter cuts for hinges, then they complain about crumbling edges or soft spots. -
How does engineered veneer change the manufacturing process?
Engineered veneer adds upstream steps—dyeing, laminating, re‑slicing—but simplifies downstream panel production. Once the design (say, a straight‑grain “teak” pattern) is locked, every bundle behaves predictably in pressing and finishing. A shop fitting out 18 identical retail stores might choose engineered veneer so the grain and color of cashier counters and wall panels match across cities, even if natural teak supply would be inconsistent or cost‑prohibitive.
References
-
Rural Technology Initiative, College of Forest Resources, University of Washington. (2022). Chapter 5: Veneer and Plywood. https://www.ruraltech.org/projects/conversions/briggs_conversions/briggs_ch05/briggs_chapter05_complete.asp
-
Chong, S.-L., New Zealand Forest Service / Scion. (1977). Veneer Yields of New Zealand-Grown Slash Pine. https://www.scionresearch.com/__data/assets/pdf_file/0004/58945/NZJFS731977CHONG420-424.pdf
-
Hardwood Plywood & Veneer Association / ANSI. (2020). ANSI/HPVA HP-1-2020: Standard for Hardwood and Decorative Plywood. https://www.scribd.com/document/843824005/ansi-hpva-hp-1-2020-Standard-for-Hardwood-and-Decorative-Plywood
-
Capital Testing / HPVA Laboratories. (2024). HP-1 Hardwood Plywood Certification Program Overview. https://www.capitaltesting.org/hardwood-plywood-hp-1-certification-program