

Wood Veneer Edge Banding: Types, Application & Manufacturing
Wood veneer edge banding is a very important finishing touch that not only increases the strength and durability of wooden surfaces but also adds to their beauty. No matter if you are making custom furniture, improving the look of cabinets, or just working on an interior design project, knowing the different kinds, uses, and production methods of wood veneer edge banding is really important to get a professional and nice-looking end product. This guide will take you through every single thing related to this multipurpose material—from picking the correct kind to its handy usages—so that you will be able to make smart choices regarding your next woodwork or design project. Be prepared to find out how this tiny yet powerful detail can change your projects for the better!
Introduction to Veneer Edge Banding
What is Veneer Edge Banding?
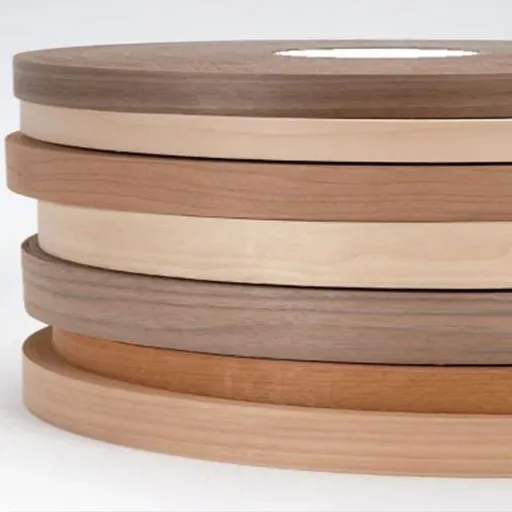
Veneer edge banding is a thin strip of wood veneer material that is typically used in woodworking and furniture production to cover the exposed edges of core materials such as plywood, MDF, or other substrates. Besides giving the project a nice, natural finish that looks professional and cleans the edges, it also protects them from being worn out, moisture, and other types of damage.
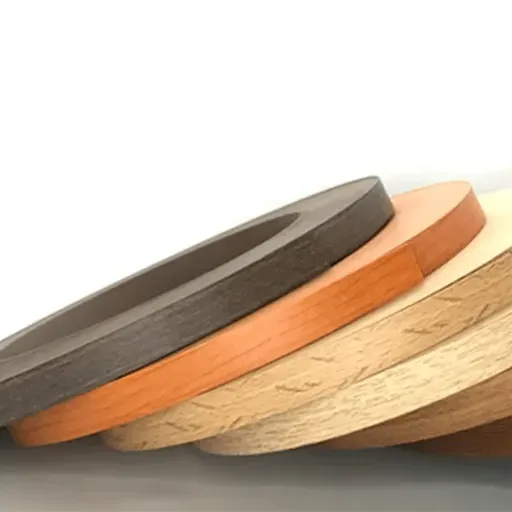
Generally, the production of veneer edge banding is done with real wood and different species of wood like oak, maple, birch, cherry, and walnut are used for the purpose of either matching or complementing the appearance of furniture or panel surface. The most common selling format for it is rolls, and it can be applied manually or through edge banding machines. A common practice in edge banding is the incorporation of a pre-applied adhesive backing such as hot-melt glue, which greatly simplifies the application and assures a strong bond once heated and pressed onto the surface.
Importance of Veneer Edge Banding in Woodworking
The use of veneer edge banding in woodworking is very significant as it delivers both functional and aesthetic advantages. Protecting raw edges of wood-based panels like plywood and MDF is one aspect of its performance; moreover, it provides a polished, finished look that conveys the whole furniture and cabinetry. Global edge banding materials market is on the rise with a significant forecast from analysts stating that it will be growing at a compound annual growth rate (CAGR) of around 6.5% during the period 2023 to 2030. The drivers behind this are the escalating need for cost-effective and eco-friendly furniture options both in the residential and commercial sectors.
The adaptability of veneer edge banding is one of the key factors that make it so popular. The edge banding can be perfectly blended with the base material in terms of design, as it is available in different wood types, colors, and grains. Moreover, a process of manufacturing has been adopted by the manufacturers through which very thin, highly durable, and moisture-resistant products are produced that can be installed in high-traffic or high-moisture areas like kitchens and bathrooms.
Types of Veneer Edge Banding
Pre-Glued Veneer Edge Banding
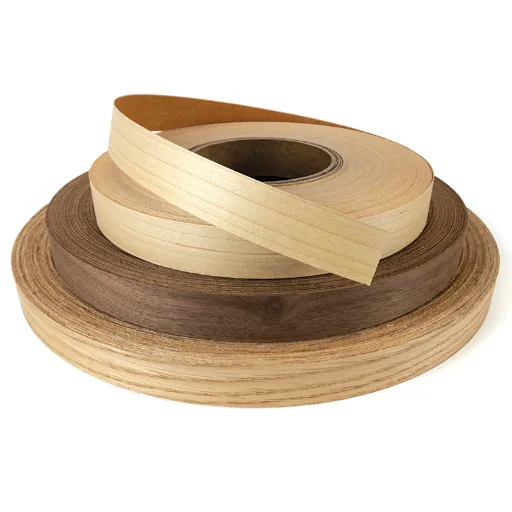
Pre-glued veneer edge banding is a practical and speedy method for completing edges in the woodworking and furniture industry. This type of edge banding is provided with an already melted-hot glue layer; thus, the application process can take place the same way it is with household ironing, heat gunning, or edging machines. The pre-glued choice means no more adhesive sold separately, so the whole process is faster and delivers great results in less time.
The modern-day pre-glued veneer edge banding is obtainable in different kinds of wood shades like oak, maple, cherry, and walnut to be compatible with almost all kinds of furniture finishes. The veneers are mostly 0.5mm to 2mm thick and come in rolls of different lengths, the most common of which range from 25 feet to 250 feet based on the project requirements.
Roll vs. Tape Edge Banding
Roll Edge Banding is commonly found in a continuous length form, usually they are made from PVC, ABS, or wood veneer. It can be used both manually or with an edge banding machine, which is particularly helpful for large-scale operations. Since roll banding is the format, it makes it possible to apply efficiently on a bulk scale, to waste the product less, and to provide nice-looking coverage for the edges that are longer. Roll edge banding finds its applications in industrial and mass production fields where it is prevailing.
Tape Edge Banding is, however, already cut to specific lengths and comes in ready-sized pieces, thus it suits small projects or DIY activities best. The tape usually has a pre-glued backing that can be heated easily and applied with a household iron or heat gun. Tape edge banding is favored by hobbyists and smaller workshops due to not needing specialized equipment and easier handling of the material when working with smaller areas.
Benefits of Using Veneer Edge Banding
Enhancing Aesthetic Appeal
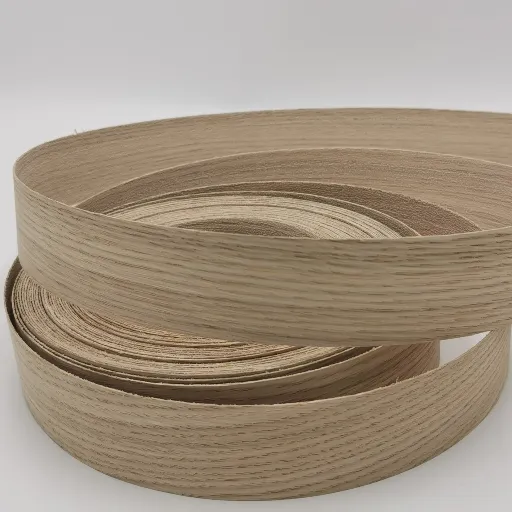
Veneer edge banding is a great way to beautify the furniture and interior designs and at the same time create a natural and seamless finish. The manufacturers are using real wood veneers which make it possible for them to perfectly match the edge banding with the surface material and hence, a very cohesive and polished look is achieved. Market trends indicate that the demand for veneer edge banding is on the rise, as the customers are looking for more sustainable and attractive options for their projects. The Grand View Research report states that the global veneer market size was worth $9.7 billion in 2022 and it will witness a growth of 5.1% CAGR from 2023 to 2030.
On top of that, tech has come to the rescue and improved the overall quality of the veneer edge banding production, thus creating cuts and finishes that closely resemble the beauty of solid wood. The main, and sometimes only, limitation of veneer edge banding is the cost, we can say that the technique is suitable for both residential and commercial projects. Its combination of natural aesthetics and practicality ensures its enduring popularity in the woodworking and interior design industries.**
Protection Against Damage
Veneer edge banding is not only an enhancement in the visual beauty of the furniture but also an indispensable protective layer. Edge banding acts as a barrier marring the already exposed edges of wood panels from chipping, moisture, and other environmental factors that could degrade the material over time. Cutting-edge research has it that furniture with properly done edge banding has increased life up to 25%, as it considerably lowers the risk of structural weakening due to external damages.
Moreover, the adhesive technology has gotten better and enhanced the durability of veneer edge banding. The most modern products are being made resistant to very high temperatures as well as humidity which is perfect for places like kitchens and bathrooms where such atmospheric conditions are common. Research points out that furniture with waterproof edge banding is capable of keeping its integrity three times longer than untreated panels in humid environments. These traits provide veneer edge banding with the benefit of being a cost-effective solution not only for longevity but also for maintaining the beautiful appearance of furniture in both residential and commercial settings.**
Step-by-Step Guide on How to Apply Veneer Edge Banding
Preparation of the Wood Surface
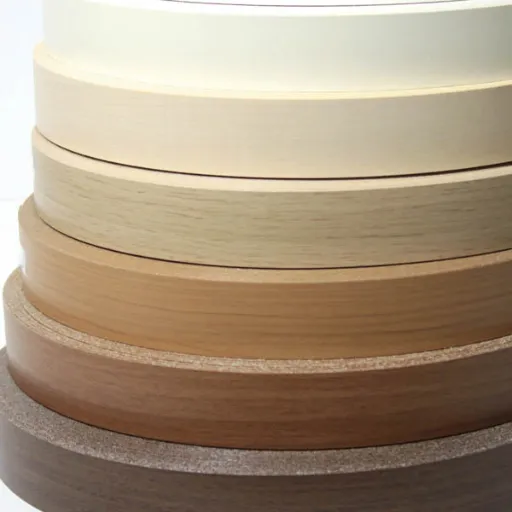
The right wood surface preparation is the foundation of successful veneer edge banding application. First, make sure the surface is clean, flat, and properly prepared for gluing by removing all dust, grease, or particles, since even the smallest imperfection can hinder adhesion. Edge sand with fine-grit paper (we recommend 120-180 grit) to get rid of rough spots or bumps and provide a smooth surface for the glue.
One research paper stated that adhesively bonded surfaces with poor prep or roughness could lose up to 40% of their bonding strength. The other condition for a good bond of the wood is that it has a moisture content of 6-8% maximum. If the wood is too dry or too wet, weak bonds will form and the veneer may eventually get damaged. A wooden moisture meter is helpful in this regard, especially in areas with a fluctuating humidity level.
Application of Hot Melt Adhesive
Pick the Appropriate Adhesive: Choose a hot melt adhesive that is ideal for your particular task. An all-purpose or wood-specific adhesive stick is usually the best choice for most woodworking projects. Also, consider the temperature ratings and strength of the bond. For example, the adhesives rated for high temperatures tend to give the strongest bonds while the low-temperature ones are safe for the delicate woods.
Warm the Glue Gun: Turn on the glue gun and let it heat up completely, which usually takes around 3-5 minutes. The temperature levels for using the glue gun optimally are usually between 250°F and 450°F, depending on the model of the glue gun. Many modern glue guns are also equipped with lights to indicate when they are ready for use.
Apply the Bonding Agent Uniformly: When the adhesive is hot, pull the trigger to lay down a uniform line or dot of glue on one surface of the wood, very carefully controlling the output. Remember that the glue will set quickly so do not apply it in huge amounts. Research has also indicated that applying a thin, even layer will result in a stronger bond as compared to thick application, which may lead to weak adhesion upon cooling.
Join the Surfaces: The two wood pieces should be aligned right away after the adhesive was applied. For about 30 seconds, clamp or use manual pressure to hold them together tightly. Research also reveals that bond strength can be increased by as much as 40% if this pressure is uniformly applied during the curing period.
Using an Iron for Easy Application
Set the Iron to the Correct Temperature: A heat setting of low to medium, which is usually between 250°F and 300°F, should be used to prevent the wood from being burnt. Studies affirm that the highest activation of adhesives occurs at around these temperatures which means that the wood fibers will be soaked with the adhesive effectively.
Protect the Surface: The area covered with the adhesive should be protected by a piece of parchment paper or a thin cotton cloth. This way, no adhesive will stick to the iron while providing heat distribution. Research indicates that the use of a protective barrier minimizes the chances of surface damage by 25% at most.
Apply Heat Evenly: For 20-30 seconds, place the iron very lightly on the covered area, and make sure there is continuous pressure and movement. The data implies that an even heating increases the bond strength by up to 30% when compared to uneven or inadequate heat application.
Allow for Cooling and Curing: When the surfaces are heated and fused together, let them cool down with pressure. Cooling time is very important for the adhesive to fully cure, and most adhesives are strong enough in 24 hours.
Common Mistakes to Avoid
Overheating the Adhesive
Overheating the adhesive is one of the most frequently made errors during adhesive application with an iron. The adhesive will no longer be effective and even worst, its burning may happen, thus leading to a weak bond if the heat is too much. The studies indicate that the majority of heat-activated adhesives are meant to be maximally effective within a limited temperature range, generally around 250°F to 350°F (121°C to 177°C). Going beyond these temperatures will not only lower the adhesive’s strength but also waste the bonding or hurt the surfaces that are being joined.
High heat not only weakens the bond but also gradually makes it invisible or changes the surface of sensitive materials—including fabrics, plastics, and thin laminates—due to their low heat resistance. To avoid the situation of adhesive overheating, always utilize an iron with adjustable temperature and get a piece of material for testing if possible. The use of infrared thermometers or heat-sensitive strips can help in accurately monitoring surface temperatures so that the adhesive stays within the recommended range. By following these preventive measures, the adhesive bond will be effective for longer and thus the adhesive is said to have a higher quality.
Incorrect Measurement and Cutting
Getting measurements and cutting precisely done is the key to a perfect fit and a project with a professional finish. Incorrect measures lead to materials being thrown away, wrong assemblies, and weak building parts. Research reveals that measurement errors are one of the main causes of material wastage, and they account for around 25% of the inefficiencies in the construction industry. Therefore, it is important to remove drawbacks during this step by taking necessary measures.
To get precise results, always take the help of calibrated measuring tools like steel rule, measuring tape, or a digital caliper. Especially for complicated shapes or angles, double-check measurements and consider the use of digital laser measurement tools for further increased precision. Also, the use of high-quality cutting tools and keeping them sharp will do wonder. The cutting done with dull blades would be uneven and so there would be alignment problems which would eventually affect the quality of the whole thing.
Reference Sources
-
Evaluation of the Effects of Edge Banding Type and Thickness on the Strength of Corner Joints in Case-Type Furniture
This study examines the impact of different edge banding materials, including veneer, on the strength and durability of furniture corner joints.
Read more here -
The Effect of Edge Banding Thickness of Some Trees on Withdrawal Strength of Beech Dowel Pins in Composite Material
This article explores how the thickness of veneer and other edge banding materials affects the strength of composite furniture components.
Read more here -
Strength, Durability, and Aesthetics of Corner Joints and Edge Banding in Furniture Design: A Review
This review highlights the importance of veneer edge banding in furniture design, focusing on its strength, durability, and aesthetic contributions.
Read more here
Frequently Asked Questions (FAQs)
What is veneer edgebanding and what are its differences compared to wood edgebanding?
Veneer edgebanding is a very thin sheet of real wood veneer which is used to cover the edges of panels so that they match the grain and species of the wood, whereas wood edgebanding can be referring to solid wood strips of a considerable thickness or pre-finished edging made from synthetic materials. Veneer edgebanding produces a more lifelike wood grain effect, it is malleable and is usually offered in the form of fleece-backed or iron-on for applying edges easily to the stock of cabinets and furniture.
Which matters to tools and veneer supplies for my shop?
A shop that deals in veneer edgebanding only needs a roll of veneer or stocked sheet in the chosen veneer species, an iron or vacuum press in case of iron-on or vacuum application, trimming tools or flat trimmer, sandpaper, and solvent for cleaning up. A high-end shop, on the other hand, would probably also include a dedicated edgebander, finger joint clamps for longer lengths, and backing types of fleece-backed or plywood-backed for superior handling, turning out a really wide selection of widths.
How can I pick the right veneer species and wood grain for my project?
Your pick is to be determined by appearance and performance: pick from among the top-quality cabinet or furniture designs the ones that are the closest in color, wood grain patterns, and stability. Frequent veneer species are oak, walnut, maple and others; check the widths available and whether prefinished or raw veneer suits your workflow. For an even appearance, match grain direction and pick stock with identical finger joints if using longer lengths.
Pros and cones of different veneer species for edgebanding?
Tougher kinds such as oak and walnut have the disadvantages of high cost and high resistance to wear but they still provide the most beautiful wood grains whereas softer ones are more good in trimming and bending around curves. For some species, it is more common to find them as pre-finished edging and thickness options like 1mm, 1.5mm, and 3mm would determine the flexibility; thin veneers can easily wrap around sharp corners while thick strips need to be sanded to flush for the solid wood effect.
When is it necessary to use the vacuum press instead of the iron-on method?
The small repairs or quick and easy installations where heat-activated glue is suitable can be done with a clothes iron or iron-on edgebanding. The vacuum press provides uniform pressure and strength of bonding when working with high-quality, big panels or delicate species, and especially with the use of backer layers in veneer supplies. Vacuum application minimizes bubbles and guarantees a flush bond when thick or wider edgebanding stock is used.