
Rough Cut vs Finished Lumber: Where Each Actually Makes Sense
Rough cut vs finished lumber is one of those choices you only really appreciate after you’ve fought a twisted board through the planer or paid too much for “ready‑to‑use” stock. You’re trading time, tooling, and control over the final dimensions against convenience, predictability, and how fast you can get parts into clamps.
What We Really Mean by “Rough” and “Finished”
When people argue about rough cut vs finished lumber, they’re often talking past each other because the terms aren’t pinned down. One yard’s “rough” is another shop’s “good enough to glue up” and that gap can wreck your cut list if you’re not careful. So it’s worth tightening the language before we compare anything.
Rough sawn, surfaced, S2S, S4S – quick glossary
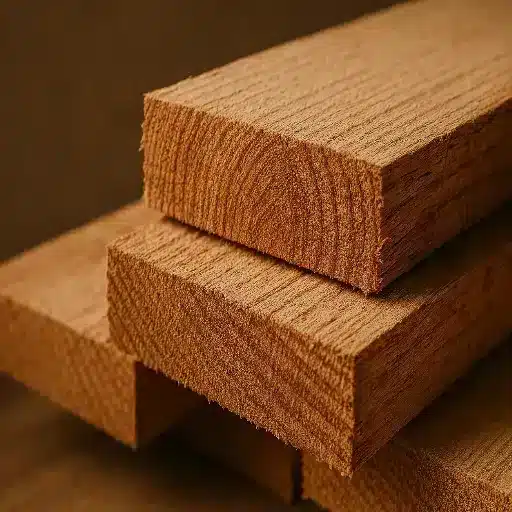
Rough sawn is what comes off the saw with no planing: full saw marks, slightly fuzzy faces, and usually a bit over the target thickness so it can be cleaned up later. In practice you might see a “4/4 rough” board come in around 1.03–1.12 inches thick, just enough meat to joint and plane and still hit a true 13/16 or 3/4. Surfaced lumber has been through a planer at the mill or yard, so the faces are cleaned up and closer to a consistent dimension, even if the edges still need work. S2S (surfaced two sides) means just the faces are planed; S3S usually adds one straight‑lined edge; S4S is dressed on all four sides, ready to go straight into a project if you aren’t chasing ultra‑tight tolerances.
Nominal vs actual dimensions in this comparison
When we talk rough cut vs finished lumber, “2×4” almost never means a true 2 by 4 inches anymore. Finished construction lumber lands around 1 1/2 by 3 1/2 inches after drying and surfacing, which is why your framing layouts rely on those actual numbers, not the name. Rough sawn material, especially from a local mill, might come off closer to a full 2 inches thick and 4 inches wide, or sometimes a hair over, so you’ve got margin to flatten and still end up beefier than standard dimensional stock. That discrepancy is where a lot of the confusion starts: someone thinks they’re getting “more strength” just because the rough piece still carries those old‑school, almost‑true dimensions. It’s not that the wood suddenly got better; you’re just comparing two different physical sizes.
How mills and small sawyers handle “rough” differently
Big commercial mills treat “rough” as an intermediate state on the way to a standardized product; they cut, dry, then surface to hit a tight size window so everything stacks, ships, and specs cleanly. A small sawyer with a band mill in the back lot is often cutting to order, leaving boards 1/8 or 3/16 heavy because they know you’ll joint out cup and twist in your own shop, and they may not be chasing the same uniformity from board to board. That means “rough” from the home center might be surprisingly close to finished dimensions, while rough from a local mill can vary enough that you really notice it at glue‑up. If you don’t ask how they define rough, you can end up 6 or 7 boards short on a job because your assumed yields were off by just a bit.
Dimension and Strength: Does Rough Cut Lumber Really Give You More?
Rough stock does give you more wood, but it doesn’t magically give you better wood. You’re mostly buying extra thickness and width that you’ll plane away to get flat, straight, consistent pieces that actually fit together.
Thickness, width, and how much you lose to milling
With rough hardwood, the classic example is 4/4 vs the finished board you pull off the planer. A typical 4/4 rough board will start right around 1 inch thick, sometimes a touch over, and you’ll usually end up in the 13/16 to 7/8 range if the board is reasonably straight and you’re careful with your passes. If the board is twisted or cupped, you might come out closer to 11/16–3/4 after jointing one face and planing the other flat because the machine is correcting the geometry, not just smoothing the surface. Width loss is similar: you’ll usually joint one edge clean and then rip to final width, so losing 1/8 to 3/8 of an inch in total is normal depending on how ugly the original edge was. On sheet goods or S4S, the opposite story is baked in—the “extra” was already taken at the mill, which is why your 1×12 is more like 3/4 by 11 1/4 by the time you see it.
Strength, span, and code realities for structural use
On the structural side, the big thing is that strength scales with the actual cross‑section, not the label. A full 2×10 rough joist will out‑span a dressed 2×10 that’s 1 1/2 by 9 1/4, simply because there’s more material carrying the load, all else equal. Building codes and span tables, though, are written around standard, surfaced dimensions, so if you want to claim extra capacity from a full‑dimension rough member, you’re outside the tidy prescriptive tables and into engineering judgment or stamped calcs. For non‑inspected work—barns, sheds, agricultural structures—people use rough full‑dimension stock all the time and treat it as “stronger,” but what they’re really doing is quietly bumping the section size up a notch. That’s why in a rough cut vs finished lumber discussion for framing, you have to separate “this board is nicer” from “this section is literally bigger.”
When extra meat on the board actually matters
Where the extra meat really earns its keep is in two places: long‑term flattening and aggressive shaping. If you’re building a 7‑foot dining table top from solid boards, having that extra 1/8–3/16 inch to re‑flatten the panel a year or two down the line can save the piece when the seasonal movement gets a bit wild. Same thing for hand‑shaped parts—chair legs, curved rails, carved handles—where you want enough thickness to fair in curves and still land on a strong, visually balanced section. For everyday cabinet parts or basic framing, though, the extra stock often ends up as planer chips and jointer shavings on the floor; you see the volume, but you never get to use it in the finished work. So yes, rough can give you “more,” but it only pays you back if your design or your process is set up to exploit that extra material instead of grinding it away to hit the same final dimensions you could have bought off the rack.
Cost Breakdown: Board‑Foot Price vs True Project Cost
The lumber that’s cheapest per board foot on paper is not always the cheapest once it’s in your shop. Rough cut vs finished lumber is a classic case where the spreadsheet looks one way and the real project budget lands somewhere else entirely.
Price per board foot: rough cut vs finished at the yard
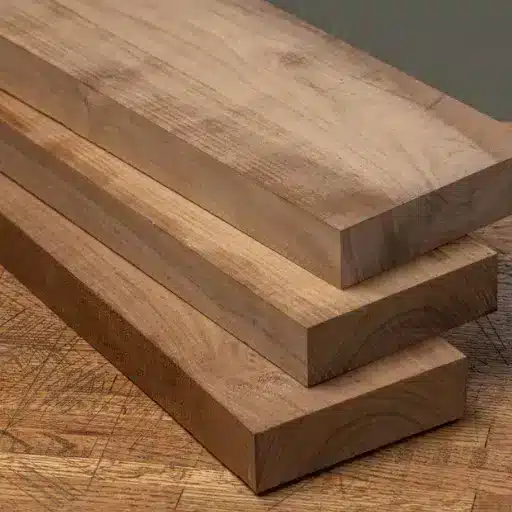
In most markets, rough sawn hardwood from a local mill or yard will list at a lower price per board foot than surfaced S3S/S4S in the same species and grade. The yard is charging you for the extra machine time, handling, and waste baked into those dressed boards. On softwoods and construction stock, the line is fuzzier: big‑box dimensional lumber is sold by the piece, and the “rough” material from a small sawmill is often priced by the board foot, so the comparison hides in the unit change rather than an obvious side‑by‑side tag. The only way to see what’s really going on is to normalize everything to cost per usable board foot at your target thickness and width, not just what’s printed on the rack label.
Take a simple example: you buy 100 board feet of 4/4 rough oak because the price is 20–25% lower than the S2S option. On paper, you just saved a chunk of money. But once you mill it flat, joint an edge, and rip it to width, it’s common to lose 15–25% of that volume to shavings, offcuts, and defects, especially if the stock moved a bit in drying or storage. Now your effective price per usable board foot is much closer to what the surfaced material would have cost, and sometimes higher if the yard’s S2S/S3S pricing is aggressive.
Factoring in waste, rejects, and defect removal
The rougher the stock, the more you need to plan for waste. Knots, end checks, twist, and the odd bit of bark inclusion all turn into shorter pieces or narrower parts, which is fine if you’ve designed around it but expensive if you thought every board was going to yield clean 8‑foot rails. It’s not unusual for a careful shop to assume 10–15% waste on well‑behaved rough hardwood and bump that to 20% or more when they know the mill is a bit “relaxed” about grading and drying. Finished, kiln‑dried, S4S stock from a large distributor tends to be more consistent, so your waste factor can drop, especially for straight‑run parts like face frames, stiles, and rails.
Defect removal also hits you in layout time. You’re not just crosscutting to length; you’re dancing around knots, sap streaks, and wane. On a small project that’s fun design work. On a run of 47 cabinet doors, it’s lost hours you never quoted. The irony is that the rough load feel like more value because the pile looks bigger on the cart, but by the time you’ve trimmed away the worst 5 or 6 inches from both ends of every board, you’ve quietly burned through a noticeable chunk of that volume.
Your time, tooling wear, and shop capacity
The other half of “true cost” is you and your machines. If you’ve got a 12‑inch jointer, a 20‑inch planer, a straight‑running dust system, and gaps in the schedule, milling rough stock is just part of the rhythm of the shop. In that context, the extra passes are cheap. But if you’re on a 6‑inch hobby jointer, a lunchbox planer, and you’re emptying a single‑bag collector every 35 or 40 minutes, the labor cost is real whether you bill for it or not.
Every pass costs knives and abrasives. Rough lumber that’s a bit dirty from yard handling or has the odd embedded chip of grit will dull planer and jointer knives faster than clean, surfaced stock. Over a year, that means more sharpenings, more knife sets, and more downtime swapping them out. On a busy schedule, that downtime can be the real expense: if the machines are tied up surfacing 200 board feet of rough, they’re not cutting parts for the job you actually need to deliver this Friday. So the honest way to compare rough cut vs finished lumber is to start with the board‑foot price, then layer in your expected waste factor, your milling hours at a realistic shop rate, and your tooling overhead. Sometimes rough still wins by a mile. Sometimes the “expensive” S4S pile is actually the budget choice once you put a number on your own time.
Working the Material: Shop Reality with Rough vs Finished
The real gap between rough and finished lumber shows up at the machines, not on the invoice. You feel it in how many passes you take, how your clamps line up, and whether you’re still milling at 11:40 p.m. on a Tuesday.
Milling workflow: jointer, planer, table saw, repeat
With rough stock, the standard dance is breakdown, joint, plane, rip, then sometimes back to joint and plane again. A typical flow is: cut boards to rough length, flatten one face on the jointer, joint one edge, run the opposite face through the planer to thickness, then rip to width at the table saw and clean up that fresh edge if needed. On a decent 8‑inch jointer and 15‑inch planer, you can move 60–80 board feet through that cycle in a morning if the lumber is cooperative. If it’s twisty or cupped, you’re taking lighter cuts and more passes, so the same pile can quietly eat half a day.
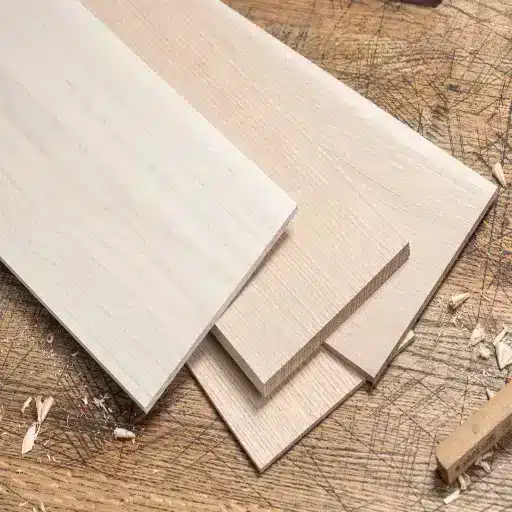
Finished S2S or S4S stock skips some of that, but not all. You might go straight to the table saw for ripping, then do a light clean‑up pass at the planer or a quick jointer touch when something needs to be dead‑on for a glue‑up. So the workflow tightens up, yet you still need to think like a mill: establish reference faces and edges, then cut joinery from those, even if the yard already “finished” the board.
Tolerances, flatness, and getting consistent thickness
With rough lumber, you own the tolerances. If you want everything at 0.77 inches because that’s what makes your door profiles work out, you just plane to that and stack your parts. The trade‑off is you have to be disciplined: joint until you’re getting full‑length shavings, plane both faces in a controlled sequence, and stop sneaking “just one more pass” after parts are to final size. Guides from small shop tooling companies consistently stress that sequence—reference face on the jointer, parallel face in the planer, then width at the saw—as the key to keeping boards flat and consistent.
Finished lumber arrives with its own set of tolerances built in. Dimensional S4S can be out by 1/32 to 1/16 in thickness or width from board to board and still be inside the seller’s spec, and many yards call a lot of their stock “S4S” when it’s really more like skip‑planed for appearance. You don’t notice that on a piece of casing or baseboard. You absolutely notice it when you’re trying to pull a panel flat across 9 edge‑glued boards and one is 0.04 thicker than the rest.
Where finished lumber still needs “tuning”
The myth is that finished lumber is ready to build with the minute it hits your rack. It’s rarely that clean. S4S boards can arrive with a slight bow, end‑to‑end twist, or a long gentle cup, especially if they’ve been sitting in a big‑box store under bright lights and changing humidity for weeks. So you still end up straight‑lining at least one edge on the jointer or a track saw, and you often do a quick pass at the planer to bring a batch of parts to a common thickness for joinery.
Even when the boards are flat, the edges aren’t always glue‑ready. A lot of S4S product has saw‑cut edges that are “good enough” for trim but not square or straight enough for a tight panel glue‑up, which is why experienced builders will still joint or at least rip a fresh edge before reaching for clamps. That said, if you’re hanging 57 feet of painted base in a remodel, you probably won’t drag every stick across the jointer; a little tuning where it matters and you’re done. In practice, the rough cut vs finished lumber decision on the shop floor is less about “milling or not milling” and more about how much of that milling burden you’re choosing to carry yourself.
Where Each Shines: Use Cases by Project Type
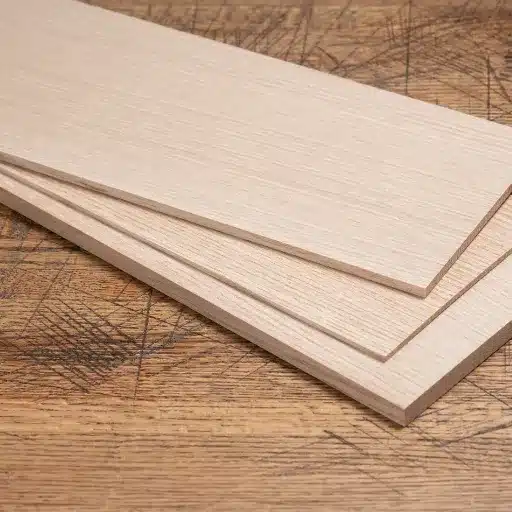
The right answer to rough cut vs finished lumber depends a lot on what you’re actually building. Same species, same grade, totally different sweet spot once you move from a pole barn to a dining table.
Framing, sheds, barns, and agricultural buildings
For sheds, barns, and agricultural buildings, rough cut shines because you’re buying strength, volume, and toughness more than cosmetics. Full‑dimension 2× and 4× stock from a local mill gives you heavier sections and a lot of bearing capacity, which is why you see rough sawn posts and girts in pole barns and farm buildings all over the place. You’re also often buying closer to the source, so the cost per board foot on a 30×40 building can drop far enough that you notice the difference in the total materials bill.
You don’t care if every face is glass‑smooth; you care that the walls stand plumb and the roof doesn’t sag. The rough surface actually helps in some cases—barn paint and exterior stains bite into that texture and hang on better than on slick planed boards. For code‑inspected residential framing in dimensional lumber, you’re usually in the finished category by default because the building department and span tables assume standard surfaced sizes. But for farm outbuildings and uninspected structures, rough full‑dimension stock is pretty much the default in a lot of rural markets.
Furniture, cabinetry, and fine interior work
On furniture and cabinet work, rough vs finished is more nuanced. Serious shops often buy rough hardwood because they want control over grain, thickness, and yield; they’ll mill it to their own internal standards that are tighter than what any yard calls “S4S”. If you’re matching doors across a 17‑cabinet run, being able to hold every stile and rail at an exact thickness and width is a bigger win than having the yard guess at it for you.
That said, finished or partially surfaced stock has its place when you’re running small batches or working in a tight shop. Pre‑milled S3S/S4S boards are faster to get into clamps, and for things like paint‑grade face frames or utility built‑ins, the small dimensional variation is much easier to live with than on a veneered conference table. Designers chasing a specific look—skip‑dressed textures, visible saw marks under a clear finish—will sometimes split the difference: start with rough, surface just enough to true things up, then leave a hint of that texture to catch light along an edge or panel. It’s still “rough” at heart, but dialed in for interior work.
Exterior projects: fences, siding, beams, and rustic details
Outside, rough cut lumber earns its keep in both performance and aesthetics. Fence boards, board‑and‑batten siding, and exposed beams all benefit from the extra thickness and the toothy surface that holds stain and paint well over time. You see a lot of rough sawn pine or cedar used for rustic cladding and trim because the saw marks and open grain give the building a bit of texture that factory‑smooth decking or siding can’t fake.
Finished stock still has roles outside: pre‑milled deck boards, fascia, and factory‑primed trim save a lot of prep on production‑style jobs. If you’re banging out 120 feet of fence in a weekend with off‑the‑shelf boards, the appeal of uniform, easy‑to‑handle finished lumber is obvious. But if you’re wrapping porch posts, building timber accents, or doing a cabin‑style facade, rough stock lets you scale up the visual mass and lean into a “real wood” look without paying for heavy machining you’re just going to sand back into something a bit rustic anyway. In other words, on exterior work the rough cut vs finished lumber decision is as much about the story the building tells as it is about the cut list.
Frequently Asked Questions (FAQ)
-
Is rough cut lumber actually cheaper than finished once I factor in waste and milling?
Rough cut often looks 20–25% cheaper per board foot, but you’ll lose a chunk of that to jointing, planing, and trimming off defects. If your planer turns 120 board feet into two contractor bags of shavings and you toss the knotty 18″ off every board, the real cost gap narrows fast. It only wins if your time and tooling are already “paid for” in the schedule. -
For a small backyard shed, should I buy rough or finished lumber?
If it’s a simple 8×10 shed with standard framing and you don’t own a jointer or planer, stick with finished dimensional lumber. You’ll frame faster, hit standard spans, and every 2×4 will work with store‑bought hardware and brackets. Rough makes more sense if you’re doing a larger pole‑style building and can use full‑dimension posts and girts cut at a local mill. -
Which is better for furniture: rough cut hardwood or S4S boards?
For serious furniture—say a walnut dining table with 36‑inch‑wide top—rough cut usually wins because you control grain selection, thickness, and final flatness. You can joint out a slight cup and still land at a healthy 7/8 thickness. S4S is fine for small side tables or painted built‑ins, but you’ll eventually fight inconsistent thickness and you can’t “fix” grain you didn’t get to choose. -
Can I mix rough milled parts and store‑bought finished lumber in one project?
You can, but only if you normalize everything. That means running the finished 3/4 stock through your planer to match the 0.72 you milled from rough, and jointing edges so glue lines stay tight. If you don’t, you’ll see proud rails, weird reveals on doors, and a face frame that’s just a hair thicker than the cabinet sides. It’s subtle, but you’d notice every time you walk past. -
Is rough cut stronger than finished lumber for structural work?
The wood species and grade are what determine strength; the “rough” part just means it hasn’t been surfaced. A full 2×8 rough joist will carry more than a planed 2×8 simply because it’s closer to a true 2 inches thick and 8 inches deep, not because it’s rough. If you cut that same joist down to the surfaced dimensions, its strength is essentially the same as store‑bought stock.
References
-
Woodweb. (2006). Rough-Sawn Thickness Versus Finished Thickness. https://woodweb.com/knowledge_base/RoughSawn_Thickness_Versus.html
-
North Castle Hardwoods. (2025). Lumber Sizing Explained: Rough Cut to Finished Dimensions. https://northcastlehw.com/blogs/wood/lumber-sizing-explained-rough-cut-to-finished-dimensions