
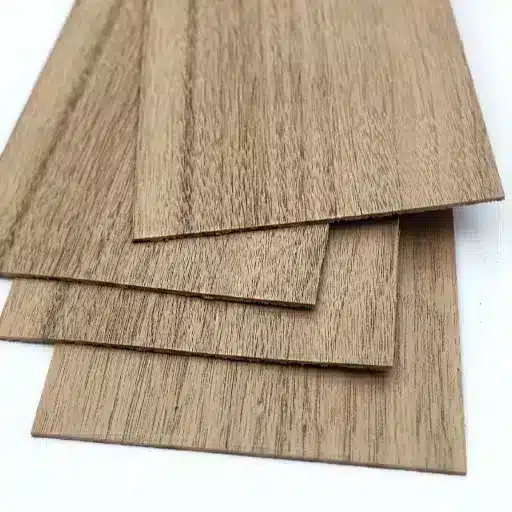
Wood Veneer: How Pros Actually Use It
Most people only think about wood veneer when it fails on them — a chipped edge on a cabinet, a bubbled panel near a dishwasher. The reality is, when it’s chosen and detailed properly, it’s one of the most efficient ways to get a high‑end wood look across dozens or hundreds of pieces without the headaches of solid lumber.
3 ways wood veneer is made (and why it matters)
How the sheet is cut from the log dictates almost everything you’ll fight with later: grain look, yield, and movement. If you’ve ever had one batch of panels look calm and straight and the next batch look wild and stripey, you’ve already seen the impact of slicing and layup in the real world.
From log to flitch: slicing methods in practice
Most production wood veneer starts with a conditioned log and ends as a flitch of thin leaves, but the way that log hits the knife changes the whole story. In practice you’ll see three workhorses on specs and mill sheets: rotary, plain (flat) sliced, and quarter/rift cuts. Rotary peels the log like paper off a roll, great for maximum yield and uniform sheets, though the grain can look a bit “engineered” and less like traditional lumber. Plain slicing reads more like boards off a sawmill, with cathedral grain you’d expect on a dining table or wardrobe fronts, while quarter and rift cuts give those straight, tight lines designers lean on for clean, modern interiors.
This isn’t academic trivia. If you’re trying to match a solid wood edge or leg, specifying the wrong cut will make the joint look off from five meters away. So when you’re talking to a supplier, you’re not just ordering “wood veneer”; you’re effectively choosing how the log is rotated in front of the knife.
Matching and layup: book, slip, and random
Once you’ve picked the cut, the next variable is how the individual leaves are laid out across the panel. Book matching flips every second leaf like you’re opening a book, which gives those mirrored cathedrals and “butterfly” grain forms that jump out on conference tables and feature walls. Slip match runs leaves side by side in the same orientation, which smooths out the pattern and keeps linear species like rift oak looking calm and consistent across, say, 37 wardrobe doors in a hotel corridor.
Random and mix matches come into play when you don’t want the eye to land on a repeating pattern at all, or when the log quality demands a bit of creative blending. You’d use that on large wall fields in busy spaces where a little controlled chaos actually hides joints, patches, and the odd darker streak. The point is, you’re not just buying a “nice” veneer pattern; you’re controlling how the viewer’s eye travels across the surface.
Backing, core, and glue: what’s under the surface
Under that top face of wood veneer, the build‑up matters just as much to performance as the visible species. You’re typically bonding to an MDF or plywood core, sometimes with a balancing backer veneer to keep the panel flat under changing humidity. Pick a cheap or mismatched backer, and you’ll see that subtle door twist or panel bow that no amount of hinge adjustment really fixes.
Glue systems and press conditions are where a lot of unseen failures start. Too cold, too little pressure, or the wrong adhesive type for the environment, and you’re looking at bubbles, edge lift, or telegraphing seams a year down the line instead of ten. So when you spec wood veneer for serious work, it’s worth treating the core and glue line as part of the system, not just a line item buried three levels down in the schedule.
Solid wood, laminate, or wood veneer – which makes sense where?
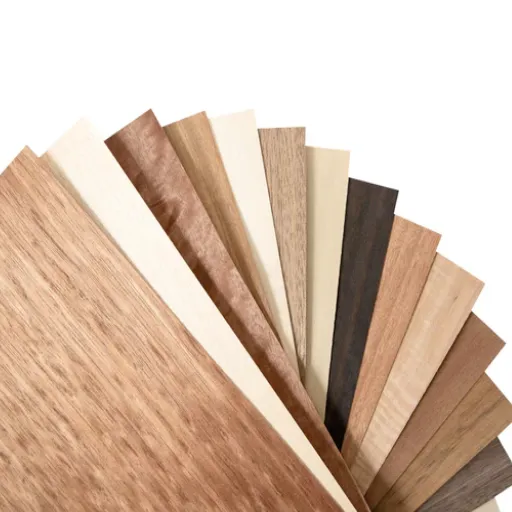
The material choice isn’t a style question first; it’s a risk and scale question. Once you’re over a handful of pieces, the wrong choice will punish you in movement, cost, or color control.
Kitchens, wardrobes, and built‑ins at scale
For a single custom dresser, solid wood is fine and even pleasant to work with. For 64 wardrobe doors on three floors, it’s a liability. Seasonal movement, yield loss, and the time spent jointing and planing all add up once you start repeating the same element again and again.
This is where wood veneer on stable cores (MDF or furniture‑grade plywood) earns its keep. You get a consistent face, predictable thickness, and sheets you can cut into doors, drawer fronts, and infill panels without watching every piece for cupping. Think of a kitchen run: 27 door and drawer fronts, a couple of tall pantry doors, and a fridge surround. If you try to match grain and color in solid wood across that many faces, you’ll burn through a small forest and still have two doors that don’t quite match under LED light.
Laminate has its place in this mix, especially on carcasses, utility areas, or rental units where impact and cleaning resistance matter more than authenticity. It shrugs off kids’ bikes, cleaning crews, and the odd spilled bottle of bleach in a way most clear‑finished veneers won’t. But once the space is client‑facing and “real wood” is in the brief, a wood veneer face on a good core lets you bridge that gap: it looks like solid, handles like a panel product, and keeps the unit cost sane.
The trick in kitchens and wardrobes is usually a hybrid: laminate or melamine boxes, wood veneer faces, maybe a couple of solid edges or trims where they’ll take abuse. You keep the budget and the humidity behavior under control without giving up the warmth the client is paying for.
High‑touch areas: doors, reception desks, meeting tables
High‑touch elements expose weaknesses fast. A solid wood entry door in a conditioned office corridor might behave, but put that same construction in a hotel corridor with fluctuating HVAC and you’ll see movement at the latch edge over time. You notice when a door drags on the frame just a bit.
Door leaves, reception fronts, and table tops are usually better served by a veneer build: wood veneer faces on engineered cores, with solid lippings where the knocks happen. On a 3.1‑meter reception desk, for example, a well‑laid‑up veneer lets you run a consistent grain across the full span without dealing with board widths, glue lines, and the tendency of solid to telegraph every change in humidity.
Laminate can still be the right call on the back side of a reception desk, on staff‑facing doors, or under‑table panels where shoes, vacuums, and cleaning carts do their worst. But where a client rests their hand, or where the eye lands as soon as the lift doors open, wood veneer gives you the depth and variation that printed patterns never quite mimic. Solid wood is still useful here, just in more targeted roles: edges, frames, legs, or details that take screws and impacts, working in tandem with the veneered surfaces rather than trying to carry the whole piece alone.
Choosing the right veneer: a quick decision path
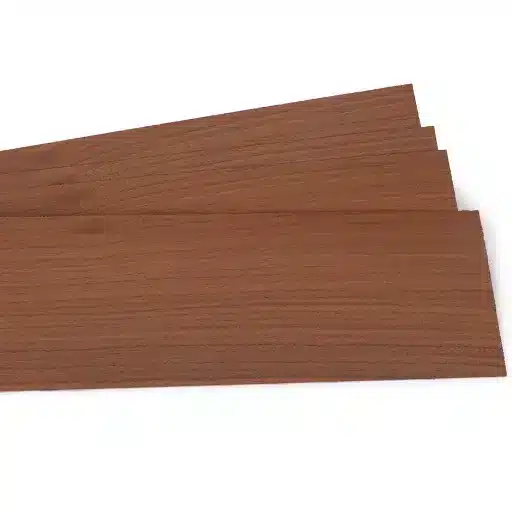
Most wood veneer mistakes come from starting with a mood board instead of the job reality. If you flip that order and work from use case back to species and finish, a lot of headaches never show up on site.
Step 1: start with the application, not the species
Before you say “walnut” or “oak,” decide what the piece has to survive. Is this a hotel wardrobe, a reception desk catching daylight, or a boardroom table that will see hot laptops and coffee rings all day. A quiet apartment built‑in and a busy coworking space bench are two different worlds, even if the photo reference looks similar.
So name the abuse honestly: cleaning chemicals, trolleys, kids’ shoes, direct sun, humidity swings, occasional leaks. In a pantry near a dishwasher, you’ll lean toward a stable substrate, a sensible edge detail, and a finish that can handle steam more than you’ll chase an exotic species. Once you’re clear on those forces, the rest of the spec has something solid to hang on.
Step 2: species, cut, and grade for the look you want
Now you can talk about what the eye sees. Start by deciding whether you want calm and linear, or expressive and figured. Straight‑grain rift or quarter cuts in species like oak or ash give that disciplined, modern look that hides small alignment issues between, say, 23 doors in a corridor. Cathedral‑grain plain‑sliced veneer feels warmer and more residential, great for wardrobes, panels behind beds, or occasional furniture.
Cut and match are doing as much work as the species. If the architect wants long, uninterrupted lines across a 3.4‑meter wall panel, specify a cut and layup that actually exists in sheets that length, not something the fabricator has to fake with joints. Grade decisions matter too: for a reception desk in full view, you’ll pay for a cleaner grade with fewer knots, patches, and mineral streaks; for utility panels inside a closet, that money is better spent on hardware or lighting.
Still, it’s rarely “one perfect species” in a vacuum. If you can’t get consistent walnut in the volume or price you need, you might pivot to a toned oak veneer with a stain that hits the same color family, but with better supply consistency and fewer wild boards.
Step 3: thickness, core, and finish for durability
Once the face is decided, the build has to keep up. A common spec for architectural wood veneer is around 0.5–0.7 mm on an MDF or calibrated plywood core, thick enough for a light resand once, but not a lifetime of refinishing. Go too thin and an over‑eager site team with a sander can cut through at an edge; go thick without a proper backer and you invite warping on larger doors and panels.
Core choice follows the environment. MDF gives you a flat, smooth base and crisp edges for interiors; a moisture‑resistant or higher‑density board makes sense in kitchens or near wet zones. Plywood cores come into play where weight, screw‑holding, or span matter more, like oversized doors or table tops. The finish is the last guardrail: a hard, well‑specified lacquer or polyurethane can make a “soft” species surprisingly tough, while an oil‑only finish on a café table will show every cup ring by week three.
So when you spec wood veneer, treat thickness, core, and finish as a little three‑way pact. If one is weak, the others can’t fully rescue the piece in real use.
What can go wrong with wood veneer? (And how to avoid it)
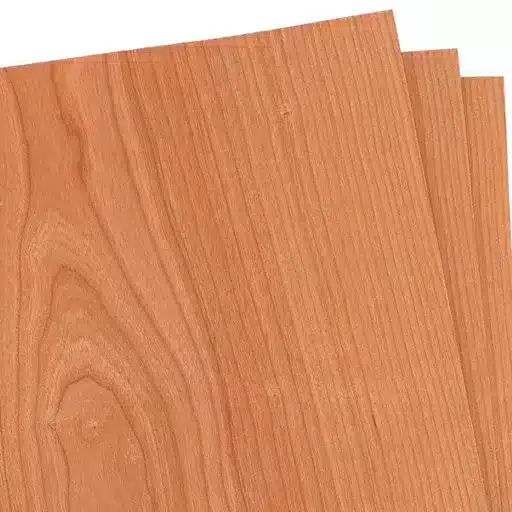
Most wood veneer failures are predictable if you’ve seen a few jobs go sideways. The good news is that almost all of them trace back to a small number of spec and process decisions you can control.
Shade variation and “mismatched” panels
The classic complaint is: “Why do these doors all look like different colors from one end of the corridor to the other?” Often the stain, species, and even batch are technically the same, but the way the veneer was sliced and matched makes each leaf reflect light differently. According to a WoodWeb finishing forum explanation of the “barber‑pole” effect in book‑matched veneer, alternating tight and loose sides of the leaf can throw light back differently even when the stain is identical.
Book‑matched rift or quartered veneer will show this effect strongly under grazing light or on long runs; you’d notice it worst on a 14‑door wall under linear LEDs. Slip‑matching keeps all the tight or loose sides facing the same direction, which is why several veneer specialists recommend it whenever very uniform color is more important than dramatic mirrored grain. So if the spec calls for “perfectly even color” across a big field, you protect yourself by choosing slip match, tighter grading, and doing stain samples on both veneer and any adjacent solid parts before sign‑off.
Bubbles, edge failures, and peeling
Bubbles and blisters in wood veneer almost always signal trouble at the glue line or moisture interaction. WoodWeb’s troubleshooting notes point to a few repeat offenders: slightly oily MDF faces that repel PVA, low press pressure, trapped moisture from water‑based glues, and flexible glue lines that creep under stress. DIY repair guides echo the same root cause: once the adhesive loses bond locally, even a small humidity swing lets that thin veneer expand and lift off the core.
On site it shows up as small raised blisters you can press down with a thumb, or edges that just start to “sing” when you run a fingernail over them near a dishwasher, sink, or window. You avoid most of this by matching the adhesive to the press method and environment—rigid urea or 2‑part systems for vacuum pressing and demanding interiors, careful moisture control in the veneer, and clean, properly sanded substrates. For pieces already installed, the usual fix is localized: inject glue under the bubble with a syringe, apply heat and pressure, then clamp for several hours, as detailed in step‑by‑step repair processes from veneer specialists.
Moisture, sunlight, and long‑term movement
Wood veneer is thin, so it responds quickly to its environment. Technical guidance from veneer and furniture manufacturers notes that rapid humidity swings and poor moisture matching between veneer and core can lead to checking, cracking, or panel warp over time. If you press veneer with a high internal moisture content onto a stable core and then move the finished piece into a much drier, air‑conditioned space, that face layer wants to shrink and can split or telegraph stresses into the finish.
Sunlight is the other slow killer. Different species age at different rates; sources point out that cherry and mahogany shift color much faster under UV than oak or maple, and that clear coats with UV blockers significantly slow visible change. You see it when a table edge under a window bleaches a band 80–120 mm in from the glass, or when a painting is moved after two years and leaves a darker “ghost” rectangle on the panel. The practical fix is part preventive, part environmental: pick species and finishes with known UV resistance, keep RH roughly in the 30–50% band where possible, avoid radiators and wet rooms for delicate veneer, and specify shades or films on large glazed areas near veneered walls and casework.
Working with veneer on real projects: tips from the shop floor

Most wood veneer problems aren’t “mysteries”; they’re gaps between what was drawn, what could actually be built, and what the supplier could realistically ship on time. Closing that triangle early is where a lot of money and sanity are saved.
Coordinating architect specs, fabricator reality, and supplier options
On paper, a spec that says “quarter cut oak, book matched, Premium” feels clear. In the shop, that might translate into three phone calls: what length can the flitches realistically run, what core is stocked in volume, and can the supplier repeat that exact look if you have to add 19 more doors six months later. AWI and QCP guidance on specifying architectural wood veneer explicitly call out the need to pin down species, cut, match, grade, and core in enough detail that architect, GC, and millworker are actually talking about the same thing.
So a practical workflow is: take the architect’s spec, translate it into shop language, then walk it past the veneer supplier while you still have flexibility. Ask very specific questions: “Can you give me slip‑matched rift white oak at 3.0 m clear, same log or at least same lot, in Custom grade, on MR MDF?” If the answer is “not at that length,” better to adjust the pattern or jointing strategy on the drawing now instead of explaining odd seams on site later. Industry guides on millwork shop drawings stress this exact loop—align veneer match, core, and yield before submittals go in—because that’s where you avoid re‑drawing after pricing and scheduling are locked.
Yet it’s not just a technical exercise. The fabricator can often suggest cost‑neutral tweaks, like switching from book match to slip match on long corridors, that give you more predictable color and better yield out of the same material pool.
Approvals, samples, and mockups that prevent surprises
For architectural wood veneer, the approval chain should be visual, not just textual. AWI sample criteria talk about multiple 300 mm x 300 mm panels that show the agreed species, cut, grade, and finish, plus at least one “step sample” that walks the owner through the full finishing system. That’s not bureaucracy; that’s your insurance policy when someone later says, “This isn’t the color I expected.”
On real jobs, a good sequence looks like this: hand samples to align on tone and figure; then a larger face sample or door corner showing veneer on the actual core and edge detail; then, for big runs, a small mock‑up field, maybe 2 panels by 2 panels, with real reveals and an outside corner. AWI and similar standards even spell out that mock‑ups should include corners and joints, because those are where color shifts and grain breaks are most obvious in use.
Still, you need to tie paperwork to these pieces. Label every approved wood veneer sample with project, date, and finish system, and keep one master set in the shop. That way, when you’re pressing the 127th panel six months later, you’re not guessing from memory under different lighting. Owners and architects get something physical to point at; you get a clear reference to build to. It’s a small habit that quietly prevents a lot of “this isn’t what we saw in the showroom” arguments down the line.
Frequently Asked Questions (FAQ)
-
What is wood veneer actually made from?
Wood veneer is a thin slice of real wood bonded to a backing or core panel. Think 0.5–0.7 mm of oak, walnut, or maple pressed onto MDF or plywood, then finished like solid wood. On a typical cabinet door, the face and sometimes the back are veneered, with solid edging on the sides where it takes more abuse. -
Is wood veneer durable enough for a busy family kitchen?
Yes, if the build is right. Veneer on moisture‑resistant MDF with a tough polyurethane finish will shrug off daily wiping, steam from the kettle, and kids’ fingerprints. Where it fails is usually edges and around sinks, so in a real kitchen you’d pair veneered faces with sensible edge details and avoid leaving standing water on door bottoms or dishwasher surrounds. -
Can I sand and refinish wood veneer like solid wood?
Only lightly. Because wood veneer is so thin, you can usually handle one careful refinish with fine paper (say 320 grit) and a light hand. If you go at a 20‑year‑old coffee table with a random‑orbit sander and 120 grit, you risk burning straight through the veneer at corners and along edges, and you’ll suddenly see the pale core telegraphing through. -
Why doesn’t my new veneer panel match the old ones in the same room?
Even with the same species and stain, veneer from a different log or with a different cut or match pattern will read differently under the same light. You see this when you replace a single walnut door in a bank of 11 and it looks slightly redder or has more cathedral grain. The fix is to order replacement pieces from the same supplier with clear photos and, ideally, a physical sample to target. -
Is wood veneer or laminate better for office furniture?
Depends where it’s going. For a manager’s desk and meeting‑room credenza, wood veneer gives depth, variation, and a more “real” feel when someone rests their hand on the edge. For under‑desk modesty panels, backs of storage units, or hot‑desking tops that get wiped 5 times a day with strong cleaner, a good laminate often makes more sense and keeps maintenance headaches down.
References
-
AWI Quality Certification Program. (2022). How to Specify Architectural Wood Veneer. https://awiqcp.org/news-and-blog/how-to-specify-architectural-wood-veneer/
-
AWI Quality Certification Program. (2018). Standardized Minimum Sample Criteria for Licensing. https://awiqcp.org/wp-content/uploads/2018/10/samplecriteria.pdf
-
AWI. (2025). A Guide to the AWI Standards of Architectural Woodwork. https://awiqcp.org/a-guide-to-the-awi-standards-of-architectural-woodwork/