
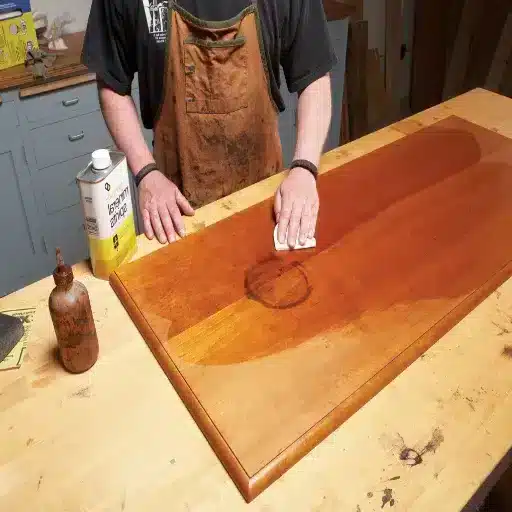
How to Refinish Water Damaged Wood: A Step-by-Step Guide
You can refinish water-damaged wood if the structure is still solid, the wood is fully dry, and any mold has been removed. The process is straightforward, but skipping a single step can ruin the new finish.
Mike opened the cabinet under his bathroom sink and found the particleboard base had swollen into a soggy mess. A slow drip from the supply line had been feeding it for weeks. He knew he needed to act fast, but he also knew that not every water-damaged board belongs in the trash. This guide is part of our complete resource on how to remove water stains from wood. By the end, you will know how to dry, clean, sand, fill, stain, and seal water-damaged wood so it looks and performs like new.
If your repair calls for replacement boards or a custom piece, explore VitalWood Global’s custom wood solutions before you start. Having the right material on hand makes the whole project smoother.
Key Takeaways
- Water-damaged wood can often be refinished if it is structurally sound.
- Drying completely is the most critical step before sanding or finishing.
- A moisture meter reading below 15% is a good target before refinishing.
- Stains and mold must be addressed before applying new finish.
- Replacement is safer when wood is soft, crumbly, or structurally compromised.
Can Water-Damaged Wood Be Refinished?
What determines if wood is salvageable
The first question is always the same: can this piece be saved? The answer depends on three things: how long the wood stayed wet, how deeply the water soaked in, and whether the fibers are still strong.
Surface discoloration, minor cupping, and raised grain are usually repairable. Even some dark stains can be lifted with the right treatment. On the other hand, wood that has been submerged for days or exposed to standing water for weeks may have lost its internal bond. When the fibers separate easily, the damage is deeper than a finish can fix.
Hardwoods like oak, maple, and walnut tend to survive water exposure better than softwoods or engineered boards. Veneer can be tricky because the thin top layer limits how much you can sand. We will cover each project type later in this guide.
The screwdriver test for structural integrity
Use a simple screwdriver test to judge structural integrity. Press the tip of a flathead screwdriver into the damaged area with moderate pressure.
- If the surface resists and only leaves a small dent, the wood is still strong.
- If the screwdriver sinks in easily or the wood crumbles, the fibers have failed.
- If you see long splits or the wood separates in layers, it has delaminated.
Passing the test does not guarantee a perfect cosmetic result, but it does mean refinishing is worth trying. Failing the test means replacement is the safer option.
When replacement is the better choice
Replacement is the better choice when the wood is load-bearing, structurally compromised, or growing mold across a large area. Subfloors, support beams, and heavily saturated trim should usually be removed rather than refinished. The same rule applies to cheap composite boards that swell when wet, because their core never returns to its original shape.
For furniture and decorative pieces, the decision is often a balance of cost, sentimental value, and time. A professional restorer can sometimes save wood that looks hopeless to a DIYer.
Tools and Materials You Will Need
Drying equipment
- Box fan or high-velocity air mover
- Dehumidifier
- Moisture meter
- Clean, dry towels
- Plastic sheeting to isolate the work area
Cleaning supplies
- Mild dish soap or wood cleaner
- Clean sponges and cloths
- Oxalic acid or wood bleach for dark stains
- White vinegar and water mixture for light mold
- Disposable gloves, safety glasses, and an N95 mask
Sanding tools and abrasives
- Random orbital sander or sanding block
- Sandpaper: 80, 120, 150, 180, and 220 grit
- Sanding sponge for corners and detail work
- Tack cloths and vacuum with a brush attachment
Filler, stain, and finish materials
- Two-part epoxy wood filler or stainable wood filler
- Putty knife
- Wood stain or primer and paint
- Oil-based or water-based polyurethane, varnish, shellac, or wax
- Clean brushes, foam brushes, or lint-free rags
- Mineral spirits for cleanup
Step 1: Stop the Water Source and Dry the Wood
How to dry wood effectively
Before you touch a sander, stop the leak. Remove standing water with towels or a wet-dry vacuum. Then open the area to airflow.
Place a box fan or air mover so it blows across the surface. Add a dehumidifier to pull moisture out of the air. If the piece is small enough, move it to a dry, climate-controlled space. Avoid direct heat from hair dryers, space heaters, or sunlight. Fast, uneven drying warps wood and can crack the finish.
Mike removed his swollen vanity cabinet and set it in the garage with a fan and dehumidifier. He checked it every day for a week before he picked up any tools.
Using a moisture meter
A moisture meter is the only way to know if the wood is dry enough to refinish. Pin-style meters press small probes into the wood and give a percentage reading. Pinless meters sit on the surface and are less invasive.
Aim for a moisture content below 15% before sanding or finishing. According to restoration guidelines from SERVPRO, this range helps prevent the new finish from trapping remaining moisture, which causes peeling, bubbling, and mold.
How long does drying take
Minor surface moisture may dry in three to five days. Hardwood floors with cupping can take seven to fourteen days. Deep saturation from a flood can take weeks or even months. The timeline depends on humidity, temperature, airflow, and the thickness of the wood.
Patience here pays off. Refinishing before the wood is dry is the most common reason water-damaged wood projects fail.
Step 2: Clean Stains and Address Mold
Removing white water stains
White water stains live in the finish, not the wood. Start with the gentlest method: wipe the area with a soft cloth and let it air dry. If the ring remains, try the heat method or an oil-based treatment like mayonnaise or petroleum jelly.
Removing dark water stains
Dark stains mean water has reached the wood fibers and reacted with tannins. Lighter dark marks may come out with oxalic acid, a wood bleach that works especially well on oak and walnut. Always follow the product instructions, neutralize with baking soda and water, rinse thoroughly, and let the area dry completely.
Stubborn dark stains may require sanding down to bare wood.
Mold removal basics
Mold can begin growing within 24 to 48 hours of water exposure. For small patches on solid wood, scrub the area with a mixture of white vinegar and water, let it sit for an hour, then wipe clean and dry thoroughly. For larger areas or black mold, follow EPA guidelines and consider professional remediation. The EPA recommends professional help for moldy areas larger than 10 square feet.
Safety note: Always wear gloves, eye protection, and an N95 mask when sanding or cleaning moldy wood. Work in a well-ventilated area.
For a visual walkthrough of the cleaning and sanding process, watch a trusted restoration tutorial on YouTube: how to refinish water-damaged wood.
Step 3: Sand the Damaged Area
Grit progression for water-damaged wood
Start with 80-grit or 120-grit sandpaper to remove the damaged finish and level raised grain. Move to 150-grit, then 180-grit, and finish with 220-grit for a smooth surface before staining or sealing.
Use coarser grits only where necessary. Aggressive sanding removes too much material and can change the profile of the piece.
Sanding with the grain
Always sand with the direction of the wood grain, never against it or in circles. Cross-grain scratches show through stain and finish. Use a random orbital sander for flat areas and a sanding sponge or folded paper for corners and edges.
Vacuum or wipe away dust between grits. Leftover grit particles cause scratches in the next pass.
Dealing with raised grain
Water-damaged wood often develops raised grain as it dries. The fibers stand up and feel rough even after sanding. A light pass with 220-grit sandpaper usually smooths them down. On some woods, dampening the surface very lightly with a wrung-out cloth, letting it dry, and then sanding with 220-grit can help.
This step is sometimes called “grain raising.” It is especially common on oak, ash, and other open-pored woods.
Step 4: Fill Cracks, Gaps, and Gouges
Choosing the right wood filler
For large gaps, missing chunks, or areas that need structural strength, use a two-part epoxy wood filler. It bonds well, does not shrink, and can be shaped and sanded. For smaller nail holes, cracks, or surface defects, a stainable latex or solvent-based wood filler works fine.
Make sure the filler is rated for the conditions the piece will face. Exterior repairs need exterior-rated filler, while interior furniture can use standard products.
Application and sanding technique
Press the filler into the damaged area with a putty knife. Overfill slightly so you can sand it flush later. Let it cure according to the manufacturer’s instructions, then sand smooth with the surrounding surface.
Feather the edges so the repair blends into the surrounding wood. A repair that sits above or below the surface will catch the light and show through the finish.
Color matching tips
Matching filler color to stained wood is rarely perfect. For the best result, choose a filler shade close to the wood’s natural color, then test the stain over the filled area on a scrap piece. Some fillers accept stain better than others. When in doubt, use a darker filler under a lighter stain, since light filler under dark stain looks like a pale scar.
Step 5: Apply Stain or Paint
Staining to match the surrounding wood
Stain is the right choice when you want to keep the natural look of the wood. Apply stain with a brush or rag, working in sections. Let it sit for a few minutes, then wipe away the excess.
Blend the edges into the surrounding finish by feathering the stain outward. Multiple thin coats give better control than one heavy coat. Let each coat dry fully before deciding if you need another.
Testing stain on a hidden area
Always test stain on a hidden spot first, such as the underside of a table or the back of a drawer front. Water-damaged wood can absorb stain unevenly, so the same color may look darker or lighter than expected.
If the repair area absorbs too much stain and looks blotchy, apply a wood conditioner before staining. Conditioner helps porous areas absorb the finish more evenly.
When to paint instead of stain
Paint is the better option when the damage is widespread, the wood species is hard to match, or you want a fresh look. Prime first, then apply two coats of quality paint. Painted surfaces hide repairs better than stained surfaces and can give old furniture a modern, durable finish.
Step 6: Seal with a Protective Finish
Oil-based vs. water-based polyurethane
Polyurethane is the most common protective finish for refinished wood. Oil-based polyurethane adds warmth and an amber tone, and it is very durable. It also takes longer to dry and has stronger fumes. Water-based polyurethane dries quickly, stays clear, and has lower odor, but it can raise grain slightly on the first coat.
For high-traffic floors, oil-based polyurethane is often preferred. For furniture in dry rooms, water-based works well and cleans up with soap and water.
Number of coats and drying time
Most projects need at least two to three coats of finish. Sand lightly with 220-grit or 320-grit sandpaper between coats to remove dust nibs and ensure adhesion. Wipe clean with a tack cloth before applying the next coat.
Follow the manufacturer’s drying times. Oil-based finishes may need 24 hours between coats, while water-based finishes can be recoated in a few hours.
Best finishes for high-moisture areas
For kitchens, bathrooms, and entryways, choose a finish that resists moisture. Marine varnish, exterior polyurethane, and catalyzed finishes offer stronger protection than standard indoor polyurethane. Wax and oil finishes are beautiful but require more frequent maintenance in humid spaces.
If you need replacement boards or custom wood for a built-in, explore VitalWood Global’s custom wood solutions tailored to your project.
Refinishing Water-Damaged Wood by Project Type
Furniture
Furniture is the most common DIY refinishing project. Tables, dressers, and chairs can usually be sanded, filled, stained, and sealed without professional help. Focus on matching the existing color and sheen so the repair does not stand out.
For furniture-specific stain removal before refinishing, see our guide on removing water stains from wood furniture.
Floors
Hardwood floors that have cupped or crowned from moisture can sometimes be sanded flat after drying. However, sanding cupped floors while they are still wet locks in the warp. Wait until the moisture meter shows consistent readings across the room, usually below 12% for interior hardwood floors.
Lisa’s hardwood floor had minor cupping after a spilled bucket sat overnight. She ran fans and a dehumidifier for ten days, then sanded the boards flat and applied three coats of water-based polyurethane. The floor looked new again.
For more on floor-specific water stains, read our guide to water stains on wood floors.
Trim and molding
Trim and molding are usually inexpensive to replace, so refinishing only makes sense when you want to preserve original material or match an existing profile. Use a detail sander or sanding sponge to work around edges and decorative profiles. Fill nail holes and cracks before painting or staining.
Veneer and antiques
Veneer is a thin layer of wood glued to a substrate. Sanding too aggressively can sand through it in seconds. Use very fine grits, light pressure, and frequent checks. For valuable antiques, consider professional restoration. A restorer can match veneers, inlays, and finishes in ways that hide the damage.
For more on delicate surfaces, see our guide to how to remove water stains from wood veneer.
Common Mistakes to Avoid
Refinishing before the wood is dry
This is the single biggest mistake. Trapped moisture under a new finish causes bubbles, peeling, and mold. Always confirm the moisture content with a meter before moving past the cleaning stage.
Using direct heat to speed drying
Hair dryers, heat guns, and space heaters dry the surface too quickly. The outside shrinks while the inside stays wet, causing cracks, warping, and joint failure. Let nature and airflow do the work.
Skipping the test spot
Every wood species and finish combination reacts differently. Test stain, filler, and finish on a hidden area before applying them to the visible surface. A five-minute test can save hours of rework.
Applying too thick a finish
Thick coats look good for a day, then they run, drip, and dry unevenly. Thin, even coats build a harder, more attractive finish. Sand lightly between coats for the best result.
When to Call a Professional

Structural damage signs
Call a professional when the wood is part of the building structure, shows extensive rot, or has been wet for so long that it crumbles. Subfloors, joists, and support posts are not DIY refinishing projects.
Extensive mold
Mold that covers more than 10 square feet, or mold inside walls and cavities, should be handled by a certified remediation company. Disturbing large mold colonies releases spores into the air and can spread the problem.
Large or load-bearing areas
Floors, stairs, decks, and load-bearing beams require specialized equipment and safety knowledge. A flooring contractor or restoration company can dry, level, and refinish these areas correctly.
Tom inherited an antique chair with a split seat and black stains from a flooded basement. The joinery was loose and the veneer had bubbled in several places. Rather than risk destroying it, he took it to a professional restorer. Two months later, the chair was stable, clean, and beautifully refinished.
FAQ
Can water-damaged wood be refinished?
Yes, if the wood is structurally sound, fully dry, and free of active mold. Refinishing follows a clear workflow: dry, clean, sand, fill, stain or paint, and seal. Severely rotted or delaminated wood should be replaced instead.
How long should water-damaged wood dry before refinishing?
Minor surface moisture usually dries in three to five days. Hardwood floors can take seven to fourteen days. Deep saturation from flooding can take weeks to months. Use a moisture meter and wait until the reading is below 15%.
What moisture level should wood be before refinishing?
A moisture content below 15% is a good general target for interior wood before refinishing. Flooring contractors often prefer readings below 12% for hardwood floors. Check several spots because moisture can be uneven.
Can you sand water-damaged wood?
Yes, once the wood is dry. Start with coarse grit to remove damaged finish and level the surface, then progress through finer grits. Always sand with the grain and clean the dust between grits.
How do you fix swollen water-damaged wood?
Swelling happens when wood fibers absorb water and expand. Let the wood dry slowly in a controlled space. Once dry, sand the raised areas flush with the surrounding surface. If the wood does not return close to its original shape, it may need to be replaced.
What is the best finish for water-damaged wood?
The best finish depends on the location. Oil-based polyurethane is durable and warm, making it ideal for floors. Water-based polyurethane dries fast and stays clear. For high-moisture areas, use marine varnish or exterior-grade polyurethane.
How do you remove mold from water-damaged wood?
For small areas, scrub the surface with a mixture of white vinegar and water, let it sit, then wipe clean and dry. For mold covering more than 10 square feet or black mold, hire a professional remediation company.
Should I stain or paint water-damaged wood?
Stain is best when you want to preserve the natural wood look and the damage is limited. Paint is better for widespread damage, difficult color matches, or a modern finish. Prime bare wood before painting.
Conclusion
Refinishing water-damaged wood is a patient process, but the results can be remarkable. Start by stopping the water source and drying the wood completely. Then clean stains and mold, sand the surface smooth, fill any damage, apply stain or paint, and seal with a protective finish. Each step builds on the one before it, so do not rush the drying phase.
The key is honest assessment. Some damage is cosmetic and fixable. Other damage has weakened the wood beyond repair. Knowing when to refinish and when to replace keeps your project safe and your home looking its best.
Ready to start your next sustainable wood project? Get in touch with VitalWood Global for responsibly sourced materials and custom wood solutions that match your build.
For more help, explore our complete guide to removing water stains from wood, plus related guides on dark water stains, removing water stains from wood furniture, water stains on floors, veneer damage, and commercial removers.