
How to Stain Wood: The Complete Guide to a Professional-Quality Finish
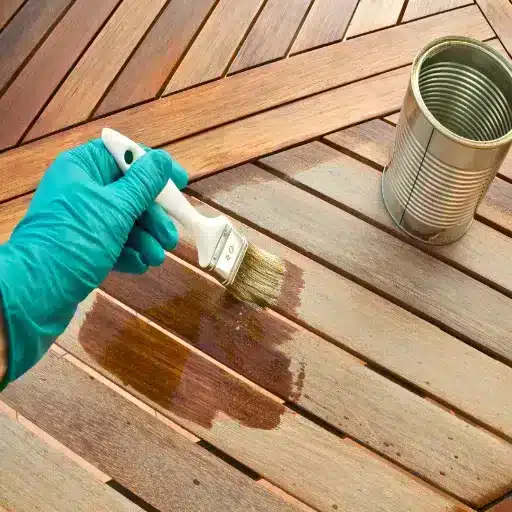
To stain wood properly, sand the surface smooth, apply a pre-stain conditioner on softwoods, brush or wipe on the stain with the grain, let it absorb for 5–15 minutes, wipe off the excess, and seal the wood once it is fully dry. That single sentence is the heart of every successful staining project, whether you are refreshing a deck, finishing a farmhouse table, or adding warmth to interior trim.
Manufacturers like Minwax publish practical wood staining tips for beginners, but this guide connects those basics to species-specific preparation and sustainable sourcing.
But here is the truth most quick tutorials skip: the finish is only as good as the wood beneath it. A blotchy pine tabletop, a sticky oak dresser, or a faded deck usually starts with a mismatch between species, preparation, and product. In this guide, we will walk you through how to stain wood from start to finish. You will learn how to choose the right stain, prepare different wood species, apply color evenly, avoid common mistakes, and protect your work with a durable topcoat. We will also show you why starting with responsibly sourced lumber makes the entire process easier and the result more lasting.
When Maya decided to refinish her grandparents’ pine dresser last spring, she bought the first can of dark walnut stain she saw. She skipped sanding, skipped conditioner, and applied one thick coat. By the weekend, the surface looked like a topographical map: dark valleys around the knots, pale highways across the grain, and tacky spots that never seemed to dry. A month later, she started over with the steps in this guide. The second finish was smooth, even, and still looks rich today. Her mistake was not the stain. It was missing the prep and species knowledge that comes before the first brush stroke.
Key Takeaways
- Wood stain adds color but not protection, so every stained project needs a clear topcoat.
- Softwoods like pine, maple, and birch need a pre-stain conditioner to prevent blotching.
- Oil-based stains dry in 8–12 hours, water-based stains in 2–4 hours, and gel stains in 24–48 hours.
- Always sand progressively from 120-grit to 220-grit, and wipe off excess stain before it dries tacky.
- Starting with quality, sustainably sourced wood gives you a more predictable and longer-lasting finish.
What Does Wood Stain Actually Do?
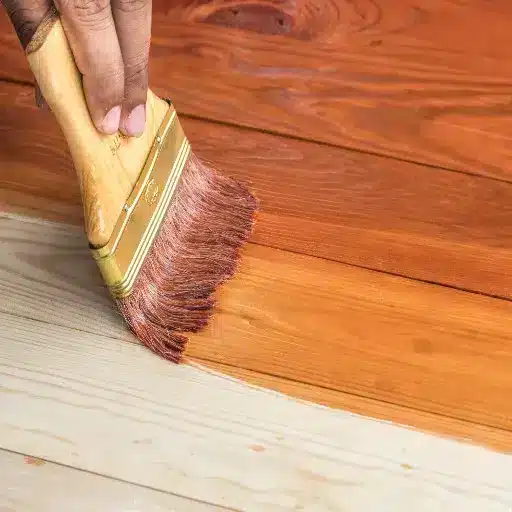
Wood stain is a finish made of colorants suspended in a carrier liquid. When you apply it to bare wood, the carrier penetrates the fibers and deposits pigment or dye inside the pores. Unlike paint, which forms a film on top, stain is meant to soak in. That is why it reveals grain instead of hiding it.
Stain has one job: to add color. It does not waterproof wood. It does not protect against scratches, UV rays, or daily wear. A stained deck will gray. A stained tabletop will scuff. The color layer needs a partner in the form of a sealer, topcoat, or finish. This distinction matters because many beginners assume a dark stain is enough protection on its own. It is not.
The two main colorants in stain work differently. Pigment particles are larger and lodge in open pores, which makes them excellent for emphasizing grain on woods like oak and ash. Dye stains are smaller and penetrate more uniformly, which makes them better for dense or tight-grained woods like maple and cherry. Understanding this difference helps you predict how a stain will behave before you open the can.
Tools and Materials You’ll Need
Before you start, gather everything in one place. Staining is a wet process, and stopping mid-step to find a clean rag can cost you an even finish.
Essential Tools
- Sandpaper: 120, 150, 180, and 220 grit
- Sanding block or random-orbit sander: for flat surfaces
- Tack cloth or lint-free rags: for removing dust
- Natural-bristle brushes: for oil-based stain
- Synthetic brushes or foam brushes: for water-based stain
- Lint-free staining pads or clean cotton rags: for wiping the stain
- Painter’s tape and drop cloths: to protect the surrounding areas
- Stir sticks: never shake stain; stirring keeps pigments suspended
Materials
- Pre-stain wood conditioner: essential for pine, maple, birch, cherry, and poplar
- Wood stain: choose oil-based, water-based, or gel-based on your project
- Topcoat: polyurethane, polycrylic, shellac, varnish, wax, or oil finish
- Mineral spirits or paint thinner: for oil-based cleanup
- Soap and water: for water-based cleanup
- Safety gear: nitrile gloves, safety glasses, and a respirator rated for organic vapors
Optional But Helpful
- A scrap piece of the same wood for testing color
- A work light held at an angle to spot scratches and dust
- Wood filler for nail holes or cracks
Want to make sure you are starting with the right wood for your project? Browse our guide to the best wood species for staining before you buy materials.
How to Prepare Wood for Staining
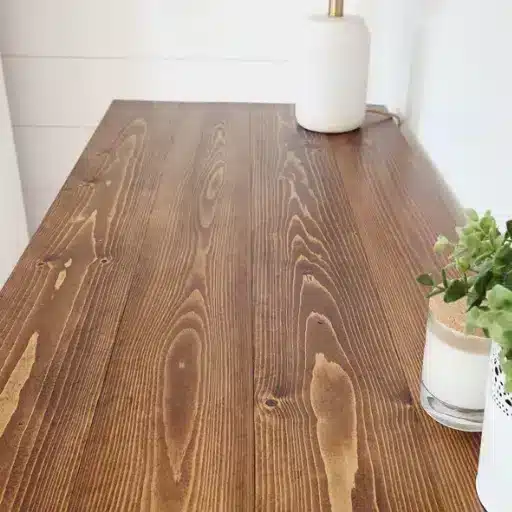
Preparation is where most staining projects are won or lost. The wood must be clean, smooth, and porous enough to accept color evenly.
Start With Clean, Bare Wood
Remove any old finish with a chemical stripper or by sanding down to bare wood. Clean off dirt, grease, and fingerprints. Even the oil from your hands can leave a spot that rejects stain. If you are working with new lumber from a big-box store, a quick wipe with mineral spirits will remove the mill glaze that sometimes coats the surface.
Sand in Progression
Never jump straight to fine-grit. Start with 120-grit to remove scratches and mill marks. Move to 150-grit, then 180-grit, and finish with 220-grit. Each grit removes the scratches left by the previous one. Always sand with the grain, not against it or in circles. Cross-grain scratches become glaring once the stain settles into them.
Raise the Grain
Water-based stains raise the grain, leaving a rough, fuzzy surface. To prevent this, dampen the wood lightly with a clean cloth, let it dry, then give it a final light sanding with 220-grit. This pre-raises the grain so the stain does not do it for you.
Fill Defects
Use a stainable wood filler for nail holes, cracks, or gouges. Standard putty often refuses to accept stain and leaves bright spots. Test the filler on scrap first to confirm it takes color.
Apply Pre-Stain Conditioner
Softwoods and tight-grained hardwoods absorb stain unevenly. The soft earlywood soaks up color like a sponge while the harder latewood repels it. A pre-stain conditioner partially seals the surface so stain penetrates more uniformly. Apply it with a brush or rag, let it sit for 5–15 minutes, then wipe off the excess. Stain within about two hours while the surface is still receptive.
Pro Tip: Match your conditioner to your stain. Use oil-based conditioner with oil-based stain, and water-based conditioner with water-based stain. Mixing the two can cause poor adhesion or a cloudy finish.
For a deeper exploration of surface prep, see our complete guide on how to prepare wood for staining.
Choosing the Right Stain for Your Project
The right stain depends on the wood species, the project location, and the look you want. Here is how the three main types compare.
| Stain Type | Drying Time | Best For | Cleanup | Key Trait |
|---|---|---|---|---|
| Oil-Based | 8–12 hours | Furniture, hardwoods, exterior | Mineral spirits | Deep penetration, rich color |
| Water-Based | 2–4 hours | Indoor projects, light colors, quick turnaround | Soap and water | Low odor, low VOC, fast drying |
| Gel Stain | 24–48 hours | Pine, cabinets, vertical surfaces, blotchy wood | Varies | Sits on the surface, very forgiving |
Oil-Based Stains
Oil-based stains use mineral spirits or similar solvents as a carrier. They penetrate deeply, which makes colors look rich and dimensional on open-grain woods like oak, walnut, and ash. They also have a longer open time, so you can blend sections before the stain starts to set. The tradeoffs are stronger fumes, higher VOC content, and longer drying times. Cleanup requires mineral spirits, and rags must be disposed of carefully because they can spontaneously combust as they dry.
Water-Based Stains
Water-based stains dry quickly and clean up with soap and water. They emit lower VOCs, which makes them a smart choice for indoor projects and homes with children or pets. They tend to raise the grain and can dry too fast on large surfaces, so work in smaller sections. Colors are often lighter and more modern, and UV stability is usually better than oil.
Gel Stains
Gel stains are thick and sit on top of the wood rather than soaking in deeply. That makes them ideal for blotchy woods like pine, birch, and maple, and for vertical surfaces where drips are a problem. They do not highlight grain as well as penetrating stains, but they give you enormous control over color depth. Apply a thin coat, wipe back the excess, and build color with additional coats.
For a full breakdown of each type, read our guide to the types of wood stain. Once you know the type, our guide to wood stain colors will help you choose the right shade.
How to Apply Wood Stain: Step-by-Step
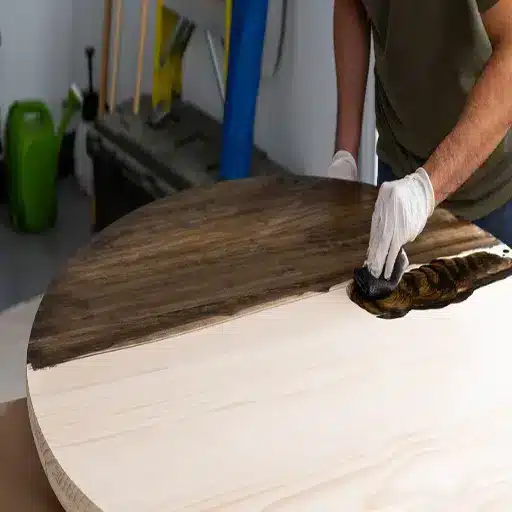
Once the wood is prepared and the stain is chosen, application is straightforward. The key is to work methodically and never let the stain dry on the surface.
Step 1: Stir and Test
Stir the stain thoroughly with a flat stir stick. Pigments settle to the bottom, and shaking can introduce bubbles. Test the color on a scrap piece of the same wood or on a hidden area. The same stain looks dramatically different on pine than on oak.
Step 2: Apply With the Grain
Dip your brush or rag into the stain and apply it liberally in the direction of the grain. Work in small sections, roughly two to three square feet at a time. For large flat surfaces like tabletops, maintain a wet edge to avoid lap marks where one section overlaps another.
Step 3: Let It Sit
Let the stain absorb for 5–15 minutes for oil-based stains, or about 2 minutes for water-based stains. The longer you leave it on, the darker the color. Do not let it dry completely. Dried stain becomes tacky and difficult to remove evenly.
Step 4: Wipe Off the Excess
Use a clean, lint-free cloth to wipe away the unabsorbed stain. Wipe with the grain using smooth, even strokes. Turn the cloth frequently so you are not reapplying stain you just removed. This step is what creates an even finish. Skipping it is the fastest route to a sticky, blotchy surface.
Step 5: Build Color With Additional Coats
If the color is too light after the first coat, let the stain dry fully, then apply a second coat using the same process. Do not try to achieve full darkness in one heavy coat. Thin, repeated coats always look better than one thick one.
When James stained his white oak dining table, he worked in 18-inch sections and set a timer for eight minutes. He wiped each section before moving to the next. The result was a uniform chestnut color with no lap lines. His neighbor, who brushed the whole table at once and forgot to wipe it down, spent the next weekend sanding tacky patches and starting over.
For more details on application technique, see our guide on how to apply wood stain evenly.
Drying, Recoating, and Curing Times
Drying time is not the same as curing time. A stain may feel dry to the touch in a few hours, but still be releasing solvents or water vapor. Sealing too early can trap moisture and ruin the finish.
| Stain Type | Dry to Touch | Recoat Time | Full Cure | Sealer Window |
|---|---|---|---|---|
| Oil-Based | 8–12 hours | 12–24 hours | 48–72 hours | After 24 hours |
| Water-Based | 2–4 hours | 4–6 hours | 24–48 hours | After 4–6 hours |
| Gel Stain | 24–48 hours | 48+ hours | 7 days or more | After 48 hours |
Environmental Factors
Temperature, humidity, and airflow all affect drying. Stain dries best between 60°F and 80°F with moderate humidity. Cold temperatures slow evaporation. High humidity can leave the surface tacky for days. Good airflow helps, but do not point a fan directly at the surface or dust will land in the wet finish.
The Tack Test
Before recoating or sealing, press a clean cotton cloth lightly against the stain. If it pulls or feels gummy, wait longer. If it feels smooth and leaves no residue, you are ready for the next step.
For exact timing by brand and conditions, read our article on how long does wood stain take to dry. The Spruce also publishes a helpful reference on wood stain drying times.
How to Seal Stained Wood for Durability
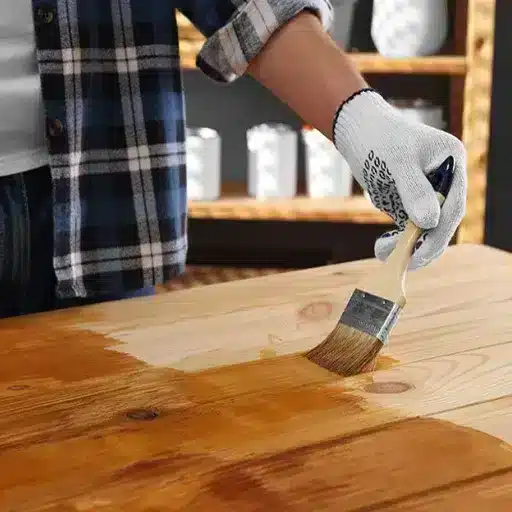
Stain gives you color. A topcoat gives you protection. Without one, your project will absorb water, show scratches, and fade quickly.
Polyurethane and Polycrylic
Polyurethane is the most common protective finish. Oil-based polyurethane adds a warm amber tone and is extremely durable, making it great for floors and tabletops. Water-based polycrylic dries clear, has low odor, and is ideal for light-colored stains and indoor furniture. Apply two or three thin coats, sanding lightly with 220-grit between each one.
Shellac and Varnish
Shellac dries quickly and gives a warm, traditional look. It is not as water-resistant as polyurethane, so it is best for decorative pieces. Varnish, especially marine varnish, offers excellent UV and moisture resistance for exterior projects.
Wax and Oil Finishes
Paste wax and oil finishes like tung oil or Danish oil are easy to apply and repair. They offer less protection than polyurethane but give a soft, hand-rubbed look that many woodworkers prefer for decorative items.
Interior vs. Exterior Sealers
Interior sealers prioritize clarity and scratch resistance. Exterior sealers must block UV rays and flex with temperature changes. Never use an interior polyurethane on a deck or outdoor furniture. It will crack and peel within a season.
Learn more about choosing and applying the right protective layer in our guide on how to seal stained wood.
Wood Species and Stain Behavior
Not all wood accepts stain the same way. Knowing your species saves you from surprises.
Forgiving Woods
Oak, ash, walnut, and mahogany have open grain and relatively even density. Stain penetrates predictably, and the grain pattern becomes more pronounced. These woods are great for beginners and for anyone who wants a dramatic grain show.
Blotch-Prone Woods
Pine, fir, spruce, maple, birch, cherry, alder, and poplar absorb stain unevenly. The soft earlywood turns much darker than the surrounding harder latewood, creating splotches. A pre-stain conditioner is nearly mandatory. On pine, gel stain is often the safest route to an even color.
Exotic and Dense Hardwoods
Teak, ipe, rosewood, and ebony are so dense that penetrating stains may barely darken them. Exotic species also contain natural oils that can repel some finishes. Test thoroughly, and consider dye stains or leaving the wood natural with an oil finish.
If certification matters for your project, ask about our FSC-certified wood options. These materials come from responsibly managed forests and take stain more predictably than rushed or poorly handled lumber.
If you are working with pine, our detailed guide on how to stain pine wood covers every step.
Common Wood Staining Mistakes and How to Fix Them
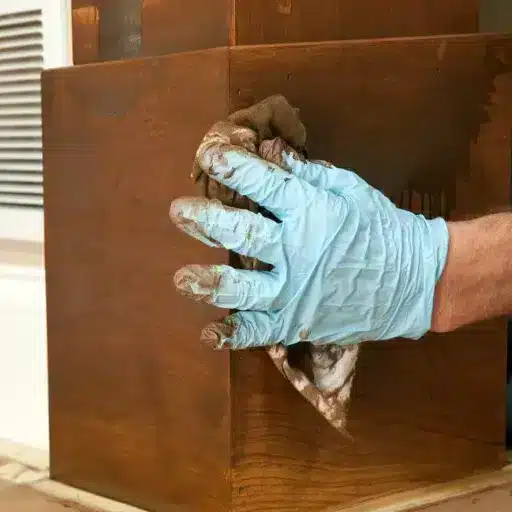
Even experienced finishers run into problems. Here is how to recover from the most common ones.
Blotchy or Uneven Color
This is usually caused by porous earlywood absorbing too much stain. The easiest fix is to apply a gel stain over the blotchy finish in a matching or slightly darker shade. For severe cases, sand back to bare wood and restart with pre-stain conditioner. Our guide on how to fix blotchy wood stain walks through five proven methods. WOOD Magazine also has practical advice on how to avoid or fix blotchy stains.
Sticky or Tacky Finish
A sticky surface almost always means excess stain was left on the wood. Wipe the surface with mineral spirits for oil-based stain or water for water-based stain, then wipe completely dry. If that does not work, strip and restart.
Drips and Runs
On vertical surfaces, use a gel stain or work in very thin coats. If drips occur, wipe them away immediately with the grain. Once dry, sand the affected spot lightly and re-stain.
Color Too Light or Too Dark
If the color is too light, apply a second thin coat after the first is fully dry. If it is too dark, you can lighten it by wiping with mineral spirits immediately after application, or by sanding back and starting over with a lighter shade.
Sustainable Wood and Quality Finishes
The best finishes start long before the stain can is opened. Wood that is properly dried, milled, and stored takes stain more predictably than rushed or poorly handled material. At VitalWood Global, we source from certified sustainable forests because consistent quality matters from forest to finished piece.
Low-VOC and Eco-Friendly Options
Water-based stains and plant-based finishes like linseed oil, tung oil, and beeswax emit far fewer volatile organic compounds than traditional oil-based products. Under EPA regulations, consumer wood stains are limited to 250 grams per liter of VOCs. Many low-VOC products come in well below that. These options are better for indoor air quality and safer for homes with children or pets.
Why Responsibly Sourced Wood Matters
Responsibly sourced lumber is dried to a stable moisture content and handled with care through the supply chain. That stability means less warping, less checking, and more predictable stain absorption. When you start with quality material, you spend less time fixing problems and more time enjoying the result.
Project-Specific Staining Guides
Different projects call for slightly different approaches. Here are quick pointers for three of the most common ones.
Furniture
Furniture sees daily handling, so durability matters. Sand thoroughly, use conditioner on softwoods, choose a color that complements the room, and finish with at least two coats of polyurethane or polycrylic. For a full walkthrough, see our guide on how to stain wood furniture. If you are still selecting material, read our advice on choosing furniture-grade wood for lasting results.
Decks and Outdoor Wood
Decks need exterior-rated stain and sealer. Clean the surface with a deck cleaner, let it dry for 48 hours, and apply a semi-transparent or solid-color deck stain. Horizontal surfaces take more abuse than vertical railings, so expect to recoat every two to three years. Read our complete guide on how to stain a deck. For the structure itself, our overview of durable exterior lumber options will help you pick the right material.
Cabinets and Built-Ins
Cabinets need a hard, washable finish. Gel stain is popular for refinishing existing cabinets because it can go over sealed wood with proper prep. Always remove hardware, label doors, and work in a dust-free area.
FAQ
Do you have to sand wood before staining?
Yes. Sanding opens the pores so stain can penetrate evenly. Stain applied over a sealed or dirty surface will bead up, look blotchy, or flake off.
Can you stain over finished wood?
No, unless you remove or scuff the existing finish first. Stain needs bare wood to absorb into. For sealed cabinets or furniture, sand with 120-grit to degloss the surface, or use a gel stain formulated for application over existing finishes.
What happens if you don’t wipe off the excess stain?
The surface stays tacky for days or weeks. Uncured stain attracts dust, shows fingerprints, and prevents a topcoat from bonding properly. Always wipe off the excess before the stain dries.
Should you use a brush or a rag to apply the stain?
Both work. Brushes give more control over detailed pieces and carved areas. Rags are better for large flat surfaces and for wiping off excess. Many professionals use a brush to apply and a rag to wipe.
Do you need to seal wood after staining?
Yes. Stain adds color but no protection. A clear topcoat seals the color and protects the wood from moisture, scratches, and UV damage.
Can you apply a second coat of stain?
Yes, after the first coat is fully dry. Apply a thin second coat, let it sit briefly, and wipe off the excess. Thick coats do not dry properly and create a gummy finish.
Conclusion
Learning how to stain wood is about more than brushing color onto a board. It is about understanding the wood species, preparing the surface with care, choosing a stain that matches the project, and sealing the finish for years of protection. When you follow these steps, you move from hoping the stain looks good to knowing it will.
Start with quality material, work in thin coats, and always wipe off the excess before it dries. Whether you are staining a pine bookshelf or an oak dining table, the fundamentals stay the same. And when you choose responsibly sourced wood, you are building something that looks beautiful and supports responsible forestry at the same time.
Ready to find the right wood for your next staining project? Contact the VitalWood Global team for personalized recommendations on species, grades, and finishes that match your vision.