
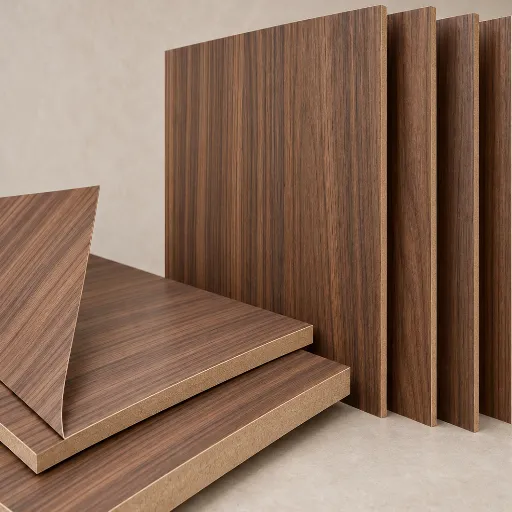
Veneer Panel Replacement: Can One Panel Match the Sequence?
A veneer panel replacement may fit an existing sequence, but species and stain names alone cannot prove the match. Find the original layout. Place the test panel beside both neighbors and compare grain, top direction, color, and sheen. Approve the finished appearance in that opening before committing to the work.
A board can look close on a workbench and still interrupt the wall. If you’re replacing one damaged panel, finding similar wood is only the start. You need to know where that face belongs in the wall.
This guide helps you collect the right records and check both joints. It also helps you choose a scope when one panel cannot meet the agreed look. It shows what a sample can tell you and what needs a view of the whole wall.
Key Takeaways
- Assess the missing position and both neighboring panels, rather than the candidate alone.
- Treat retained flitch material or an unlabeled spare as evidence to investigate.
- Compare the complete finish under project lighting before appearance approval.
- Agree on a wider scope only after reviewing its effect on sound original work.
What a Veneer Panel Replacement Must Match
Within one face versus across the whole elevation
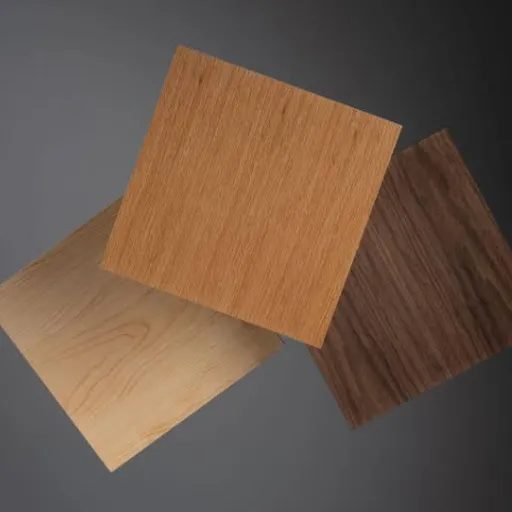
Book matching and slip matching describe how leaves of veneer form a face. A leaf is a thin sheet sliced from wood; a flitch is the source section from which a series of leaves is cut. Book matching turns alternate leaves, while slip matching places them in the same orientation. Our guide to veneer matching patterns explains those arrangements.
Sequence matching links the grain of panels in a set. A blueprint layout assigns each face to a planned wall view, called an elevation. For veneer panel replacement, check both levels. A face with the right pattern may still be wrong for the empty space.
AWI 0642-2024 material requirements distinguish sequence requirements from specially specified made-to-order and blueprint-matched sets. Check the project’s own specification to find out what was required. The standard does not establish an invisible replacement guarantee for every existing wall.
Define appearance and physical requirements separately
For the appearance review, compare figure, leaf seams, both panel joints, top direction, color, and sheen. Figure means the visible grain character, such as an arch or sweeping line. The wood veneer matching chart can help you name the existing arrangement.
Keep that review separate from the fabricator’s checks of dimensions, core, edges, and mounting. A visual match does not prove that the new panel fits the wall system.
Planning a veneer panel replacement? Send VitalWood the panel location and available records to ask what material comparison is possible. Include a view of the whole run, since a close-up alone leaves the panel’s role unclear.
Recover the Original Panel and Flitch Records
Identify the opening before looking for new material
Start with the original elevation or shop drawing. Mark the missing panel and the neighbors on either side. Copy the job’s panel numbers if you have them.
If you don’t, make clear location labels. Mark them as new labels so nobody treats them as factory IDs.
For veneer panel replacement, a useful record connects the material to a position. A species label tells you what the wood is called. It doesn’t show which leaf was used or which end was trimmed. Nor does it tell you if that panel belonged beside a door or in the middle of the run.
Build this veneer panel replacement record before asking for a test panel:
| Record | What to include |
|---|---|
| Location | Room, wall, elevation reference, missing position, and both neighbors |
| Panel identity | Original number, visible face, top arrow, and any back label already accessible |
| Layout | Shop drawing, opening dimensions, joint positions, and nearby corners or doors |
| Material | Species, cut, face arrangement, flitch reference, and retained-stock list if known |
| Finish | Recorded coating system, sheen, approved sample, and past refinishing if known |
| Photographs | Whole elevation, straight-on opening, both joints, and labeled details |
Use the pack as a handoff checklist:
- Mark missing fields as unknown; don’t turn guesses into order details.
- Link each photo to a location label and a top arrow.
- Ask the fabricator to check size and fit.
- Keep sound work in place rather than removing it just to find a label.
What retained material can and cannot prove
Ask the original fabricator whether spare panels, unused leaves, offcuts, or flitch records survive. Their availability is a question, not an assumption. For veneer panel replacement, a finished spare can show more than raw stock. Still check where it was meant to go.
Illustrative scenario: A facilities buyer finds an unlabeled spare stored after fit-out. Its color looks close. But where did it belong, and which end was the top?
Before treating it as the missing panel, the buyer asks for the layout and compares it against both neighbors. The spare remains a candidate until those questions are answered.
The TVAA 2019 Product Manual, printed pages 24-25, explains sequence progression and the effects of trimming and flitch changes. This explains why shared origin alone can’t place a face in the original set.
Retained stock can narrow the search for veneer panel replacement. Keep proof of origin separate from proof of visual fit. A record can show where the wood came from. It can’t prove that the finished face will look right in this space.
Check Both Joints Before Approving Veneer Panel Replacement
Follow the figure across the left and right edges
Place the test panel in the planned opening for review. Keep the intended face and top direction clear. Ask the fabricator how to trial the veneer panel replacement safely before any removal or test fitting. Don’t disturb neighboring panels merely to create a better photograph.
Start with the full wall view. Then look more closely at the joints. Trace an arch, sloping grain line, or change in grain spacing from the left neighbor into the candidate. Repeat at the right edge.
For veneer panel replacement, check each side on its own. A match at one edge does not prove a match at the other.
Look for the kind of progression the original set actually shows. Sequence matching need not make every grain line meet across a cut edge. Check the test panel against the layout and approved sample. Don’t demand a pattern the wall never had.
Illustrative scenario: A candidate seems convincing beside the panel on its left. At the right joint, a broad grain arch meets a narrow, unrelated pattern. The reviewer records that break and asks whether another candidate is available. A change in stain won’t move that grain line.
Keep panel position and orientation visible
Record these observations for the veneer panel replacement review. The table is an assessment aid, not a universal standard or tolerance chart.
| Observation | What to verify | Next action |
|---|---|---|
| Left side fits; right side differs | Leaf order, trimming, and original panel assignment | Compare another candidate or reconsider the scope |
| Figure looks displaced across the run | Candidate position and the full elevation drawing | Review the layout before choosing finish adjustments |
| Contrast changes as you move | Intended face orientation and reflected appearance | Check under agreed light and viewing positions |
| Corner or end relationship is uncertain | Whether an end or corner match was specified | Ask the designer to define the required relationship |
Keep the test-panel label, top arrow, and neighbor labels in the veneer panel replacement record. Note each edge separately: left accepted, right unresolved, for example. Add the grain feature that led to each finding so another reviewer can trace the decision.
If the photo hides those labels, who can tell which panel was reviewed later? Give each test panel its own label. Keep that label with its finished trial.
If contrast changes with your viewing angle, consult the guide to the veneer barber-pole effect. Check that effect before calling every light-dark band a wrong color. Don’t flip fitted faces to test them. Keep to the planned face and wall assembly.
Compare the Finished Face Under Project Lighting
Use the whole finish schedule, not a stain name
Raw veneer can help select stock for veneer panel replacement. It isn’t a finished approval sample.
For veneer panel replacement, ask a qualified finisher to make a finished trial. Use material that represents the proposed panel and the whole planned finish system. Record the preparation, color steps, topcoat, and sheen so the trial can be traced to the proposed work.
Follow the coating supplier’s instructions for drying and assessment. Don’t approve a wet sample as if it were the completed surface. Set the trial beside the old work, facing the same way and in the same plane. Review it before you approve the final work.
Our wood veneer color matching guide covers the broader sample and finish workflow. Here, first check the grain and place in the sequence. Then ask if the finish makes that test panel acceptable. A stain adjustment cannot move a missing grain landmark into place.
Ask what the trial proves about the veneer panel replacement. A small offcut can show color and sheen. It can’t show how the full panel’s grain meets both edges.
Keep a view of the whole face beside the finished sample. Note what each one shows and what it leaves out. Record both under the same test-panel ID so the grain view cannot be mistaken for a different finish trial.
Record what changes with the view and what does not
Use the room’s planned lights. Agree with the owner or designer on where to stand for the review. Note daylight conditions, artificial lights in use, and the angle of the review. Keep those notes with the candidate ID rather than relying on an unlabeled phone image taken under unknown light.
For veneer panel replacement, distinguish a fixed figure mismatch from changing reflected contrast. A grain arch in the wrong place remains a layout issue. Does the contrast grow or fade as you move? Check the face direction, light, and finish before deciding what to change.
TVAA guidance on minimizing color change explains that sunlight can change wood and coating appearance, and protective coatings do not eliminate that change. Do not assume stored material and exposed panels have aged alike. Don’t accept a visible difference just because someone says the new panel will age into a match.
End the veneer panel replacement review with written notes on the remaining differences. Note whether the reviewer accepts them. If not, state what trial or missing fact comes next.
If there’s no agreed limit, ask the owner or designer to set one. Don’t invent a color limit, viewing distance, or wait time for every job.
Choose Between a Single Panel, Local Repair, or a Wider Scope
Match the intervention to the evidence
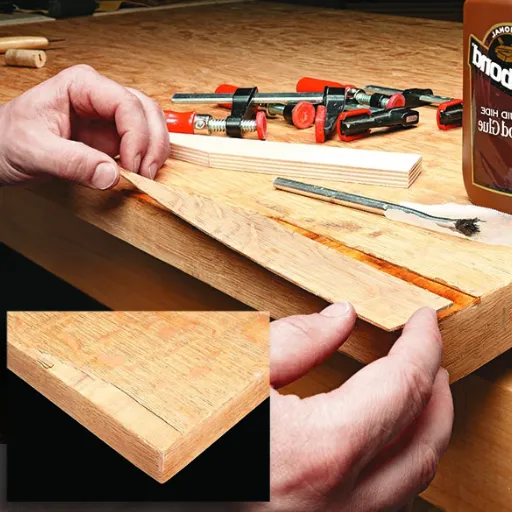
Veneer panel replacement is one possible scope. If damage is confined to a small area and the remaining panel is sound, ask whether specialist localized veneer repair would retain more of the original face. Ask what’s feasible before choosing a filler, glue, or sanding method.
One panel may be enough if it meets the agreed look and fits the assembly. Record what was accepted, including visible differences. Don’t promise an invisible result. Describe what the trial shows and what the owner accepts.
If the grain won’t flow as required, ask the designer and fabricator about other scopes. These could include a wider group, new faces, or a planned visual break. Each veneer panel replacement option needs its own review. Include the effect on sound panels that would otherwise stay in place.
| Scope | Evidence to review | Main limit |
|---|---|---|
| Local repair | Damage assessment and a proposed repair appearance reference | A repair may remain visible and may not suit the damage |
| One panel | Both-joint comparison, finished reference, and physical suitability | A similar species or finish label cannot establish continuity |
| Wider group or new boundary | Revised elevation, material layout, sample, and written scope | Sound work may be affected; the new composition needs approval |
What requires a fresh approval
Illustrative scenario: No candidate demonstrates an acceptable relationship at both joints. The designer proposes treating a wider group as one composition. The owner asks which sound panels would change.
Where would the new group end, and which sample would show the new work? This is a new scope to assess, not proof that a larger intervention is better.
Before extending veneer panel replacement, obtain a revised proposal that names the affected panels and the intended appearance. Ask what evidence is still missing and who must approve it. Ask for the price and timing for that scope. A visual match won’t tell you either.
If records or samples are missing, pause before work starts. Name the gap in the veneer panel replacement review: an untested finish, for example, or grain at the right edge that has not been checked. Make it clear what the next review must resolve.
Veneer Panel Replacement Questions
These questions separate proof of origin from a visual match and final approval. A useful answer should tell you what evidence comes next. Keep these checks separate in a veneer panel replacement review. This matters even more when the original records are missing.
Can one panel in a sequence-matched wall be replaced?
Yes, if a suitable candidate and the agreed review support it. Check the original opening, both neighboring joints, intended orientation, and finished appearance. A panel may be acceptable even if you can still see a difference. If those checks leave a visible break that the owner rejects, assess another candidate or a revised scope.
Will material from the same flitch guarantee a match?
No. Shared origin can help the search, but it does not identify the missing leaf position, trimming, or finished appearance. Check the records and compare the actual candidate beside both neighbors. Retained material is useful evidence for veneer panel replacement; it is not automatic approval of the result.
Can stain fix a break in grain continuity?
Stain can change color, but it cannot relocate a grain arch or restore a missing sequence position. Separate the figure problem from the finish problem before requesting another trial. Ask a qualified finisher about color adjustments only after the candidate’s grain relationship has been reviewed in the intended opening.
Can I approve a replacement from photos?
Use photos to locate the panel, share grain details, and screen candidates. Do not rely on them alone for final finished color and sheen approval. Record the physical comparison and viewing conditions with the candidate ID. A cropped image of one edge leaves the other joint and full elevation unresolved.
What if the original panel records are missing?
Create a location record from the existing elevation, accessible labels, and photographs of both neighbors. Ask the original fabricator what documentation or retained material survives. Keep unknowns explicit. If identity cannot be recovered, assess candidates against a newly agreed appearance reference without claiming to have restored the original sequence.
For arrangement background, Oakwood Veneer’s video below introduces matching techniques, including sequence matching. It is not a demonstration of replacing an installed panel or evidence that a particular candidate will fit your wall.
Approve the Scope Before Work Starts
Approve the test panel and scope you actually reviewed. Choose a clear result: accepted as shown, a new trial needed, or scope review required. Keep a record of the opening, test-panel ID, and both neighbors.
Add the face direction, finish sample, light, remaining differences, and agreed scope. Name the person responsible for appearance approval and retain the reference they accepted.
If the proposal changes from one panel to a wider group, update that record before work starts. In the wider-scope example above, review the new wall layout and sample. Approval of the earlier single panel doesn’t cover the new group.
For a veneer panel replacement inquiry, contact VitalWood with the location, photographs, and available material records. Ask what material could be compared or sourced. Start with the records you have and mark the gaps. Use the next review to decide if one panel can belong in the existing sequence.