
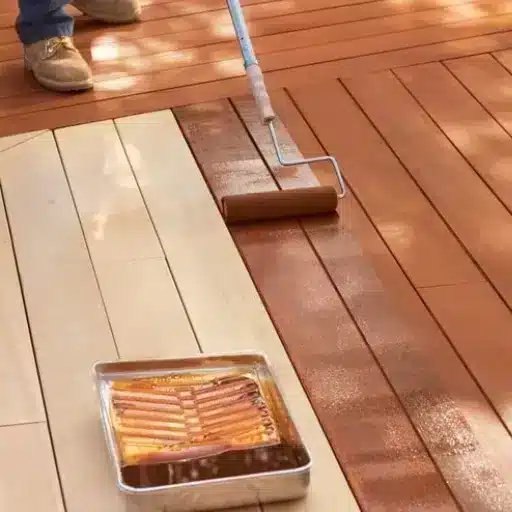
How to Stain a Deck: A Step-by-Step Guide for Long-Lasting Results
Staining a deck takes one weekend if the wood is clean, dry, and the weather is right. The process is straightforward: inspect the boards, clean and brighten the surface, apply a quality exterior stain, then let it cure. The difference between a finish that lasts two years and one that lasts five is almost always the prep work, not the brand of stain you buy.
If you are new to this, do not worry. Deck staining is one of the most beginner-friendly exterior projects, and the results are immediately visible. In this guide, you will learn how to stain a deck from start to finish, including how to choose the right stain, how to prep old or new wood, and how to build a simple maintenance schedule. For the fundamentals of staining any wood project, see our complete guide to how to stain wood.
Key Takeaways
- A well-maintained wood deck can last 10–15 years; regular staining is one of the biggest factors in longevity.
- Always clean and brighten the deck before staining; skipping the brightener is a common cause of uneven color and early failure.
- New pressure-treated lumber needs 8–12 weeks, often longer, to dry before it will accept stain evenly.
- Thin, even coats beat thick ones; over-applying leads to peeling, stickiness, and lap marks.
- Choose an exterior-rated stain with UV and water protection, and match the product to your wood species and climate.
When Should You Stain a Deck?
Timing matters more than most people realize. Stain needs time to penetrate and dry before rain, dew, or foot traffic interrupts the process. The best window is a stretch of dry days with moderate temperatures and low humidity.
Weather Rules
Aim for air temperatures between 50°F and 90°F, with no rain forecast for at least 24–48 hours after application. Avoid staining in direct midday sun, because the surface can dry too quickly and cause “flashing,” where some areas look lighter or duller than others. Windy days are also problematic: dust and debris can stick to wet stain, and overspray from a sprayer can drift onto siding or plants.
Morning application often works best. The deck surface is cool, dew has evaporated, and you have the full day for the stain to set before evening moisture settles.
New Decks Need Time to Dry
Fresh pressure-treated lumber is saturated with preservative chemicals and moisture. If you stain too soon, the finish cannot penetrate properly and may flake within months. Most experts recommend waiting 8–12 weeks minimum, and many contractors prefer 6–12 months for pressure-treated pine to reach a moisture content below 15–19%.
Cedar and redwood are less treated and typically ready sooner, often within 4–8 weeks, but you should still test first. Redwood contains natural tannins that can bleed, so a brief weathering period helps those tannins surface and wash away.
The Water Drop Test
The simplest way to check readiness is the water drop test. Sprinkle a few drops of water onto the deck boards. If the water absorbs into the wood within 1–2 minutes, the deck is ready for stain. If it beads up, the surface still has mill glaze, old sealer, or excess moisture, and you need to clean or wait longer.
Choose the Right Deck Stain
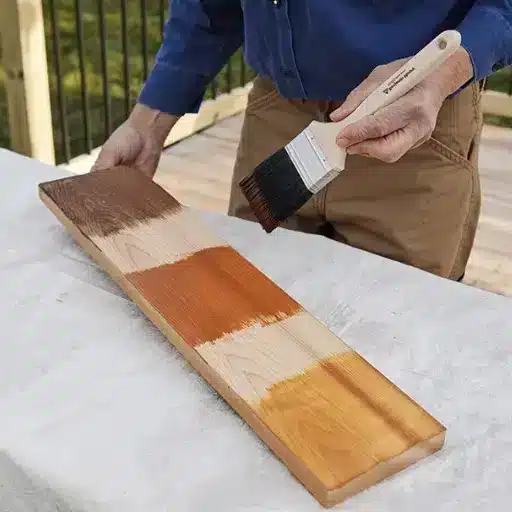
Deck stains are not one-size-fits-all. The right choice depends on your wood species, the look you want, and how much maintenance you are willing to do. For a deeper comparison of oil, water, gel, and specialty stains, read our guide to the types of wood stain. Consumer Reports offers a practical overview of how to stain your deck from a product-testing perspective.
Stain Opacity Levels
| Type | Appearance | UV Protection | Maintenance Frequency | Best For |
|---|---|---|---|---|
| Clear sealer | Shows all grain | Lowest | Every 1–2 years | New, high-quality cedar or redwood |
| Semi-transparent | Tinted; grain visible | Moderate | Every 2–3 years | Most natural wood decks |
| Semi-solid | Some grain visible | Higher | Every 3–4 years | Older decks with minor discoloration |
| Solid color | Opaque; hides grain | Highest | Every 4–6 years | Weathered decks or color change |
Clear sealers preserve the natural look of the wood but offer the least UV protection. Semi-transparent stains are the most popular choice because they add color while letting the grain show through. Semi-solid and solid stains hide more grain but last longer and can unify the appearance of an older deck.
Oil-Based vs. Water-Based Exterior Stains
Oil-based deck stains penetrate deeply and are known for durability, especially on rough-sawn or weathered wood. They are often easier to recoat because a new oil stain can bond with old oil residue. The downsides are longer drying times, stronger odors, and usually higher VOCs.
Water-based stains have improved dramatically. They dry faster, clean up with soap and water, and generally emit fewer VOCs. They are a strong choice for eco-conscious homeowners or projects where low odor matters. However, they can be less forgiving on damp wood and may require more careful surface prep.
Match the Stain to the Wood
- Pressure-treated pine: Accepts most stains well once dry; semi-transparent or semi-solid are common choices.
- Cedar: Naturally resistant to rot; clear or semi-transparent stains show off the grain.
- Redwood: Similar to cedar, but tannin bleed can discolor light stains; darker tones or tannin-blocking prep help.
- Tropical hardwoods: Dense woods like ipe and mahogany do not absorb stain easily; penetrating oil finishes or specialty hardwood products work best.
Tools and Materials You Will Need
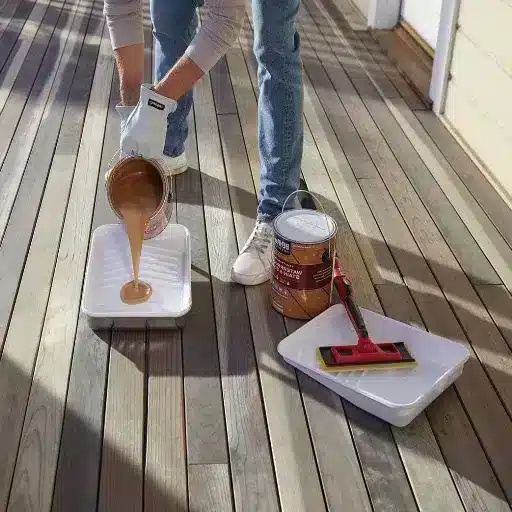
Gathering everything before you start prevents interruptions that can cause lap marks or missed spots. Here is a practical checklist.
Application Tools
- Stiff-bristle deck brush or push broom
- Pump sprayer or paint roller with extension pole
- 4–5 inch stain brush for back-brushing and detail work
- Paint tray and liners
- Drop cloths or plastic sheeting
Prep Supplies
- Oxygen-bleach deck cleaner (sodium percarbonate)
- Wood brightener with oxalic acid
- Deck stripper, if the old stain is failing
- Pressure washer or garden hose with spray nozzle
- Sandpaper or sanding sponge, 60–80 grit
- Wood filler and putty knife for small repairs
Safety Gear
- Safety glasses
- Chemical-resistant gloves
- Dust mask or respirator, especially when sanding pressure-treated lumber
- Long sleeves and pants
Extras
- Moisture meter (optional but useful)
- Rags for wiping excess stain
- Plastic sheeting to protect plants and siding
How to Inspect and Repair the Deck
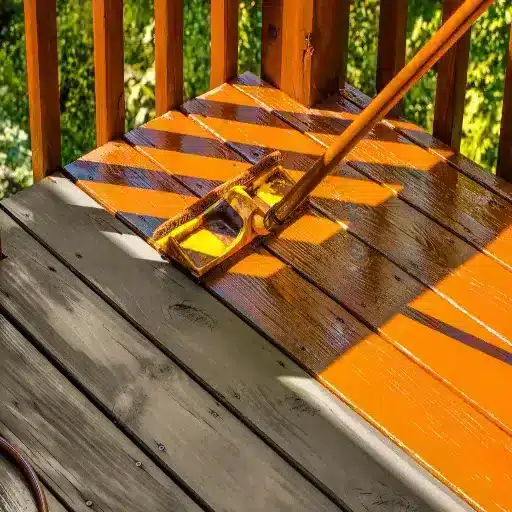
Before you open a can of stain, walk the entire deck and look for problems. Stain cannot fix rot, loose fasteners, or structural movement. It will only make those flaws more visible.
What to Look For
- Loose or popped nails and screws
- Warped, cracked, or splintered boards
- Soft or rotted spots, especially near ledger boards and posts
- Wobbly railings or stairs
- Mold, mildew, or algae growth
Replace any rotted boards and tighten or replace fasteners. Sand splintered areas with 60–80 grit paper until smooth. Cover nearby plants, siding, and concrete with plastic sheeting, because deck cleaners and brighteners can discolor vegetation and masonry.
A Quick Story
Last spring, a homeowner named Priya planned to stain her 10-year-old cedar deck in one Saturday. She skipped the inspection step and started cleaning. Halfway through, she found a soft board near the house ledger that crumbled underfoot. The repair added a full day, but it also prevented a potential safety issue. Her takeaway: always inspect before you prep.
How to Prep a Deck for Staining
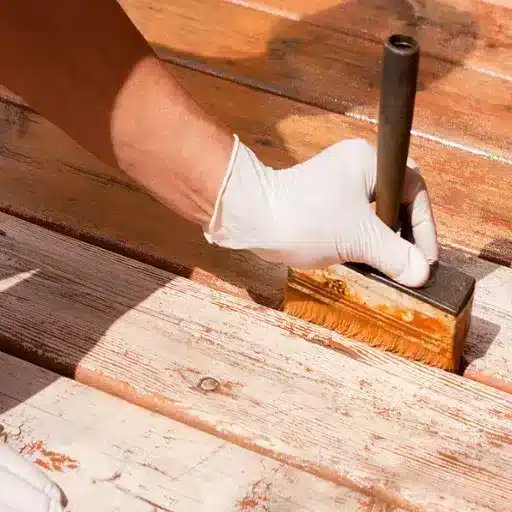
Prep is where most deck staining projects succeed or fail. The goal is to remove dirt, mildew, old finish, and mill glaze so the stain can penetrate evenly. For a full walkthrough of wood prep fundamentals, see our guide to how to prepare wood for staining.
Step 1: Sweep and Remove Debris
Clear the deck of furniture, grills, and planters. Sweep thoroughly, paying attention to gaps between boards where leaves and dirt collect. Use a putty knife or stiff brush to clear out trapped debris.
Step 2: Clean with an Oxygen-Bleach Deck Cleaner
Mix the cleaner according to the manufacturer’s instructions and apply it with a pump sprayer. Let it dwell for 10–15 minutes, keeping the surface damp. Scrub with a stiff deck brush, working with the grain. Rinse thoroughly with a garden hose or a pressure washer on a low setting, around 500–1,500 PSI, held at a consistent distance to avoid etching the wood.
Avoid chlorine bleach when possible. It can break down wood fibers and leave the surface fuzzy, which reduces stain adhesion.
Step 3: Strip Old Stain If Needed
If the existing stain is peeling, flaking, or uneven, use a deck stripper before cleaning. Strippers soften old film-forming finishes so they can be scrubbed or rinsed away. They are generally ineffective on solid stains, paints, or varnish-like coatings; those may need sanding or a dedicated paint stripper.
Step 4: Brighten the Wood
This is the step most homeowners skip, and it is often the reason the stain looks blotchy or fades early. A wood brightener, usually based on oxalic acid, neutralizes the cleaner or stripper, restores the wood’s natural pH, and opens the pores for better stain penetration.
Apply brightener immediately after cleaning, before the wood dries. Let it dwell for 5–20 minutes, then rinse thoroughly. The wood should look lighter and more uniform when you are done.
Step 5: Let the Deck Dry
Allow 48–72 hours of dry weather after rinsing. Use a moisture meter if you have one; readings below 15–19% are ideal. If the water drop test still beads, give it more time.
How to Apply Deck Stain
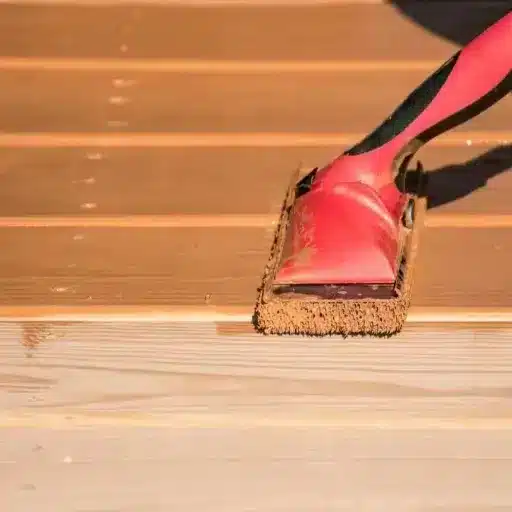
Once the deck is clean, dry, and repaired, application is the satisfying part. The key is thin, even coats and a wet edge.
Mix and Test
Stir the stain thoroughly with a paint stick. If you are using multiple gallons, combine them in a large bucket to ensure color consistency across the whole deck. Test the color on a small hidden area or spare board and let it dry completely before judging.
Start with Railings and Vertical Surfaces
Work from the top down. Stain railings, balusters, and posts first. These vertical surfaces are less likely to show lap marks, and any drips that fall onto the deck boards will be covered when you stain the floor.
Stain the Deck Boards
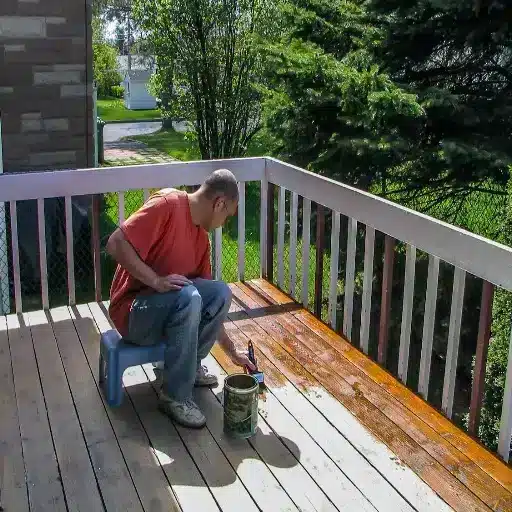
Work in sections of two or three boards at a time, staining from one end to the other. This prevents lap marks where the wet stain meets the dry stain. Maintain a wet edge by working quickly and continuously.
Apply the stain with a roller, sprayer, or brush, then immediately back-brush with a quality stain brush. Back-brushing pushes the stain into the grain and evens out puddles. Pay special attention to the open end grain of boards, which absorbs more stain than the flat surface.
Thin Coats Win
Over-applying stain is one of the most common mistakes. Thick coats cannot penetrate properly, leaving a sticky surface that attracts dirt and never fully cures. If you want a darker color, build it with two thin coats rather than one heavy coat.
Work Toward Your Exit
Plan your path so you do not paint yourself into a corner. Start at the house and work toward the stairs, or start at the far corner and work back toward the access point.
Drying, Recoating, and Curing Times
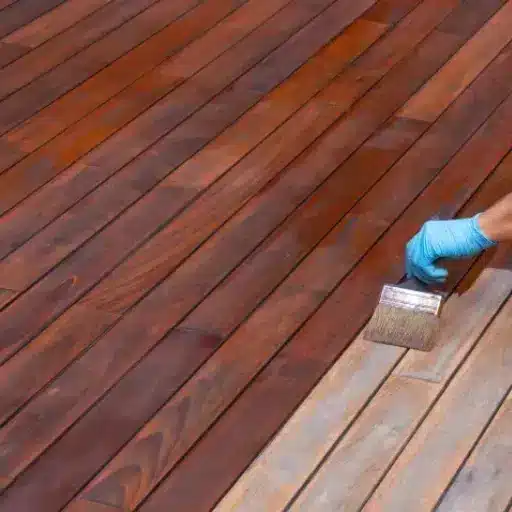
Drying time depends on the stain type, temperature, humidity, and airflow.
General Guidelines
| Stain Type | Dry to the touch | Recoat Time | Light Foot Traffic | Full Cure |
|---|---|---|---|---|
| Water-based | 2–4 hours | 4–6 hours | 24 hours | 48–72 hours |
| Oil-based | 12–24 hours | 24 hours | 24–48 hours | 48–72 hours |
| Solid-color acrylic | 1–4 hours | Per label | 24 hours | 48–72 hours |
Always check the manufacturer’s label for specific recoat instructions. Some stains are designed as one-coat products; adding a second coat can cause peeling. Others benefit from two thin coats for richer color and durability.
When Can You Use the Deck?
Wait at least 24 hours before light foot traffic, and 48–72 hours before replacing heavy furniture. Even if the surface feels dry, the stain may not be fully cured underneath. Avoid dragging furniture across the finish.
How to Seal and Maintain a Stained Deck
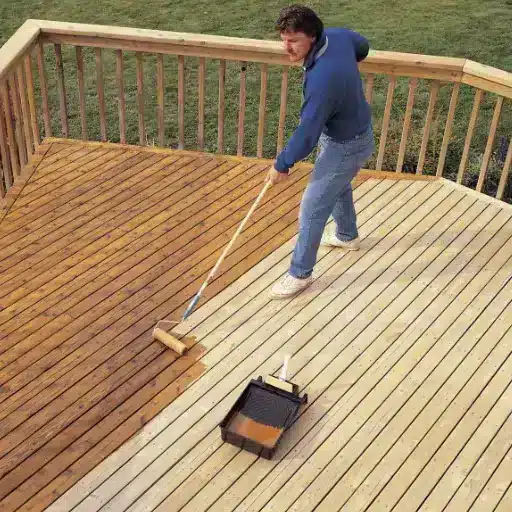
Many modern deck stains include sealer in the formula, so a separate topcoat is not always necessary. However, some penetrating oil stains perform better with a clear water-repellent sealer applied on top. For more on sealers, read our guide on how to seal stained wood.
Annual Cleaning
Once a year, sweep the deck and wash it with a mild deck cleaner. This removes dirt, pollen, and mildew before they degrade the finish. Annual cleaning can extend the life of your stain by a year or more.
Maintenance Coat Schedule
| Stain Type | Full Sun Exposure | Partial Shade | Covered or Screened |
|---|---|---|---|
| Clear sealer | 1–2 years | 2 years | 2–3 years |
| Semi-transparent | 2–3 years | 3 years | 3–4 years |
| Semi-solid | 3–4 years | 4 years | 4–5 years |
| Solid color | 4–6 years | 5–6 years | 6+ years |
South-facing decks in hot climates wear fastest. Shaded decks last longer but may develop mildew, so cleaning is still important.
Signs It Is Time to Restrain
- Water no longer beads on the surface
- Color looks faded or gray in high-traffic areas
- The finish is peeling, cracking, or flaking
- Wood looks dry and thirsty even after cleaning
Deck Staining Mistakes to Avoid

Even experienced DIYers make these errors. Avoiding them will save you time and money.
Staining Over Damp Wood
Moisture trapped under the stain prevents adhesion and leads to early peeling. Wait the full drying time after cleaning, and do not stain if rain is forecast within 24 hours.
Skipping the Brightener
Cleaning raises the wood’s pH and can darken the surface. Brightener restores balance and opens pores. Without it, the stain may absorb unevenly.
Over-Applying Stain
Thick coats look good for a day, then turn sticky, attract dust, and peel. Thin coats penetrate and cure properly.
Staining in Direct Sun
Hot wood causes the stain to dry before it can soak in, leading to lap marks and uneven color. Work in the morning or shade when possible.
Using Interior Stain Outside
Interior stains lack the UV blockers, mildewcides, and water repellents that exterior decks need. Always choose an exterior-rated product.
Sustainable Deck Staining Choices
At VitalWood Global, we believe that a beautiful deck starts with responsible materials. The lumber you choose and the finish you apply both affect the environmental impact of your project.
Start with Responsibly Sourced Lumber
Look for FSC-certified or otherwise responsibly sourced decking. Certified wood comes from forests managed for biodiversity, reforestation, and long-term ecological health. Choosing durable, high-quality lumber also means fewer replacements over the life of the deck.
Choose Low-VOC Exterior Stains
Water-based and plant-oil exterior stains generally emit fewer volatile organic compounds than traditional oil-based products. Lower VOCs mean better air quality during application and less environmental impact. The EPA explains how volatile organic compounds affect indoor and outdoor air quality.
Dispose of Leftovers Responsibly
Oil-soaked rags can spontaneously combust if piled together. Lay them flat to dry outside, store them in a sealed metal container with water, or follow local hazardous waste guidelines. Leftover stain should never be poured down drains or onto soil.
Longevity Is Sustainability
A stain that lasts five years instead of two reduces the total product used, the labor involved, and the waste generated. Investing in proper prep and a quality finish is one of the simplest ways to make your deck project more sustainable.
Frequently Asked Questions
How long should a new deck dry before staining?
New pressure-treated lumber typically needs 8–12 weeks minimum, and often 6–12 months, to reach a moisture content suitable for staining. Cedar and redwood may be ready in 4–8 weeks. Always use the water drop test to confirm.
Can you stain a deck without cleaning it first?
You can, but the results will be poor. Dirt, mildew, and old finish prevent the stain from penetrating evenly. Cleaning and brightening are essential steps for a long-lasting finish.
How often should you stain a deck?
Clear sealers usually need renewal every 1–2 years. Semi-transparent stains last 2–3 years, semi-solid stains 3–4 years, and solid-color stains 4–6 years. Exposure, climate, and foot traffic all affect longevity.
What happens if it rains after staining a deck?
If light rain falls within a few hours of application, the finish may develop streaks, spots, or uneven color. Heavy rain can wash away uncured stains. Check the forecast and allow at least 24–48 hours of dry weather after staining.
Should I use a brush, roller, or sprayer?
Each has a role. Brushes offer the most control and work well for railings and back-brushing. Rollers cover large areas quickly. Sprayers are fast but require back-brushing for even penetration. Many pros use a roller or sprayer first, then back-brush with a stain brush.
Can I use interior wood stain on a deck?
No. Interior stains do not contain the UV inhibitors, water repellents, or mildewcides that exterior decks need. They will fade and fail quickly outside.
How do I fix peeling deck stain?
Peeling usually means the surface was not clean or dry enough, or the stain was over-applied. Strip or sand the peeling areas, clean and brighten the deck, then apply a thin coat of exterior stain.
Conclusion
Staining a deck is one of the most rewarding outdoor projects you can take on. The results are immediate, the protection is real, and the maintenance is manageable if you stay ahead of it. The formula is simple: inspect, clean, brighten, dry, stain thin, and maintain on schedule.
Start with quality, responsibly sourced lumber, choose an exterior-rated stain suited to your wood and climate, and do not rush the prep. For a complete guide to the staining process, read how to stain wood. For personalized recommendations, contact our team. We are here to help you build a deck that looks great and lasts for years.