
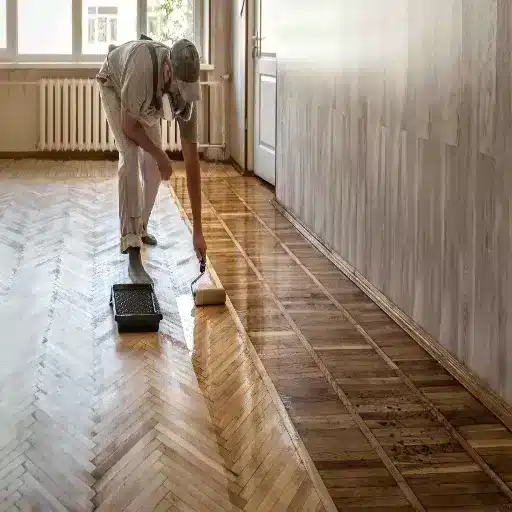
Refinishing Engineered Hardwood Floors: A Step-by-Step 2026 Guide
Yes, you can refinish engineered hardwood floors — but only if the real-wood wear layer is thick enough to survive sanding. Most engineered floors with a 2 mm veneer or less should not be fully sanded; they need a screen-and-recoat or replacement instead. Understanding that single distinction saves homeowners thousands of dollars and keeps usable wood out of landfills.
What would you rather do: spend $6,000 replacing a floor that still has life in it, or spend $1,500 refreshing it the right way? That decision starts with knowing what is actually under your finish. In this guide, you will learn how to assess your engineered hardwood, choose between sanding and screening, pick a durable low-VOC finish, and budget the project accurately. By the end, you will know whether refinishing is the smart move — and how to avoid the one mistake that ruins an engineered floor forever.
Key Takeaways
- Engineered hardwood can be refinished only when the wear layer is roughly 2 mm or thicker; thinner veneers should be screened and recoated, not sanded.
- A screen-and-recoat costs $2–$4 per square foot professionally and removes almost no wood, making it the safest refresh for thin veneers.
- Full sanding and refinishing runs $3–$8 per square foot and can return about 147% of its cost in home value, according to NAR remodeling data.
- Water-based polyurethane dries faster and emits fewer VOCs than oil-based, making it the better choice for households focused on indoor air quality.
- Refinishing extends the life of certified, sustainably sourced engineered wood and keeps the embodied carbon in that floor out of a landfill.
Can You Refinish Engineered Hardwood Floors?
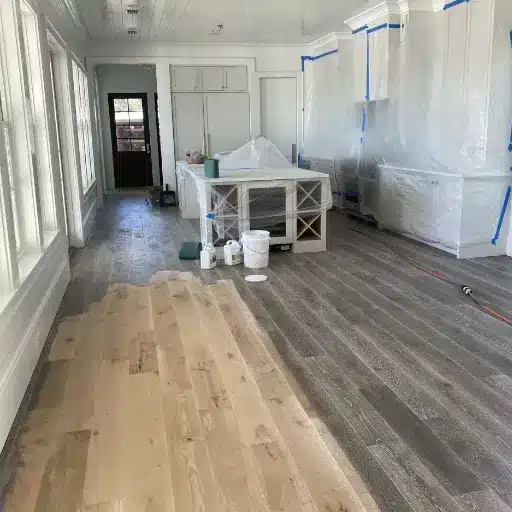
The short answer is yes — with a caveat. Engineered hardwood is real wood, but only the top layer. Below that veneer sits a plywood, HDF, or solid-engineered core that is not meant to be exposed. Sand through the veneer and you cannot fix the floor; you must replace it. That is why the first step in any refinishing project is not picking a stain color — it is confirming how much wood you have to work with.
Wear-layer thickness is the deciding factor. Here is the rule of thumb professionals use:
| Wear Layer Thickness | Can You Sand? | Typical Refinishing Potential |
|---|---|---|
| ≤ 1 mm | No | Screen-and-recoat only, or replace |
| 2 mm | Maybe once | One very light sanding with extreme care |
| 2.5–3 mm | Yes | 1–2 light sandings |
| 4–6 mm | Yes | 2–5 sandings, similar to solid hardwood |
| 6 mm+ | Yes | Multiple sandings, comparable to solid wood |
If you do not know your wear layer, check the original product specs, look for a spare plank from installation, or inspect the edge of a board under a baseboard or floor vent. Some manufacturers stamp the thickness on the back. If you still cannot find it, err on the side of screening rather than sanding.
When Lisa bought her 2018 townhome, the engineered oak floors looked tired but were structurally sound. She checked the product label left in a closet and found a 3 mm wear layer. That one number meant she could safely sand and refinish rather than tear out perfectly good flooring. The refresh cost her $3,200 instead of the $9,000 quote she had received for replacement.
If you are choosing engineered wood flooring for a new project and think you may refinish it someday, specify a wear layer of at least 3 mm. Thicker veneers cost more upfront, but they buy you decades of additional service life.
How to Tell If Your Engineered Hardwood Is Ready for Refinishing
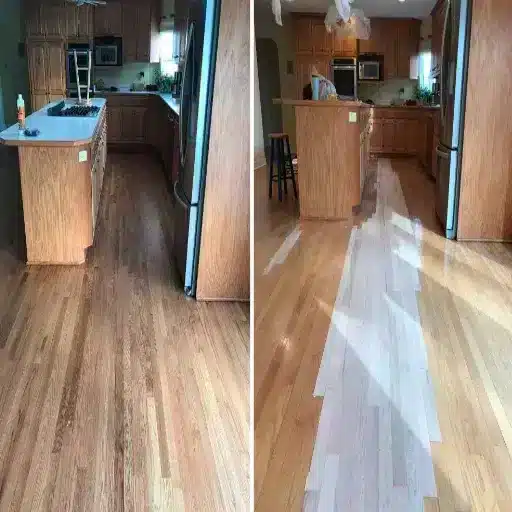
Not every worn floor needs refinishing, and not every refinishing candidate is worth saving. Before you rent a sander, run through this checklist.
Inspect the surface damage. Superficial scratches and a dull finish are ideal for refinishing. Deep gouges that reach the core, widespread water stains, or boards that cup or crown indicate structural problems. Refinishing will not fix those.
Test the finish. Drip a few drops of water on the floor. If the water beads up, the finish is still doing its job. If it soaks in within a few minutes, the finish has worn through and the wood is unprotected.
Measure the wear layer. Use a small mirror and flashlight to look at the edge of a plank under a heating vent, or remove a floor register for a clear view. Count the visible wood layers. If the top veneer looks thinner than a credit card edge, do not sand it.
Check for moisture damage. Press on suspected areas with your foot. Soft spots, squeaks, or visible mold mean the core has taken on moisture. Sanding a compromised core can make the floor worse.
Identify the surface texture. Hand-scraped, distressed, or wire-brushed floors lose their character if sanded flat. A screen-and-recoat preserves that texture while adding a fresh protective layer.
For a full comparison of how engineered hardwood holds up over time versus solid wood, read our guide on engineered hardwood vs solid hardwood. The refinishing limits are one of the biggest differences between the two.
Refinishing Methods: Full Sand vs. Screen and Recoat
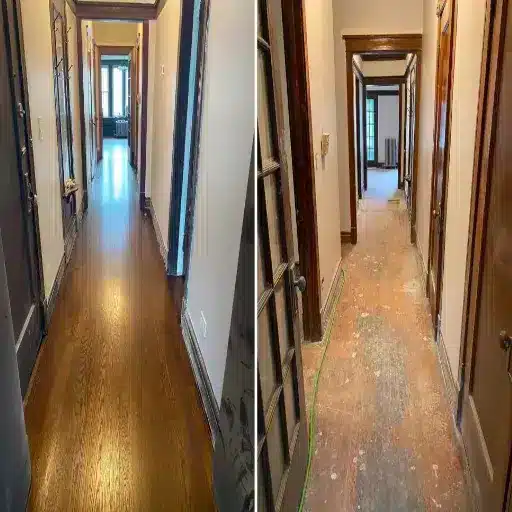
There are three ways to refresh engineered hardwood. The right one depends entirely on wear-layer thickness and the condition of the floor.
Full Sand-and-Refinish
This is the most dramatic transformation. It removes the old finish, smooths scratches, and lets you change stain color. It is also the riskiest method for engineered floors because every sanding pass removes a small amount of real wood.
Use this method only when:
- The wear layer is 2.5 mm or thicker
- Scratches are deep enough that screening cannot blend them
- You want to change the stain color
- The floor has no structural damage
Always use a random-orbital or lightweight orbital sander, never a drum sander. Drum sanders remove wood too aggressively and are the fastest way to destroy an engineered floor.
Screen and Recoat
Screening scuffs the existing finish with a fine abrasive screen, then a new topcoat bonds to it. Almost no wood is removed, so it works even on thin veneers.
Use this method when:
- The finish is dull, but the wood underneath is fine
- Scratches are shallow
- The wear layer is 1 mm or less
- You want the lowest-risk refresh
This is often the best first move. If screening does not solve the problem, you can still sand later — assuming the veneer is thick enough.
Chemical Abrasion / No-Sand Systems
These kits etch the old finish chemically so a new coat can adhere. They are marketed as DIY-friendly, but results vary. Some systems work well on factory-finished floors; others peel within a year. If you choose this route, follow the manufacturer’s instructions exactly and test in a closet first.
How to Refinish Engineered Hardwood Floors Step by Step
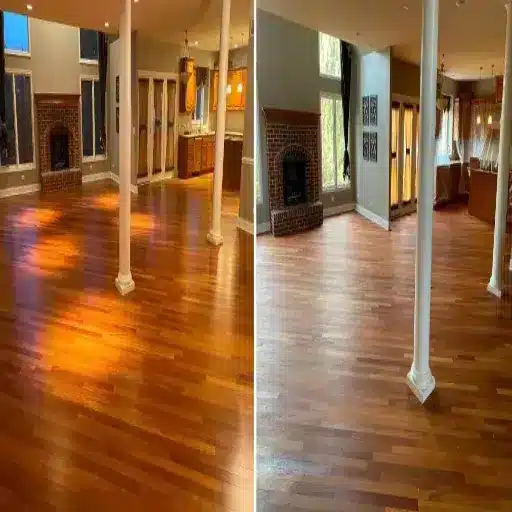
If you have confirmed that sanding is safe, here is the professional workflow.
- Clear and prep the room. Remove furniture, rugs, and curtains. Seal doorways and vents with plastic to contain dust. Tape off baseboards if you are not removing them.
- Repair damage. Fill small gouges with wood filler that matches the species. Replace boards that are split, warped, or water-damaged before you start sanding.
- Test in a hidden area. Sand a small spot in a closet or under an appliance. Check that you are not seeing plywood or fiberboard appear. If you do, stop immediately.
- Sand lightly with the grain. Use 100–120 grit on a random-orbital sander for the first pass. Follow with 150 grit for the final pass. Never let the sander sit in one spot.
- Vacuum and tack-cloth thoroughly. Dust is the enemy of adhesion. Use a HEPA vacuum, then wipe with a tack cloth dampened with mineral spirits.
- Apply stain if desired. Oil-based stains penetrate well but emit strong fumes. Water-based stains dry faster and smell less. Work in small sections and wipe off excess evenly.
- Apply the finish. Use a high-quality applicator and lay down two to three thin coats of polyurethane. Thin coats dry more evenly and are less likely to bubble or peel.
- Buff between coats. Once each coat is dry, lightly screen or buff the surface so the next coat bonds. Vacuum and tack again before applying the next coat.
- Cure before use. Most finishes are dry to the touch in 24 hours, but full curing takes 5–7 days. Avoid heavy furniture, rugs, and water during that window.
For details on how a new engineered floor should be installed so it is ready for future refinishing, see our engineered wood flooring installation guide.
Choosing the Right Finish for Engineered Hardwood
The finish you choose affects durability, appearance, indoor air quality, and maintenance. Here is how the three main options compare.
Water-Based Polyurethane
Water-based finishes are clear, fast-drying, and low-odor. They do not yellow over time, so they are ideal for white, gray, or natural oak floors. Many water-based products meet FloorScore or GREENGUARD standards for low VOC emissions. For households with children, pets, or respiratory sensitivities, this is usually the best choice.
Oil-Based Polyurethane
Oil-based finishes are durable and self-leveling, giving a smooth, amber-rich look. They take longer to dry — often 24 hours between coats — and emit stronger fumes until cured. The amber tone deepens over time, which works beautifully on warm-toned woods like walnut or red oak.
Natural Oil / Hardwax Oil
Hardwax oils penetrate the wood rather than forming a plastic-like film. They feel warm underfoot, hide scratches well, and are easy to spot-repair. The trade-off is lower scratch resistance than polyurethane and more frequent maintenance. They are popular in Scandinavian and modern interiors.
When sustainability matters, look for finishes certified low-VOC by FloorScore or GREENGUARD Gold. These choices protect indoor air quality and align with the values behind certified, responsibly sourced wood.
Cost to Refinish Engineered Hardwood Floors
Refinishing is almost always cheaper than replacement, but prices vary by method, location, and floor condition.
| Approach | Typical Cost per Sq Ft | Best For |
|---|---|---|
| DIY screen-and-recoat | $0.50–$1.50 | Thin veneers, confident DIYers |
| Professional screen-and-recoat | $2–$4 | Thin veneers, busy households |
| Professional full refinishing | $3–$8 | Thicker veneers, stain changes |
| Full replacement | $8–$25 | Core damage, thin veneers, layout changes |
A 500-square-foot living room might cost $1,500–$4,000 to refinish professionally. The same space could cost $4,000–$12,500 to replace. That gap is why accurate wear-layer assessment matters so much.
The return on investment is strong. According to the National Association of Realtors, hardwood floor refinishing recovers about 147% of its resale cost — the highest ROI of any interior remodeling project tracked in their report. Even if you are not selling soon, that number reflects how much buyers value refreshed wood floors.
Factors that increase cost:
- Repairs to subfloor or individual boards
- Removing old carpet adhesive or staples
- Stain color changes
- Applying more than two finish coats
- Dustless sanding systems
- Working in homes built before 1978, which may require EPA RRP lead-safe practices
DIY vs. Hiring a Professional

The question is not just about money. It is about risk tolerance, equipment access, and the thickness of your wear layer.
When DIY Makes Sense
- The wear layer is 3 mm or thicker
- You have experience with power sanders
- The floor needs only light sanding or screening
- You can dedicate 3–5 days to prep, finishing, and curing
- You have proper dust containment and ventilation
When You Should Hire a Pro
- The wear layer is 2 mm or less
- The floor covers a large area or multiple rooms
- You want to change stain color
- Your home was built before 1978 and may contain lead-based finishes
- You need dustless sanding for health or cleanup reasons
- The floor has structural issues that need diagnosis
Professional refinishers also carry insurance. If they sand through the veneer, the cost of replacement is on them. If you do it yourself, the cost is on you.
When Marcus’s neighbor tried to save money by sanding his own 2 mm engineered floor, he burned through the veneer in two spots near a window. The $400 rental turned into a $7,000 replacement. The lesson: thin veneers reward caution, not courage.
When Refinishing Engineered Hardwood Is Not Worth It
Sometimes the most sustainable choice is admitting a floor has reached the end of its life. Refinishing is not the answer when:
- The wear layer is 1 mm or less and the finish is worn through
- Boards are cupping, crowning, or delaminating
- The core shows signs of moisture damage or mold
- Large areas have been sanded before and little veneer remains
- The floor was installed with adhesives containing asbestos
- You want a completely different wood species or plank width
In those cases, replacement with a high-quality, certified engineered floor may be the better long-term investment. Look for products with a wear layer of 3 mm or more if you want the option to refinish again in 15–20 years.
Frequently Asked Questions
How many times can you refinish engineered hardwood floors?
It depends on the wear layer. A 2 mm veneer may allow one careful sanding. A 4–6 mm veneer can usually handle 2–5 sandings. Floors with 6 mm or thicker veneers behave similarly to solid hardwood.
Can you stain engineered hardwood a different color?
Yes, if the wear layer is thick enough to be sanded down to bare wood. Once sanded, the floor accepts stain like solid hardwood. Thin veneers cannot be safely stained a different color because you cannot remove enough finish to expose fresh wood.
How long does refinished engineered hardwood take to cure?
Most polyurethane finishes are dry to the touch in 24 hours and ready for light foot traffic in 24–48 hours. Full curing takes 5–7 days. Wait that long before placing rugs or heavy furniture.
Is it cheaper to refinish or replace engineered hardwood?
Refinishing is almost always cheaper. Professional refinishing runs $3–$8 per square foot, while replacement typically costs $8–$25 per square foot. Screening and recoating is even less expensive at $2–$4 per square foot.
Can you refinish prefinished engineered hardwood?
Yes, if the wear layer is thick enough. Prefinished floors often have aluminum-oxide coatings that are extremely hard, so the initial sanding pass takes longer. A pro with the right abrasives is usually the safer choice.
What happens if you sand through the veneer?
You will expose the plywood, HDF, or fiberboard core underneath. That area cannot be repaired by refinishing. The damaged board must be replaced, or the entire floor must be replaced if the damage is widespread.
Conclusion
Refinishing engineered hardwood floors is one of the smartest ways to extend the life of a beautiful, sustainable floor — but only when you respect the wear layer. Thicker veneers give you the freedom to sand, stain, and transform. Thinner veneers still respond well to a screen-and-recoat, which refreshes the look without removing precious wood.
The real win is not just saving money. It is keeping a floor in service, preserving the carbon stored in that wood, and avoiding the waste of a full replacement. Whether you are a homeowner planning a weekend project or a specifier choosing materials for a commercial client, the principle is the same: buy thickness, maintain the finish, and refresh before the damage reaches the core.
If you are selecting engineered wood flooring for a project where long-term value matters, prioritize a thicker wear layer from the start. Explore our complete guide to engineered wood flooring to learn how construction, species, and certification affect the floor you will live with for decades.
Ready to source engineered hardwood built to last? Contact the VitalWood Global team for certified, sustainably sourced options and expert guidance on wear layers, finishes, and project specifications.