
Engineered Wood Flooring Installation: 2026 Step-by-Step Guide
The best way to approach engineered wood flooring installation is simple. Choose the right method for your subfloor. Prep the surface carefully. Acclimate the planks. Then follow the manufacturer’s instructions exactly. Most DIYers succeed with a floating click-lock floor over concrete or plywood. Glue-down and nail-down methods deliver a sturdier feel but require more skill, more tools, and more time.
That sounds simple enough, but one skipped step can turn a beautiful floor into a warranty dispute within a year. Marcus in Seattle learned this the hard way. He installed engineered maple in his basement over the summer without a moisture barrier and without acclimating the boards.
The planks looked perfect for three months. By December, cupping appeared along every third row. The repair cost him nearly twice what the original install would have cost if done correctly.
This guide explains how to install engineered wood flooring the right way, whether you are a homeowner doing your first room or a professional specifier writing installation notes for a multi-unit project. We will cover all three common methods, the prep work that prevents callbacks, and the sustainability choices that matter for indoor air quality.
Key Takeaways
- Floating, glue-down, and nail-down are the three main engineered wood flooring installation methods, and each suits a different subfloor and skill level.
- Moisture testing and acclimation are not optional; concrete should read below 3 lbs/1,000 sq ft/24h or 75-80% RH, and boards need 48 hours to 5 days to acclimate.
- A 1/4 to 1/2 inch expansion gap around the perimeter prevents buckling, and end joints should be staggered at least 6 inches apart.
- Low-VOC adhesives and certified materials protect indoor air quality and align with sustainable building practices.
- Engineered wood flooring installation cost ranges from $7-$12/sq ft for floating to $10-$16/sq ft for glue-down.
Which Engineered Wood Flooring Installation Method Is Right for You?
Before you open a single box, decide how the floor will connect to the subfloor. The method you choose affects the tools you need, the time the job takes, the final feel underfoot, and how much the project costs.
Floating / Click-Lock
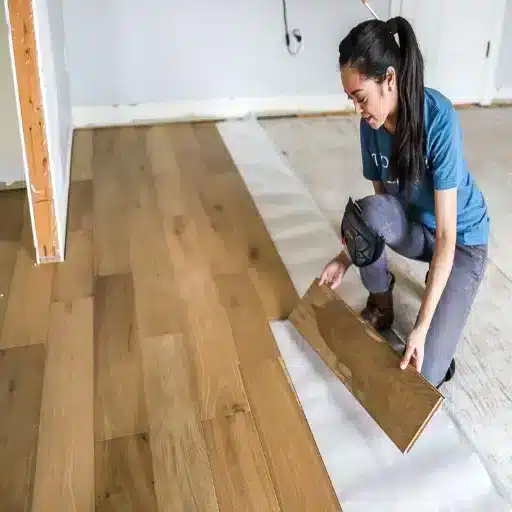
A floating floor clicks together like puzzle pieces and rests on top of an underlayment. The boards are not attached to the subfloor at all. This is the fastest engineered wood flooring installation method and the most forgiving for beginners.
Floating floors work especially well over concrete slabs, existing tile, and radiant heat systems. Because you do not use adhesives, there are no VOC emissions from glue, and cleanup is minimal. The downside is that the floor can feel slightly less solid than a glued or nailed installation, and the hollow sound means a quality underlayment is essential.
Glue-Down
With glue-down installation, you trowel adhesive directly onto the subfloor and press each plank into place. This method is popular for concrete slabs, large commercial areas, and anywhere you want a dense, quiet floor.
The floor feels more solid underfoot because it is bonded to the slab. There are no fasteners to hide, and transitions are easier to manage. The tradeoffs are messier work, longer cure times, and the need for proper ventilation when using urethane adhesives. If indoor air quality matters for your project, choose a low-VOC or zero-VOC adhesive and verify that it meets FloorScore or GREENGUARD standards.
Nail-Down / Staple-Down
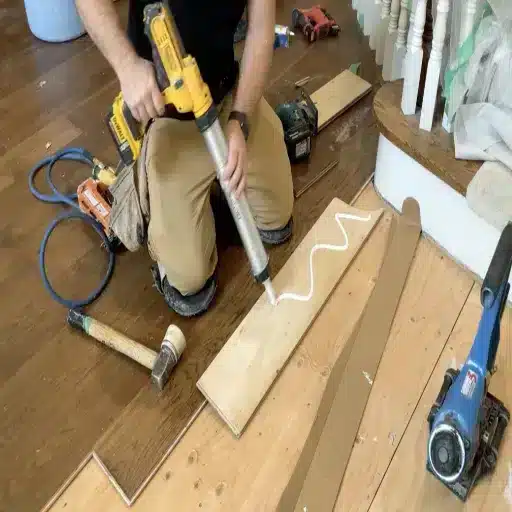
Nail-down installation is the traditional approach for plywood or OSB subfloors. You fasten each plank through the tongue at an angle so the next row hides the staple or cleat. This method gives a permanent, solid feel that many homeowners and builders prefer.
The catch is that you need a wood subfloor of adequate thickness, a flooring nailer or stapler, and enough experience to place fasteners consistently without splitting tongues. It is usually the fastest method for professionals but less forgiving for first-timers.
Need help choosing the right product before you install? See our guide to the best engineered wood flooring for different rooms, budgets, and sustainability goals.
Tools and Materials You’ll Need
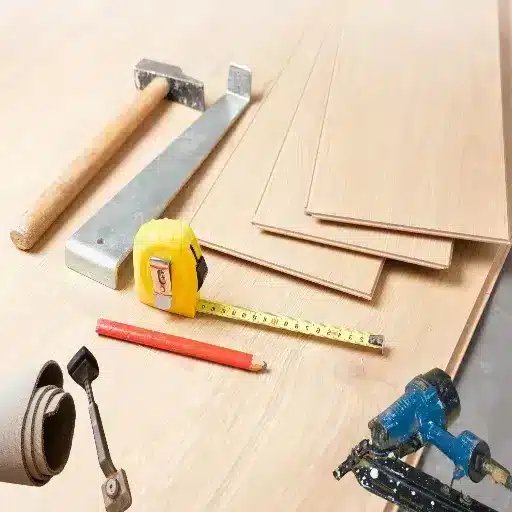
The exact list depends on your installation method, but every job starts with a few basics. Gather these before you begin so you are not running to the hardware store mid-project.
Essential Tools
- Tape measure and chalk line for layout
- Miter saw or table saw for end cuts
- Jigsaw for notching around door casings and vents
- Hammer, tapping block, and pull bar for floating floors
- Notched trowel for glue-down installations
- Flooring nailer or stapler for nail-down installations
- Moisture meter and hygrometer
- 1/4 to 1/2 inch spacers for expansion gaps
- Safety glasses, knee pads, and dust mask
Materials by Method
- Floating: underlayment with or without built-in vapor barrier, foam or cork padding, transition strips, baseboards or quarter-round
- Glue-down: urethane or low-VOC wood flooring adhesive, adhesive remover, 100 lb floor roller
- Nail-down: 1-1/2 to 2 inch flooring cleats or staples, underlayment paper if required
Safety and Indoor Air Quality
Engineered wood flooring installation can expose you to sawdust and adhesive fumes. Wear a respirator when sanding or cutting. Open windows or run fans during adhesive work. Keep pets and children out of the space until adhesives have fully cured.
Choosing adhesives labeled low-VOC or zero-VOC reduces both odor and long-term emissions. This is especially important for bedrooms, schools, and healthcare settings.
Subfloor Preparation: The Step Most People Rush
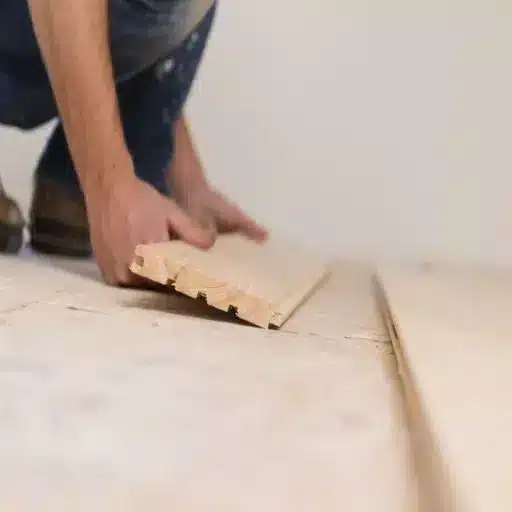
Subfloor prep is where professional jobs separate themselves from DIY disasters. You can install the most expensive engineered plank in the world, but if the subfloor is dirty, wet, or uneven, the floor will fail.
Clean and Inspect
Remove every staple, nail, wax ring, and paint blob. Vacuum thoroughly. Walk the entire floor and mark squeaks, loose boards, or soft spots. Fix these before the new floor goes down. A clean, sound subfloor is the foundation of a lasting installation.
Moisture Testing
Moisture is the single biggest enemy of wood floors. On a wood subfloor, the moisture content should read 6-9%. On a concrete slab, run a calcium chloride test or use an in-situ relative humidity probe. Industry guidelines from the National Wood Flooring Association call for less than 3 lbs/1,000 sq ft/24h with calcium chloride, or less than 75-80% RH with an in-situ probe.
If readings are high, do not proceed. Address the moisture source first, then retest. Installing over damp concrete is the fastest way to end up with cupping, buckling, and mold.
Flatness and Leveling
Place a straightedge on the subfloor and check for gaps. For floating floors, the surface should be flat within 3 mm under a 1 meter straightedge. For glue-down installations, the tolerance is tighter: 3 mm under a 3 meter straightedge. Grind high spots and fill low spots with a cementitious leveling compound. This step takes time, but it prevents hollow-sounding boards and adhesive bond failures.
Moisture Barrier and Underlayment
Always follow the flooring manufacturer’s instructions. Over concrete, a moisture barrier or vapor barrier is almost always required. Some floating floors use an underlayment with a built-in vapor barrier, which simplifies the job. For glue-down installations, the adhesive may act as the barrier, or you may need a separate membrane.
Acclimating Engineered Wood Flooring
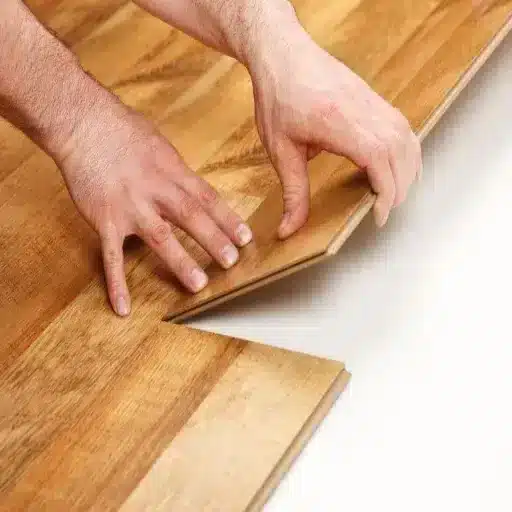
Acclimation is the process of letting the boards adjust to the temperature and humidity of the room where they will be installed. This step matters because wood expands and contracts with changes in moisture.
Why Acclimation Matters
Engineered wood is more stable than solid hardwood, but it is still wood. If you install boards straight from a cold warehouse into a heated home, they will shrink as they dry out. If you install them during a humid summer without letting them stabilize, they may expand and buckle once the air conditioning kicks in.
Ideal Conditions and Duration
Bring the boxes into the installation room and let them sit for 48 hours to 5 days. The room should be between 60-80 degrees Fahrenheit with 30-50% relative humidity. According to Hartco, acclimation is the foundation of a lasting installation because it allows the wood to reach equilibrium moisture content before it is locked in place.
How to Stack and Measure
Cut open the ends of the boxes but leave the planks inside. Stack the boxes in a crosshatch pattern so air can circulate. Do not store them in a garage, basement, or directly on concrete. Measure the moisture content of the subfloor and the planks with a pinless moisture meter. The differential should be within 2-4% before you begin installation.
Priya in Sarasota followed this process for a beach rental property in 2024. She acclimated the engineered oak for five days, installed a moisture barrier over the concrete slab, and kept the HVAC running during the install. Three rental seasons later, the floor still looks new despite constant sand, salt, and humidity.
How to Install Floating Engineered Wood Flooring
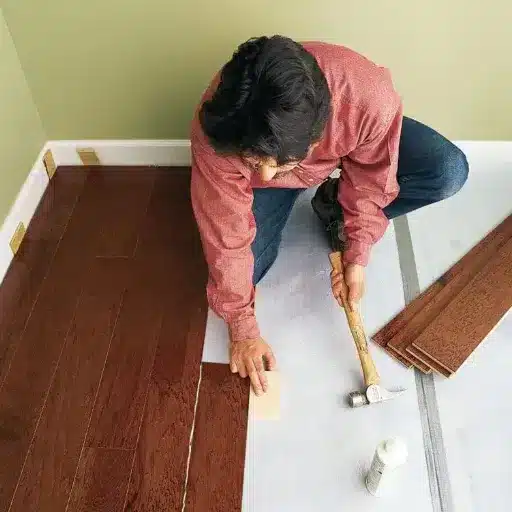
Floating installation is the easiest entry point for most homeowners. Follow these steps for a clean, stable result.
- Install the underlayment or moisture barrier. Roll it out perpendicular to the direction you plan to lay the planks, overlap seams by 4-8 inches, and tape them shut.
- Plan the layout. Measure the room and decide the starting wall. The first row should be straight, so snap a chalk line a few plank widths away from the wall to use as a guide.
- Cut door casings. Lay a piece of scrap flooring on the underlayment next to each casing and undercut the casing with a flush-cut saw. This lets the floor slide underneath for a clean edge.
- Place spacers. Set 1/4 to 1/2 inch spacers between the planks and every wall to maintain the expansion gap.
- Install the first row. Start in a corner and work along the chalk line. The groove side of the plank usually faces the wall.
- Connect subsequent rows. Angle the tongue of the new plank into the groove of the installed row, then press down until it clicks. Use a tapping block to close stubborn joints.
- Stagger joints. End joints should be offset by at least 6 inches from row to row. This creates a stronger, more natural-looking floor.
- Fit the final row. Rip the last row to width if needed, leaving the expansion gap. A pull bar helps lock the final row against the previous one.
- Install transitions and trim. Add transition strips at doorways and under cabinets. Reinstall baseboards or add quarter-round, but do not nail through the floor. Nail to the wall only.
- Wait before heavy traffic. Follow the manufacturer’s recommendation, usually 24 hours before furniture and full use.
How to Install Glue-Down Engineered Wood Flooring
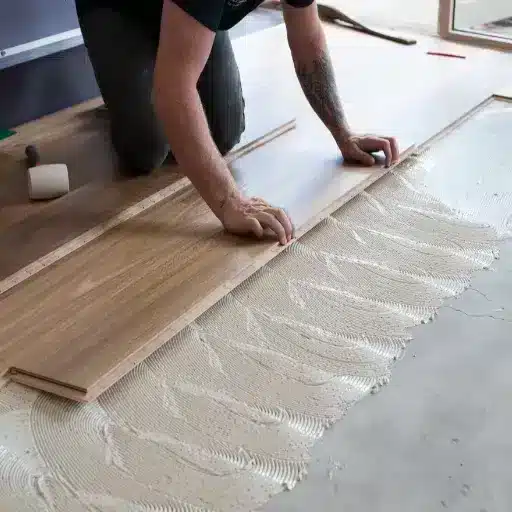
Glue-down installation requires patience, but it delivers a floor that feels like it is part of the building.
- Apply a moisture barrier if needed. Some adhesives include a moisture barrier; others require a separate membrane. Verify with the flooring manufacturer.
- Snap chalk lines. Mark the room into manageable sections so you do not spread more adhesive than you can cover before it skins over.
- Spread adhesive with a notched trowel. Use the trowel notch size specified by the adhesive maker. Spread only enough for 15-30 minutes of work at a time.
- Place planks and press. Set each plank into the adhesive and press firmly. Wipe excess adhesive immediately with the recommended cleaner.
- Roll with a 100 lb roller. Once a section is complete, roll it within the working time recommended by the adhesive manufacturer. This removes air pockets and ensures full contact.
- Maintain temperature during cure. Keep the room between 60-80 degrees Fahrenheit and avoid drafts that could dry the adhesive too quickly.
- Keep traffic off during cure. Most urethane adhesives need 24 hours before light foot traffic and up to 72 hours before moving furniture.
How to Install Nail-Down Engineered Wood Flooring
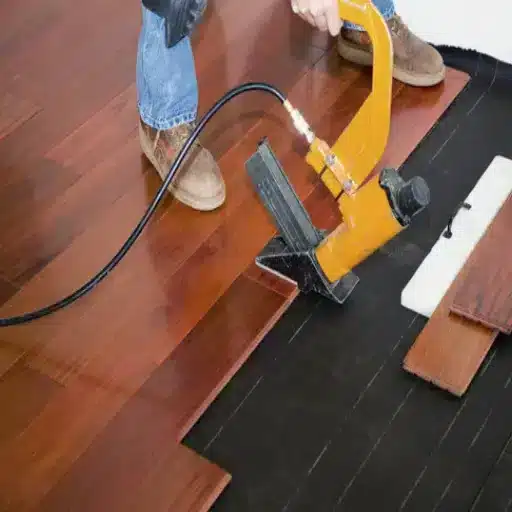
Nail-down installation is usually the fastest method for experienced crews working over a wood subfloor.
- Check plywood or OSB thickness. The subfloor should be at least 3/4 inch thick. Thinner subfloors may not hold fasteners securely.
- Choose fastener length. Use fasteners long enough to penetrate the subfloor by at least 3/4 inch. For 3/8 inch engineered planks, 1-1/2 inch staples are common.
- Nail through the tongue at an angle. Place the nailer against the edge of the plank and strike the plunger firmly. Fasteners should enter through the tongue at roughly a 45-degree angle.
- Maintain proper spacing. Follow the manufacturer’s fastener schedule, typically every 6-10 inches along each plank and 2-3 inches from the ends.
- Avoid fasteners too close to ends. Splitting the tongue weakens the joint and can cause squeaks. Keep end fasteners back the distance the manufacturer recommends.
Engineered Wood Flooring Installation Cost
Budgeting for engineered wood flooring installation means separating material costs from labor and preparation. The table below shows typical installed ranges in the United States for 2026.
| Method | Labor Cost /sq ft | Total Installed /sq ft |
|---|---|---|
| Floating | $3-$5 | $7−$12 |
| Glue-down | $5−$8 | $10−$16 |
| Nail-down | $4−$7 | $9−$14 |
| Herringbone or specialty pattern | $8−$16+ | $14−$24+ |
The final price depends on subfloor condition, room shape, plank width, and regional labor rates. A simple rectangular living room over a flat plywood subfloor costs far less than a basement with moisture issues or a hallway with many doorways to cut around. For a deeper breakdown, read our dedicated guide on engineered wood flooring cost.
Common Installation Mistakes and How to Avoid Them
Even experienced installers make mistakes. Here are the most common ones and how to prevent them.
Skipping Acclimation
Installing boards before they adjust to the room is one of the most common causes of gapping and buckling. Always acclimate for at least 48 hours, and longer in extreme climates. Wagner Meters explains why acclimating engineered hardwood flooring is essential for long-term performance.
Insufficient Expansion Gap
Wood needs room to move. A 1/4 to 1/2 inch gap around the perimeter is standard. Do not let baseboards or shoe molding pin the floor against the wall.
Poor Moisture Testing
Assuming the concrete is dry is a costly gamble. Test every slab, and retest after any remediation. Keep a written record for warranty purposes.
Wrong Underlayment
Using a cheap underlayment under a floating floor can create a hollow sound and fail to block moisture. Match the underlayment to the flooring and subfloor requirements.
Improper Stagger Pattern
Stair-step or H-pattern joints weaken the floor and look artificial. Keep end joints at least 6 inches apart, and avoid lining up joints across multiple rows.
Walking on the Floor Too Soon
Adhesives and floating click-lock joints need time to settle. Respect cure times even when the floor looks ready.
Ignoring Manufacturer Instructions
Every product has a unique installation guide. That guide overrides general advice, including this article. Save the instructions and any moisture test records with your warranty documents.
After Engineered Wood Flooring Installation: Care and Warranty

The work is not finished when the last plank goes down. How you treat the floor in the first weeks affects how it performs for years.
First 24 Hours
Wait at least 24 hours before placing furniture on the floor. For glue-down installations, extend this to 72 hours. Use felt pads under furniture legs and avoid dragging heavy items across the new surface.
Humidity Control
Keep indoor relative humidity between 30-50% year-round. Use a humidifier in dry winters and a dehumidifier in humid summers. Stable humidity is the single best way to prevent seasonal gapping and cupping.
Cleaning and Maintenance
Sweep or vacuum regularly to remove grit that can scratch the finish. Clean with a manufacturer-approved product and a barely damp mop. Avoid steam mops and excessive water, which can damage the wear layer and core.
Document Everything
Take photos of the installation, keep moisture test results, and store the original purchase receipt and installation instructions. Most warranties require proof that the floor was installed according to manufacturer guidelines. If you ever need refinishing engineered hardwood floors, proper documentation also helps you know whether the wear layer is thick enough.
FAQ About Engineered Wood Flooring Installation
Can I install engineered wood over concrete?
Yes. Floating and glue-down methods both work over concrete. A moisture barrier is almost always required, and the slab must pass moisture testing first.
Do I need a moisture barrier?
If you are installing over concrete or a crawl space, yes. Over a dry plywood subfloor in an above-grade room, an underlayment without a separate barrier may be enough. Always check the flooring manufacturer’s instructions.
How long should engineered wood acclimate?
Most manufacturers recommend 48 hours to 5 days in the installation room at 60-80 degrees Fahrenheit and 30-50% relative humidity.
Can I install engineered wood over radiant heat?
Yes, but only if the product is rated for radiant heat. Floating floors are often the easiest choice over radiant systems because they allow the planks to expand and contract without stressing adhesives or fasteners.
What expansion gap do I need?
A 1/4 to 1/2 inch gap around the perimeter is standard. Larger rooms may require expansion joints in the field of the floor.
Can I install engineered wood in a basement?
Yes, with caution. Basements are moisture-prone, so proper testing, a moisture barrier, and the right product are essential. Our guide to engineered wood flooring for basement spaces explains how to manage humidity and choose materials that can handle below-grade conditions.
How soon can I walk on newly installed engineered wood?
For floating floors, you can usually walk on them immediately after installation. For glue-down floors, wait 24 hours before light traffic and 72 hours before heavy use. For nail-down floors, 24 hours is typical.
Should I glue tongue and groove joints?
Most click-lock floating floors do not need glue. Some tongue-and-groove products benefit from a bead of adhesive in the groove, especially in high-traffic commercial areas. Follow the manufacturer’s recommendation.
Is engineered wood a good choice for bathrooms or kitchens?
Engineered wood handles humidity better than solid hardwood, but it is not waterproof. For rooms with frequent water exposure, consider waterproof engineered wood flooring or another water-resistant alternative.
Conclusion
Engineered wood flooring installation is a project that rewards preparation. Choose the method that matches your subfloor and skill level. Moisture test. Acclimate the boards. Leave the expansion gap the manufacturer requires. Those steps are not busywork. They are what separate a floor that lasts decades from one that fails within a year.
At VitalWood Global, we believe the right materials make the installation easier and the result more sustainable. Whether you are selecting engineered wood flooring for a single room or sourcing certified materials for a large build, we are here to help. Contact our team at contact for product recommendations, certification details, and installation support that aligns with your project goals.