
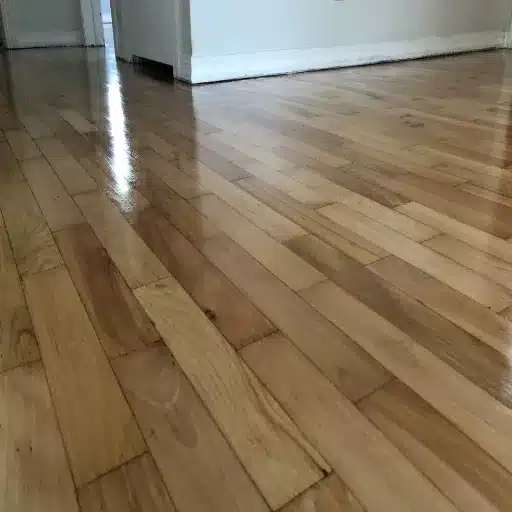
Staining Maple Floors: How To Get An Even Finish
Yes, you can stain maple floors, but maple is the hardest common flooring species to stain evenly, and dark colors are the riskiest choice you can make. The Maple Flooring Manufacturers Association (MFMA) goes further: it does not recommend staining or bleaching maple strip flooring at all.
That advice is not a marketing position. It is what happens when pigment meets a grain structure that refuses to absorb it evenly.
Here is the part most guides skip. Maple is not a bad floor. It is a bad candidate for wiping stain. Those are different problems, and separating them is the difference between a floor you love and a floor you pay to sand back.
Key Takeaways
- The MFMA advises against staining maple strip flooring and requires an approved onsite sample if staining proceeds anyway.
- Water popping and pre-stain conditioner do opposite things. Water popping opens the grain for deeper color. Conditioner blocks absorption to even out light tones and caps how dark you can go.
- Floors should finish at 120 to 150 grit. Sanding finer burnishes the surface and makes blotching worse, not better.
- Dye stains penetrate maple’s tight structure far better than pigment stains. This is why finishers reach for dye first.
- Maple’s realistic color range is light to medium. Espresso-dark maple often reads as painted furniture rather than finished wood.
Can You Stain Maple Floors?
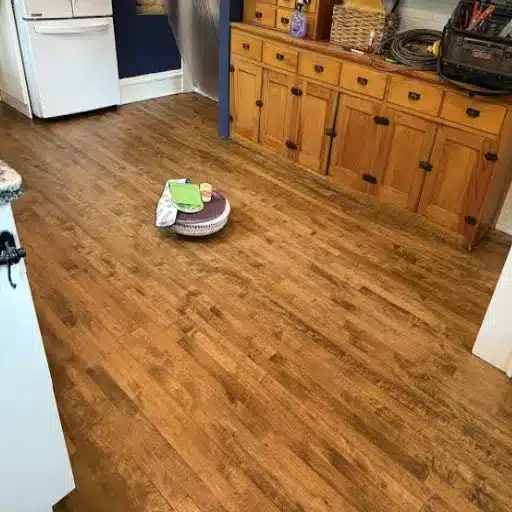
You can, with three conditions: a solid or thick-wear-layer floor, a realistic color target, and a willingness to build a sample board first. If any of those is missing, a tinted finish will serve you better than stain.
What the MFMA Actually Says
The MFMA’s guidance is blunt. Staining or bleaching maple strip flooring is not recommended under any circumstances, because northern hard maple has an extremely tight cellular structure and variable grain patterns. Small areas may accept stain cleanly. Much of the floor will not, and the result reads as uneven or blotchy.
The association does not stop at “don’t.” It gives conditions for when a customer insists:
- Prepare an onsite sample and get the owner’s approval before the project starts.
- Use an installer with extensive staining experience.
- Contact the finish manufacturer directly for tinting product recommendations.
Read that list carefully, because it is the whole article in miniature. The industry authority on maple flooring is not saying staining is impossible. It is saying the outcome is unpredictable enough that it must be approved in advance, by someone who has done it many times.
If a contractor tells you maple will stain evenly and skips the sample board, that is your signal to find another contractor.
When Staining Maple Is Worth It
- The floor is solid maple or engineered with a 3 mm wear layer or thicker. You need enough material to sand to bare wood.
- You are targeting light to medium color. Honey, warm brown, and muted greige are realistic. Walnut-dark and espresso are not.
- The existing finish is failing anyway. If you are sanding regardless, adding color is a smaller incremental risk.
- You are working with soft maple. Red maple (Janka ~950) accepts stain more readily than sugar maple (~1,450). It is the more forgiving species.
When It Isn’t
- The wear layer is under 2 mm. There is no second chance if the color goes wrong.
- The floor is factory prefinished with an aluminum-oxide coating. You cannot stain it without sanding the entire finish off, which is a full refinish, not a stain job.
- You want a very dark floor. Buy prefinished maple in the color you want instead. It is cheaper than a failed color change.
If you are not sure which category your floor falls into, send us a photo and the product name. We will tell you straight whether it is a staining candidate or not, and there is no charge for the answer.
Why Maple Blotches
Blotching is not a technique error. It is a predictable physical result of how maple is built. Understanding the mechanism is what lets you choose the right tool.
Diffuse-Porous Grain and Why Pigment Sits on Top
Maple is a diffuse-porous, closed-grain hardwood. Its cells are small, similar in size, and tightly packed. Oak, by contrast, has large open pores that wick stain in like straws. The Wood Database documents the cell structure for every commercial species if you want to compare before you buy.
Pigment particles in a conventional oil stain are too large to enter maple’s cells. So the stain sits on the surface and dries wherever it happens to land. Where the grain is slightly more open, more pigment sticks. Where it is denser, less does. The result is a cloudy, marbled finish that no amount of careful wiping will fix.
Hard Maple vs. Soft Maple
Hard maple and soft maple behave differently under stain, and that difference matters when you buy.
| Hard Maple | Soft Maple | |
|---|---|---|
| Species | Sugar maple, black maple | Red, silver, boxelder, bigleaf |
| Janka hardness | ~1,450 lbf | ~700 to 950 lbf |
| Stain behavior | Resists penetration, blotches easily | Accepts stain more readily |
| Main watch-out | Uneven blotching | Gray sapwood tones surface under light stains |
Soft maple is not a lesser wood in every respect. It is more dimensionally stable and far easier to color. If you are staining anyway, ask which maple you have. Our guide to hard maple vs soft maple flooring covers how to tell them apart on a quote, and the National Wood Flooring Association publishes the Janka figures behind this table.
Mineral Streaks and Growth-Ring Contrast
Two features of maple cannot be sanded out and cannot be stained over.
Mineral streaks are dark gray-green lines from minerals the tree absorbed. They resist stain and stay lighter than the surrounding wood. Growth-ring contrast comes from earlywood and latewood absorbing at different rates, which reads as banding once color is applied.
No stain, conditioner, or technique removes these. A sample board tells you how prominent they will be on your floor.
Prep That Decides the Result
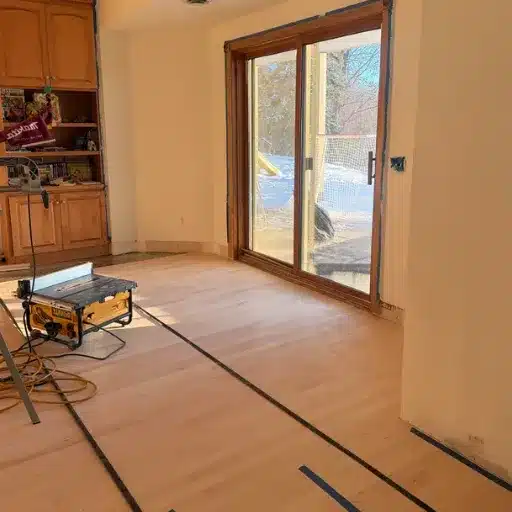
Staining is the fast part. Prep is where the outcome is decided, and where most failures originate.
Sanding to the Right Grit
Floors should finish at 120 to 150 grit. This surprises people, because the instinct is that a smoother surface stains better. The opposite is true. Finer grit burnishes the wood, closes the pores further, and reduces stain pickup, which makes blotching worse.
Work through a consistent grit progression, vacuum after every pass, and tack-cloth before you open the stain can. Inconsistent sanding is the most common cause of uneven color.
Sanding Flaws Telegraph Through Stain
This is the part that catches DIYers. Drum marks, orbital swirls, edger chatter, and old dings are nearly invisible on bare maple. Under stain, they become permanent landmarks.
Inspect under raking light, not overhead light. Raking light throws shadows across imperfections that overhead light flattens out. If you can see it at an angle, you will see it forever once the color is down.
The Moisture Gate
Check moisture content before anything else. Target 6 to 9%. Above roughly 10%, do not stain dark. Trapped moisture will push back through the finish and cause the color to cloud or lift.
If you are working on a basement slab or a recently renovated space, read our guide to cleaning wood before staining for the full prep sequence.
Water Popping vs. Pre-Stain Conditioner
This is the single most misunderstood choice in maple finishing. These two products are routinely recommended as if they were interchangeable. They are opposites.
| Water Popping | Pre-Stain Conditioner | |
|---|---|---|
| What it does to grain | Opens and swells it | Partially fills and seals it |
| Mechanism | Water raises the fibers so dye penetrates deeper | Mineral-spirit/alkyd resin blocks absorption |
| How to apply | Mist evenly, no puddles or dry patches | Liberal even coat with cloth or foam brush |
| Wait time | Dry back to correct moisture before staining | Apply stain inside the wet window (~15 min) |
| Color range suited | Medium to deep | Light to medium only |
| Effect on depth | Roughly 30 to 35% richer color | Noticeably lighter than the chip |
| Main downside | Raises the grain, so expect fuzz and an extra coat | Caps how dark you can go |
| When to skip | Light color targets | Deep color targets |
Water Popping: Opening the Grain for Deep Color
Water popping is the step that separates professional maple work from DIY attempts. Mist clean water evenly across the sanded floor, let the grain swell, then let it dry back to the correct moisture range before staining. The wood is now more open, and dye can travel further into it.
Skipping this step is one of the most common reasons a maple floor comes out blotchy. Pros report the result is roughly 30 to 35% richer in color, which matters because maple otherwise fights you on depth.
Two cautions. Water popping raises the grain, so expect some fuzz, and plan an extra finish coat to knock it down. And do not water-pop and stain on the same day. Let the floor come back to moisture equilibrium first.
Pre-Stain Conditioner: Blocking Absorption for Light Tones
Conditioner works the opposite way. It is a thin penetrating liquid that partially fills maple’s pores so the wood absorbs less stain, and absorbs it more evenly.
Application is where people go wrong. Stir it, do not shake it, or you introduce bubbles. Apply a liberal, even coat. Let it penetrate 5 to 15 minutes, then wipe off all the excess. Any conditioner left on the surface will block the stain entirely.
Then watch the clock. Per Minwax’s guidance, apply the stain within about 15 minutes while the conditioner is still wet. If it dries completely, the surface seals and the stain will not penetrate.
Be honest with yourself about the limit here. Conditioner reduces blotching. It does not eliminate it, and it visibly lightens the final color. It is the right tool for honey and light golden tones. It is the wrong tool if your target is walnut-dark.
Which One, and Can You Use Both?
- Light or medium color: conditioner.
- Medium or deep color: water pop, then dye.
- Both together: only with a tested sequence on a sample board, never as an experiment on your floor.
Choosing a Stain That Works on Maple
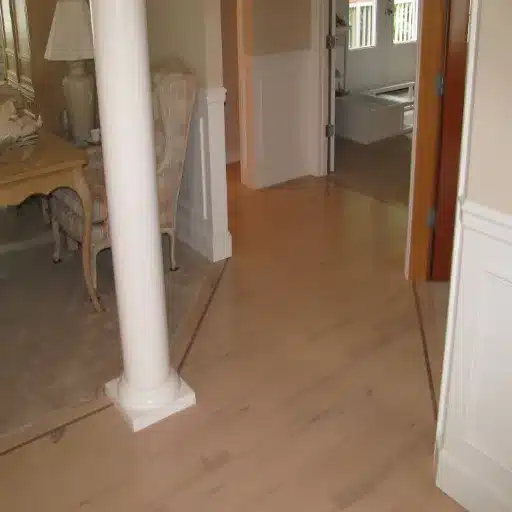
Once prep is right, the product choice does the rest of the work.
Dye vs. Pigment Stains
Dye molecules are small. Pigment molecules are large. That single fact explains most of the dye-versus-pigment decision on maple.
Aniline dye stains (water-based or alcohol-based) penetrate maple’s tight structure instead of sitting on top of it. This is why experienced finishers reach for dye first and why some spray a dye coat before applying an oil-based wiping stain on top. Our overview of types of wood stain breaks down where each family belongs, and the broader how to stain wood guide covers the techniques that apply to every species.
Gel Stain on Floors: The Honest Answer
Gel stain is thick, sits on the surface, and does not depend on absorption, which makes it genuinely useful on furniture and on furniture-scale maple.
Floors are a different question. Gel stain on a floor surface raises real concerns about film thickness, adhesion under foot traffic, and wear. You will find sources recommending it and flooring professionals calling it inappropriate. If you want gel stain lessons that transfer, apply them to furniture, not to 800 square feet of maple.
Light vs. Dark on Maple
Maple’s realistic range is light to medium. Past a certain depth, the color stops reading as stained wood and starts reading as paint. Very dark maple also shows dust, pet hair, and every scratch far more than a light floor does.
If color selection is the sticking point, our guide to wood stain colors covers undertones and how they shift on pale species.
Washcoats and Toners
Two refinements worth knowing. A washcoat is a thin sealer applied after the first dye coat. It stops the second coat from moving the first around, and it flattens the contrast between maple’s light and dark growth zones. Toners and tinted topcoats add color without wiping stain across the grain at all, which sidesteps blotching entirely.
How to Stain Maple Floors Step by Step
- Confirm the floor can be stained. Check whether it is solid or engineered, and measure the wear layer if engineered.
- Check moisture content. Target 6 to 9%. Stop if it is above 10%.
- Sand through a consistent grit progression and finish at 120 to 150 grit.
- Vacuum after every grit and tack-cloth before staining.
- Inspect under raking light for drum, orbital, and edger marks.
- Build a sample board from the same lot and get it approved.
- Apply water popping or conditioner, depending on your target color.
- Apply dye stain to the required depth, working in small sections with a wet edge.
- Apply a washcoat before any second color coat.
- Let the color dry fully. Allow 24 hours before the first sealer coat.
- Seal and topcoat with a compatible finish system.
- Cure fully before returning furniture to the room.
Your Sample Board Is Not Optional
When Priya quoted a maple refinish in a 1920s bungalow, the homeowner wanted the color she had seen on oak. Priya built three sample boards on scrap from the same lot and finished them through the full sequence: pop, dye, washcoat, topcoat. All three read differently, and none matched the oak photo. The homeowner picked one of the three and approved it in writing.
That board cost Priya an afternoon. It saved her a re-sand of 900 square feet, and it saved the relationship.
Board-to-board density varies. The only reliable preview is a sample from the same lot, finished through the whole process. This is exactly what the MFMA means by preparing an onsite sample and obtaining owner approval.
Staining Engineered and Prefinished Maple Floors
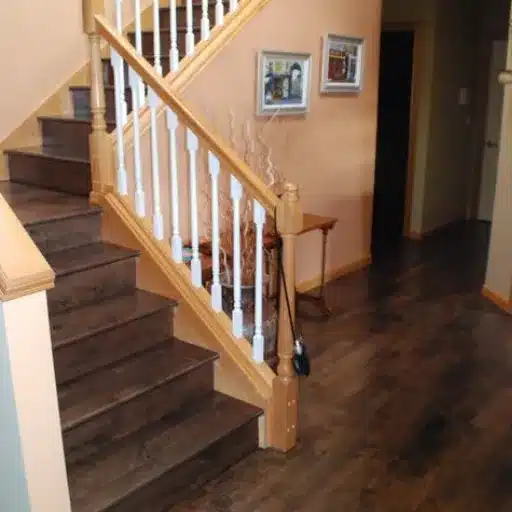
Most guides assume site-finished solid strip. If your floor is engineered or prefinished, the rules change before you start.
Engineered Maple: The Wear Layer Is the Limit
You can only stain what you can sand to bare wood. An engineered maple floor is a real maple veneer over a plywood or HDF core, and the species lives in that top layer.
- Under 2 mm wear layer: roughly one careful sand, no staining risk worth taking.
- 3 to 4 mm wear layer: two to three refinishing cycles, and a genuine staining candidate.
- HDF core: screen-and-recoat only. No staining.
Our comparison of engineered maple vs solid maple covers how to read these specs on a product sheet, and the engineered maple flooring hub covers construction in detail.
Factory Prefinished Surfaces
A factory prefinished maple floor carries an aluminum-oxide finish that is far harder than anything applied on site. You cannot stain it without removing that entire finish down to bare wood. At that point you are not staining a floor, you are refinishing one.
The practical answer is usually to buy prefinished maple in the color you actually want.
When Not to Stain: Better Ways to Color Maple
Staining is one option among several, and often not the best one. The most common advice from experienced finishers is that the best stain for maple floors is no stain at all.
Amber and Tinted Sealers
A warm amber or tinted sealer adds tone without the blotch risk of wiping stain. The process is far more forgiving, and it never produces the cloudy patches that pigment stain does. Sanding flaws will still show, so prep still matters.
UV-Inhibited Finish Systems
Maple ambers as it ages, and sunlight accelerates it. A finish system with a UV inhibitor holds the pale look substantially longer than a standard clear coat. If your goal is “a slightly warmer version of what I have,” this is frequently the better route than staining. See refinishing maple floors for the full finish-selection discussion.
Leave It Natural
For pale, uniform hard maple, no color at all is often the strongest recommendation. Maple’s selling point is its clean, bright uniformity, and staining works against the reason most people chose it.
What Staining Maple Floors Costs in 2026
Costs vary by region, floor condition, and how dramatic the color change is. Use these as planning ranges and confirm locally.
| Scope | DIY materials | Professional (per sq ft) |
|---|---|---|
| Stain and seal only, over bare wood | $0.30 to $0.80 | $2 to $4 |
| Full sand and stain, natural tone | $0.80 to $1.50 | $3 to $5 |
| Full sand and stain, custom dark color | $1.00 to $2.00 | $4.50 to $6.50 |
| Screen and recoat only | $0.20 to $0.50 | $1.00 to $2.00 |
| Replacement, prefinished maple | $5 to $11 | $6 to $12 installed |
Staining itself typically adds $1 to $3 per square foot on top of a refinishing project. A dark custom color adds roughly another $1 to $1.50 per square foot over a natural refinish, because of the extra labor in sanding to bare wood, applying dye evenly, and avoiding lap marks.
Where DIY Budgets Go Wrong
The hidden line items are test boards, extra finish coats after water popping, and re-sanding a color you rejected. Every one of those is cheaper than the alternative you are trying to avoid. Our maple flooring cost guide covers material tiers if you are buying new rather than refinishing.
Common Maple Staining Mistakes
- Finishing above 150 grit. Burnishes the surface, reduces stain pickup, worsens blotching.
- Skipping water popping on a dark color. Produces thin, muddy, uneven results.
- Using conditioner and expecting espresso. The color will land well short of the chip.
- Skipping the sample board. Guarantees a color surprise you cannot undo cheaply.
- Applying gel stain to a floor surface. Adhesion and wear problems under foot traffic.
- Staining engineered maple with a thin wear layer. You sand through the veneer and expose the core.
- Forgetting that dark maple shows everything. Dust, pet hair, and scratches all read more clearly.
- Water-popping and staining the same day. The floor has not returned to moisture equilibrium.
If It’s Already Blotchy
Your options run from least to most invasive: apply a gel stain over the existing color, darken the entire surface to hide the variation, use a toner or glaze over a sealer, sand back and restart, or strip and begin again.
Does maple flooring turn yellow over time? It does, and it is worth understanding before you choose a color. We cover the causes and what can be done in our guide to whether maple flooring turns yellow. If you are already dealing with uneven color, the ranked repair methods live in our how to fix blotchy wood stain guide.
Sustainability: Low-Impact Finishing for Maple
Finishing choices carry real environmental weight, and they are one of the easiest places to make a better decision.
Choose water-based, low-VOC finish systems where the finish chemistry allows it. They reduce solvent exposure for everyone in the building and cut the odor and cure-time burden in occupied homes. Look for indoor air quality certifications when you specify.
Refinishing beats replacing. Dana and her husband bought a 1968 ranch with orange-toned maple under worn carpet. The floor was sound; only the finish was gone. Refinishing kept roughly 1,100 square feet of mature maple in service instead of sending it to landfill and buying new. That is the lowest-carbon option available for a floor that is structurally fine.
Real maple wear layers use a premium species efficiently. A 3 mm veneer face delivers decades of maple surface from a fraction of the solid lumber, which is why engineered construction is often the more responsible specification. Our maple veneer range covers FSC-certified options and what to ask a supplier.
FAQ About Staining Maple Floors
Can you stain maple floors?
Yes, but it is the hardest common flooring species to stain evenly. Solid maple and engineered maple with a 3 mm or thicker wear layer can be stained. Factory prefinished and thin-wear-layer engineered floors cannot.
Is it hard to stain maple floors?
Very. Maple is diffuse-porous with a closed grain, so pigment particles sit on the surface and dry unevenly. Hard maple is harder to stain than soft maple, and both are harder than oak.
Should I use pre-stain conditioner or water popping on maple?
They solve opposite problems. Conditioner blocks absorption and evens out light to medium colors, though it limits how dark you can go. Water popping opens the grain so dye penetrates deeper, which suits medium to deep colors.
What grit should I sand maple floors to before staining?
Finish at 120 to 150 grit. Sanding finer burnishes the surface, reduces stain pickup, and makes blotching worse.
Will dark stain look good on maple floors?
Often not. Very dark maple frequently reads as painted rather than stained, and it shows dust, pet hair, and scratches more clearly. Maple’s realistic range is light to medium.
Can you stain engineered maple floors?
Only if the wear layer is thick enough to sand to bare wood, generally 3 mm or more. HDF-core products and thin wear layers can only be screen-and-recoated, not stained.
Can you stain prefinished maple floors?
Not without sanding the entire factory finish off first, which is a full refinish. Buying prefinished maple in your target color is usually cheaper and more reliable.
How much does it cost to stain maple floors?
Staining adds roughly $1 to $3 per square foot to a refinishing project. A professional full sand and stain runs about $3 to $5 per square foot, or $4.50 to $6.50 for a custom dark color.
Does maple stain better than oak?
No. Oak’s open pores absorb stain evenly, which makes it one of the easiest species to stain. Maple’s closed grain makes it one of the hardest.
The Bottom Line on Staining Maple Floors
Staining maple floors is possible, and it is not a coin flip. It is a process with a known set of conditions, and when those conditions are met, the results are excellent.
- Maple blotches because its closed, diffuse-porous grain resists pigment penetration. That is physics, not technique.
- Water popping and pre-stain conditioner do opposite jobs. Choose by target color, not by habit.
- Prep decides the outcome. Sand to 120 to 150 grit, check moisture, and inspect under raking light.
- Dye outperforms pigment on maple every time.
- A sample board is mandatory. The MFMA says so, and every experienced finisher agrees.
- If your target color is espresso-dark or your wear layer is thin, a tinted finish or prefinished product will serve you better than stain.
If you are specifying maple for a project, or you want a finish schedule that has been tested before it reaches your floor, talk to our finishing team. We will tell you honestly whether your maple should be stained, and what it takes to get it right.