
Vacuum Press Veneering: Bag Setup, Leak Checks and First-Panel Trials
Vacuum press veneering uses the pressure difference between the evacuated bag and the surrounding air to clamp veneer onto a core. Start with compatible materials, a supported layup and an open air path; leak-check the equipment before applying glue, then record a representative first-panel trial.
During vacuum press veneering, a steady gauge can look reassuring while a blocked air path leaves part of the panel poorly clamped. If you’re preparing an expensive face veneer, that gap between the reading and the actual contact deserves attention.
This guide connects material checks, bag setup and trial inspection so you can decide what to change before the production panel. It covers flat panels, not engineered curved forms or bent laminations. The veneer adhesive guide covers the broader selection task. For vacuum press veneering, the focus is proving that your chosen system works together, with recorded observations rather than a universal pressure or time recipe.
Key Takeaways
- Check the actual veneer, backing, core and adhesive instructions before vacuum press veneering; a cold-press label alone does not establish suitability.
- Support the platen on a flat bench and maintain an evacuation route from the panel to the port.
- Test the pump, hose, closure and bag before the glue clock starts.
- Record achieved vacuum, loading time, press time and cure requirements separately.
- Keep a representative sample and trial record. A good-looking panel is useful evidence, but it does not certify bond strength or an entire batch.
Confirm Materials Before Vacuum Press Veneering
Identify the veneer, core and balance layer
Write down whether the face is raw veneer or backed veneer, and identify the backing itself. Paper, fleece, phenolic and pressure-sensitive systems are different bonding surfaces. Don’t assume that instructions for raw wood apply through a backing layer.
For a material inquiry, contact VitalWood Global with your veneer, backing and panel requirements. Include the intended core and finish so the discussion starts with the actual construction.
Before vacuum press veneering, check the core for flatness, surface contamination and compatibility with the chosen glue. A water-based product may require a porous surface; a sealed face needs a different assessment. Identify the balance layer and the planned sequence for bonding both faces. Vacuum press veneering does not remove the need to consider panel balance.
Before glue-up, let the materials reach the conditions their suppliers require. The storage and handling guide provides preparation context. Record the state of the wood. Time in the same room does not prove that each piece is ready.
Check pressure compatibility and working time
Read the adhesive’s current technical instructions and safety data. Check the core and backing, how to spread the glue and the required temperature. Then check pressure, assembly time, press time and cure. Ask its technical supplier when the stated pressure requirement does not clearly fit a vacuum bag.
For example, Franklin International’s Titebond Cold Press Veneer guidance lists applied pressures of 100-250 psi, depending on substrate. Its name alone is no basis for recommending it for vacuum press veneering. Don’t treat a bag as meeting that listed range.
For vacuum press veneering, choose an explicitly suitable system rather than substituting a familiar glue. Keep its instructions at the bench. Write down any unanswered compatibility question beside the material list. Don’t start a bonded trial while the required pressure or backing approval remains unclear.
If the working window cannot accommodate spreading, loading, sealing and evacuation, revise the process before mixing or spreading adhesive. A longer press interval is not a substitute for meeting assembly instructions.
Set Up the Vacuum Press Veneering Bag and Air Path
Build the stack on a flat supported bench
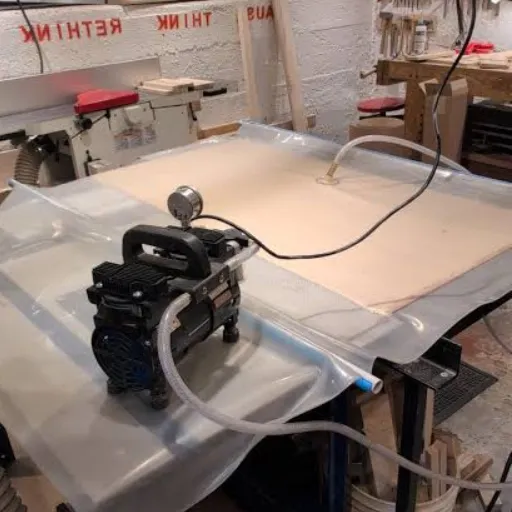
For vacuum press veneering, place the bag and bottom platen on a flat workbench. A platen spanning separate supports can bend under its own weight. Clean its faces and protect the bag from sharp edges, chips and dried glue. Allow enough bag slack for it to conform around the stack without stretching tightly over corners.
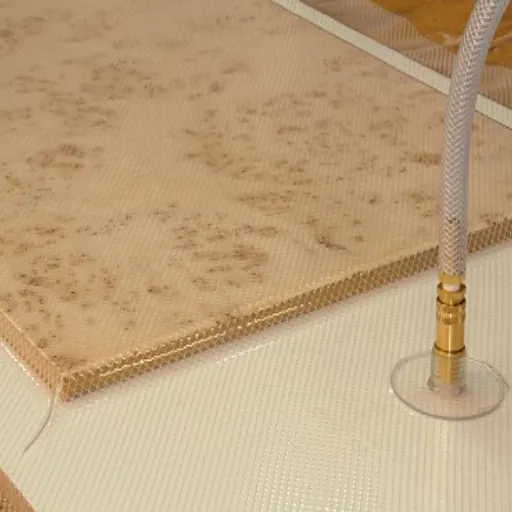
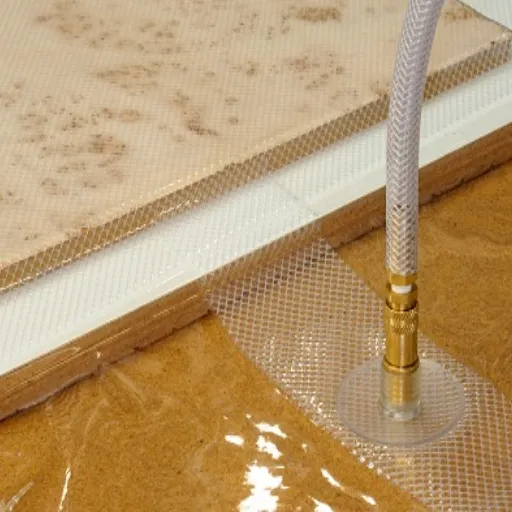
The bottom platen provides a flat reference. A top caul, where the selected arrangement calls for one, contacts the upper side of the layup. Breather mesh preserves air routes. These parts have different jobs; adding mesh does not replace firm support beneath the panel.
Label each part of the dry stack. Start with support and bottom platen. Add the required release layer, balance layer, core and face, then the chosen caul or mesh.
The bag and glue instructions set the order of these extra layers. Don’t block the only air route with a sealed release sheet.
Prepare seams before loading. The veneer splicing guide addresses joint preparation; bag pressure cannot turn an open or misaligned seam into a well-prepared joint. Check tape placement against the adhesive and veneer instructions.
Keep a route from the panel to the port
Use the supplier’s approved path arrangement. The VeneerSupplies breather-mesh guide explains why mesh must connect the panel area with the bag stem. It also distinguishes arrangements for flat veneer from those needing a top platen.
Illustrative scenario: A small trial panel sits in a much larger bag, away from the port. The operator traces the air route and notices that bare bag film could close between the panel and stem. During the dry run, they arrange an approved mesh bridge rather than assuming that empty bag space will remain an open channel.
For vacuum press veneering, trace that route with your finger before sealing. Check where the film will touch down as air leaves. Keep mesh edges from damaging the bag and assess whether direct mesh contact could mark the face.
Rehearse loading without glue
Rehearse the full vacuum press veneering loading sequence using the actual dry stack. Keep dust and folds out of the closure. Check hose reach and access to controls before starting the pump. Watch the bag conform and check for bridging over corners or obstacles.
For an equipment-specific introduction, see Vacuum Pressing Systems’ Getting Started with a VacuPress System. Compare its setup with your own manual; equipment and adhesive instructions still govern.
Leak-Check the System Before Applying Glue
Establish the pump and hose baseline
Before vacuum press veneering, establish what the equipment can achieve using its maker’s test procedure. Record the reading, gauge units and gauge location. Vacuum level and airflow are different. The final reading tells you about vacuum at the gauge; draw-down time tells you how fast the connected setup removes air.
Use the approved pump-and-hose check before diagnosing the entire bag. If that test fails, check the hose joints and pump as the maker directs. If it passes but the bag test fails, check the closure, port, bag skin and air path. Don’t add an improvised isolation arrangement that defeats the controls.
For vacuum press veneering, record the dry stack’s evacuation time as well as the final reading. Reaching vacuum at last is not enough. The draw-down must fit the glue’s working time. Use the equipment maker’s expected behavior, not an arbitrary online leak tolerance.
Check the closure, connector and bag skin
Check each location on its own:
- Closure: reseat it as instructed. Remove trapped dust, folds or chips.
- Hose and connector: check for loose seating or damage.
- Bag skin: inspect both faces, especially near sharp stack edges or stretched areas.
Quality VAKuum’s leak-finding guide separates closure, connector and bag-body leaks. Its water-and-paper indicator is a manufacturer procedure, not a reason to wet a production layup. Use that method only in an empty test setup if your bag maker approves it, and dry everything before reuse.
Follow the actual bag maker’s approved repair kit and instructions. Do not transfer solvent or patch-glue advice between bag materials. After a repair, repeat the dry test before vacuum press veneering with fresh adhesive.
Monitor the required press cycle
Illustrative scenario: An operator closes a valve and reads a gauge mounted on the pump side. That reading cannot establish the vacuum remaining inside the isolated bag. They check the system layout before treating the observation as a bag-hold test.
For vacuum press veneering, know what your gauge measures. Use the specified continuous-run or automatic-cycling mode and keep the pump connected as required. A stable initial reading does not justify disconnecting the equipment for the rest of the press cycle.
Watch for changed cycling behavior or loss of vacuum. Stop the planned glue-up if the dry setup cannot meet the chosen instructions. A leak and a blocked air route can require different corrections; squeezing the closure harder won’t open a sealed-off path over the panel.
Run and Record a Representative First-Panel Trial
Make the sample representative
For the vacuum press veneering trial, match the planned veneer, backing, core, balance layer, glue and surface preparation. Include a representative seam if the production face has one. An offcut with a different backing will not tell you if the planned panel suits vacuum press veneering.
Mark the sample with its material identification and orientation. Decide what you will inspect after pressing and after cure: edges, local lifting, seams, face contamination, flatness and the planned finish. Keep enough material to compare its look with the approved sample under the planned lighting.
Illustrative scenario: Before committing a decorative face, an operator times spreading motions, dry loading, closure and draw-down. They compare those observations with the chosen adhesive’s assembly window. If the sequence does not fit, they revise the loading plan or seek a suitable adhesive before the bonded trial.
Use a blank trial record
Keep required settings separate from observed readings. This proposed worksheet makes vacuum press veneering easier to repeat; fill it with your own measurements and the applicable instructions.
| Record field | Required instruction or identification | Actual observation |
|---|---|---|
| Face veneer, backing and lot | ____ | ____ |
| Core and balance layer | ____ | ____ |
| Adhesive, batch and instruction reference | ____ | ____ |
| Room and material conditions | ____ | ____ |
| Surface preparation and spread method | ____ | ____ |
| Spread start and layup complete | ____ | ____ |
| Bag sealed and required vacuum reached | ____ | ____ |
| Vacuum reading, units and gauge location | ____ | ____ |
| Press start/end and monitoring notes | ____ | ____ |
| Cure and conditioning requirements | ____ | ____ |
| Edge, face, flatness and finish inspection | ____ | ____ |
| Next change and repeat-trial decision | ____ | ____ |
For a named product example, Better Bond X-Press instructions list approximately 10-12 minutes for open time in the technical information, 45-60 minutes clamping and full cure outside the bag within 3-4 hours. The specification table also labels 10-12 minutes as assembly time; check the current directions for how to time your layup.
These figures belong to that product and its instructions. They are not a schedule for every vacuum press veneering adhesive.
X-Press is described for vacuum pressing, but its instructions also limit materials and uses, including porous substrates and exclusions for extra-thick veneers and multi-layer laminations. Check the current bottle directions and your exact construction. Do not borrow its timings while ignoring its preparation or temperature requirements.
Inspect after cure and conditioning
After vacuum press veneering, keep press/set time distinct from full cure and finish readiness. Inspect at the stages required by the chosen system. Describe what you see. A note such as “good” does not identify which edges, seams or face areas you checked.
Mark the location of a lifted edge or surface mark so the next trial can address it.
Keep a sketch or photo with the record and identify the panel face. This is a proposed recordkeeping method, not a separate test standard.
Use the finishing guide for the next preparation stage once the bonded panel is ready. For appearance approval, compare with the color-matching workflow. This process record does not certify mechanical strength, emissions, fire performance or the full production batch.
Read Trial-Panel Symptoms Without Guessing the Cause
Choose the next controlled check
Use each symptom to choose a check. It does not prove one cause. In vacuum press veneering, similar-looking defects can follow different material or process conditions. Record where the symptom occurs and compare it with the stack and timing notes before changing the next trial.
| Trial observation | Check next | Decision before another panel |
|---|---|---|
| Slow draw-down | Pump/line baseline, bag size and open air route | Resolve the delay against the glue window. |
| Changed or frequent recharge | Closure, connector, bag skin and maker’s operating guidance | Repeat the leak check; don’t invent a cycle limit. |
| Local bubble despite a good reading | Local air route, contact and adhesive application/timing | Hold the panel and inspect the affected area. |
| Seam moved or opened | Joint preparation, alignment and tape arrangement | Correct seam preparation before repeating. |
| Glue contamination on the face | Spread, veneer voids and contact arrangement | Resolve contamination before finishing. |
| Mesh pattern on the face | Direct contact and caul arrangement | Trial an approved protective arrangement. |
| Panel warp | Support, balance construction and conditioning | Review the whole layup before repeating. |
| Alternating reflected stripes | Leaf orientation and viewing/light direction | Separate appearance from suspected bond failure. |
These are suggested checks, not confirmed diagnoses. The earlier air-bridge scenario illustrates why a good gauge cannot prove local contact. Use the trial record to check that air path. A bubble alone does not prove the pump is at fault.
Know when to stop
Don’t sand or finish over unresolved lifting, contamination or instability merely to improve the first impression. Keep bleed-through and checking observations in the record; their detailed causes need separate assessment. When repeating vacuum press veneering, do not change several process variables at once and then claim to know which one solved the problem.
Alternating light and dark leaves may involve the veneer barber-pole effect. Use its viewing checks before assigning an optical stripe to a bonding defect. If material selection remains unclear, share your panel requirements and actual trial observations with VitalWood Global.
Vacuum Press Veneering Questions
How much vacuum is needed for veneering?
Use the vacuum level required by your equipment and compatible adhesive instructions. Record the gauge units and achieved reading. Available pressure difference depends on atmospheric conditions, including altitude, so a quoted reference is not a universal acceptance limit. A gauge reading also does not prove contact across every part of the panel.
Can I switch the pump off after sealing the bag?
Only follow the operating mode specified for your system. Continuous-run and automatic-cycling systems maintain vacuum differently. A sealed bag may still leak, and a pump-side gauge behind a closed valve may not measure the bag. For vacuum press veneering, maintain and monitor the required conditions throughout the specified press interval.
Do I need both breather mesh and a top caul?
They perform different tasks, and the approved arrangement depends on the panel. Mesh provides an air route; a caul provides a contact surface where required. The bottom platen still supports the layup. Check the equipment supplier’s arrangement for your veneer flatness and thickness, including the risk of mesh impressions on the face.
How long should veneer stay in a vacuum bag?
Follow the chosen adhesive’s press interval under the stated conditions. Open time, total assembly time, press/set time and full cure are separate requirements. An overnight rule can conflict with product instructions. Record when the required vacuum was reached and follow the specified cure and conditioning process after removal from the bag.
Can I use paper-backed veneer in a vacuum press?
Paper-backed veneer can suit a compatible system, but identify the actual backing and check both suppliers’ instructions. Confirm surface preparation, adhesive penetration, core suitability and pressure requirements. Do not transfer a raw-veneer recipe to every backed sheet. A representative trial should use the same backing and construction as the intended panel.
Approve the Setup Before the Production Panel
Vacuum press veneering begins before the pump switch: identify the materials, confirm the adhesive, support the stack and trace the air path. Use the dry rehearsal to check loading and evacuation before starting the glue clock.
Keep the vacuum press veneering record with its labeled first-panel sample. Compare observed conditions with the selected instructions, inspect after the specified cure and resolve unexplained defects before repeating. If you change the veneer, backing, core or glue, repeat the checks that change affects. Don’t assume that the old trial still applies.
For the material-selection discussion, contact VitalWood Global with your veneer and panel requirements, including the proposed layup and trial record. Record the next decision: use the checked layup, change a known part of the process, or ask for advice before using the production face.