
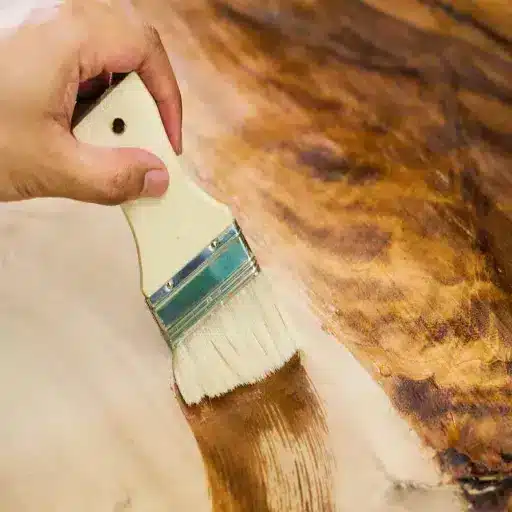
How to Stain Wood Furniture: Beginner’s Guide
Staining wood furniture takes a weekend and a few basic tools: sandpaper, wood conditioner, stain, lint-free rags, and a clear topcoat. The process is straightforward: prep the surface, apply the stain evenly, wipe off the excess, and seal the finish. The difference between a DIY project that looks store-bought and one that looks streaky almost always comes down to sanding and patience.
If you have never stained furniture before, this guide is for you. You will learn how to stain wood furniture from start to finish, including how to choose a stain, how to prep bare or previously finished wood, and how to protect the final surface. For the fundamentals of staining any wood project, see our complete guide to how to stain wood. MasterClass also breaks down the basics of staining wood in a clear, beginner-friendly format.
Key Takeaways
- Sanding is the most important step; stain will highlight, not hide, scratches and unevenness.
- Softwoods like pine, maple, and cherry need a pre-stain wood conditioner to prevent blotching.
- Water-based stains dry in 2–4 hours and clean up with soap and water; oil-based stains dry in 6–8 hours and penetrate deeper.
- Always wipe off excess stain within the manufacturer’s recommended time to avoid tackiness.
- A clear topcoat such as polyurethane, polycrylic, or wax protects the color and extends the life of the finish.
What You Need to Stain Wood Furniture
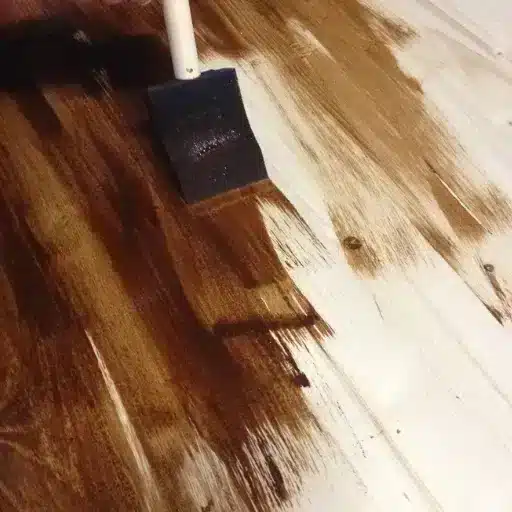
Gathering your supplies before you start prevents interruptions that can cause uneven color. Here is a practical checklist for staining a typical piece of furniture.
Sanding and Prep Supplies
- Sandpaper: 120, 180, and 220 grit
- Sanding sponge or block
- Tack cloths or lint-free rags
- Vacuum with brush attachment
- Degreasing cleaner or mild dish soap
- Chemical stripper or scraper (only if removing old finish)
Staining Supplies
- Wood conditioner / pre-stain conditioner
- Oil-based, water-based, or gel stain
- Stir stick
- Foam brush, natural-bristle brush, or clean lint-free rags
- Disposable gloves
- Drop cloth or cardboard
Sealing Supplies
- Clear topcoat: polyurethane, polycrylic, wax, or oil
- Fine steel wool or 220-grit sandpaper for between coats
- Clean applicator for the topcoat
Safety Gear
- Nitrile gloves
- Dust mask or respirator when sanding
- Safety glasses
- Work in a well-ventilated area or outdoors
Choose the Right Stain for Your Furniture
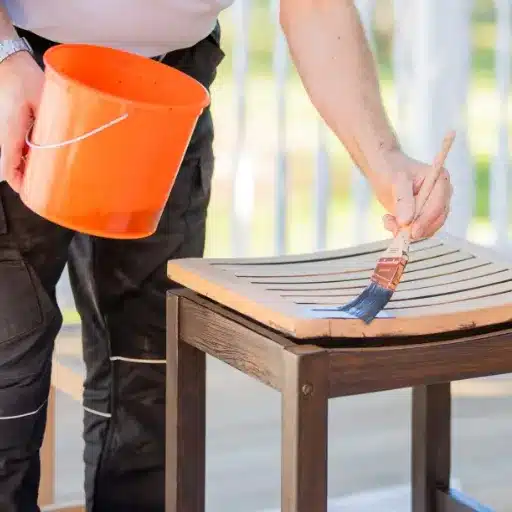
The stain you choose determines the color, durability, and workability of the project. For a deeper comparison of oil, water, gel, and specialty stains, read our guide to the types of wood stain. If you are unsure which color to choose, our guide to wood stain colors covers popular options and how they look on different species.
Oil-Based Stain
Oil-based stains penetrate deeply and are forgiving for beginners. They dry slowly, which gives you more time to blend edges and fix mistakes. They work especially well on hardwoods like oak, walnut, and ash. The downsides are a stronger odor, longer drying time, and cleanup requiring mineral spirits.
Water-Based Stain
Water-based stains dry quickly, emit fewer VOCs, and clean up with soap and water. They are a strong choice for indoor furniture projects where air quality matters. Because they dry fast, you need to work quickly and keep a wet edge to avoid lap marks.
Gel Stain
Gel stains sit on top of the wood rather than soaking in deeply. They are ideal for vertical surfaces, blotchy woods, or furniture with an existing finish that you do not want to strip completely. Gel stain is also a good option for beginners because it is easier to control.
Stain Type Comparison for Furniture
| Stain Type | Best For | Drying Time | Cleanup | Odor/VOCs |
|---|---|---|---|---|
| Oil-based | Hardwoods, deep color | 6–8 hours | Mineral spirits | Higher |
| Water-based | Indoor projects, fast turnaround | 2–4 hours | Soap and water | Lower |
| Gel stain | Vertical surfaces, blotchy woods | 8–10 hours | Varies by base | Moderate |
Matching Stain to Wood Species
- Oak: Accepts stain evenly; great for beginners. Almost any stain type works well.
- Pine: Soft and blotchy; always use wood conditioner first. For more details, see our guide on how to stain pine wood.
- Maple: Dense and tricky; use conditioner and light coats.
- Cherry: Darkens naturally over time; test carefully and go lighter than you think.
- Walnut: Often looks best with oil or a clear finish rather than a dark stain.
How to Prep Furniture for Staining
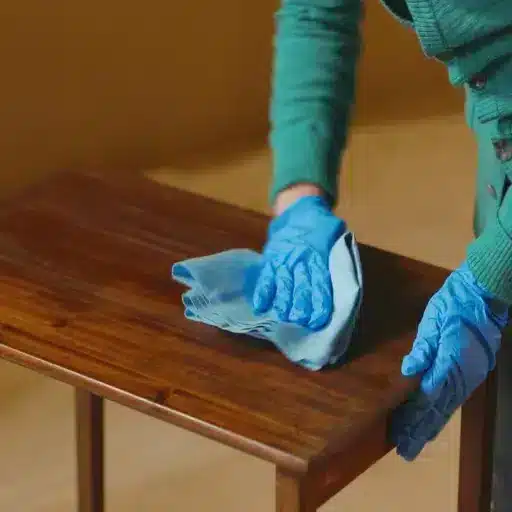
Prep is where most furniture staining projects succeed or fail. Stain will reveal every scratch, dent, and patch of old finish left behind. For a full walkthrough of wood prep fundamentals, see our guide to how to prepare wood for staining. Woodshop Diaries shares a practical furniture staining tutorial with project photos worth reviewing.
Step 1: Remove Hardware and Disassemble When Possible
Take off knobs, pulls, hinges, and drawer slides. Remove drawers and doors if you can. This lets you stain every surface evenly and protects metal from stray stain.
Step 2: Clean the Surface
Furniture accumulates oils, wax, polish, and grime. Use a degreasing cleaner or mild dish soap and water, then rinse with a clean, damp cloth. Let the piece dry completely before sanding.
Step 3: Strip Old Finish If Needed
If the piece is painted, varnished, or has a failing old stain, remove it before staining. You can use a chemical stripper, a scraper, or a combination of sanding. For thick paint or varnish, stripping is usually faster than sanding alone.
Step 4: Sand Progressively
Start with 120-grit sandpaper to remove the old finish and smooth rough areas. Move to 180-grit to remove the scratches left by the coarser paper. Finish with 220-grit for a smooth surface ready for stain. Always sand with the grain, not against it or in circles, to avoid visible scratches.
Step 5: Remove All Dust
Vacuum the piece with a brush attachment, then wipe it down with a tack cloth. Even a small amount of dust can create bumps in the finished surface.
When and How to Use Wood Conditioner
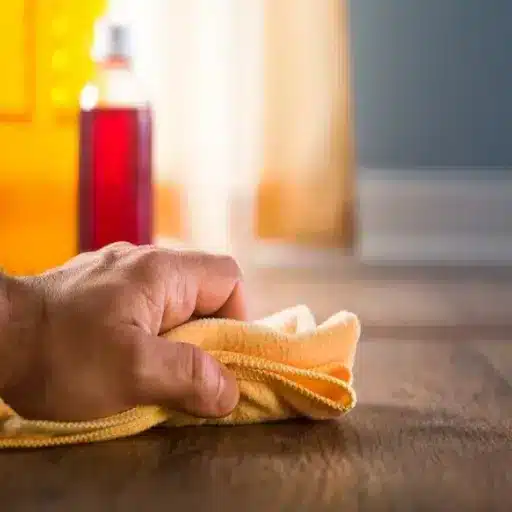
Wood conditioner, also called pre-stain conditioner, is one of the most overlooked steps in furniture staining. It is especially important on soft or porous woods that absorb stain unevenly.
Why Conditioner Matters
Softwoods like pine, maple, cherry, and poplar have uneven grain density. Some areas absorb stain quickly and become dark, while other areas resist stain and stay light. Conditioner partially seals the wood so the stain absorbs more uniformly.
How to Apply It
Brush or wipe the conditioner onto the bare wood and let it penetrate for 5–15 minutes, depending on the manufacturer’s instructions. Wipe off any excess, then apply the stain within the recommended window, usually within two hours.
When You Can Skip It
Dense hardwoods like oak, walnut, and ash generally accept stain evenly without conditioner. If you are staining a hardwood and want the grain to pop, you can often skip this step.
How to Apply Stain to Furniture
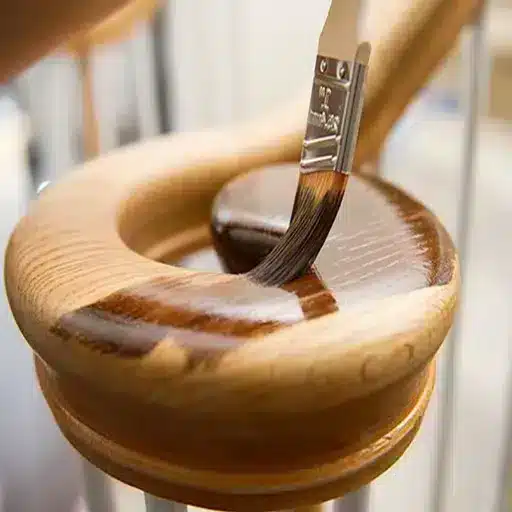
Once the surface is clean, smooth, and conditioned, the actual staining is the rewarding part. Apply the stain with the grain, work in small sections, and wipe off the excess before it dries.
Stir and Test
Stir the stain thoroughly with a flat stick. Shaking creates bubbles that can leave spots on the finish. Test the color on a hidden area or scrap piece of the same wood, and let it dry fully before judging. Stain always looks darker when wet. Windsor Plywood provides a helpful wood furniture staining checklist for beginners.
Apply With the Grain
Use a foam brush, natural-bristle brush, or clean rag to apply the stain in the direction of the wood grain. Work in small sections, especially with water-based stain, so the product does not dry before you wipe it.
Let It Penetrate
Follow the manufacturer’s instructions for dwell time. For oil-based stains, this is usually 5–15 minutes. The longer the stain sits, the darker the color will be.
Wipe Off the Excess
This step is critical. Wipe away excess stain with a clean, lint-free rag, moving with the grain. If you leave too much stain on the surface, it will stay tacky and never fully cure. Continue wiping until the surface feels smooth and no longer transfers color easily.
A Quick Story
A few years ago, a woodworker named David decided to refinish a maple dresser for his daughter’s bedroom. He skipped the wood conditioner and applied a dark walnut oil stain. Within minutes, the surface looked blotchy, with dark patches around the grain and pale spots elsewhere. After sanding back down and starting over with conditioner, the second attempt came out smooth and even. His takeaway: on softwoods, conditioner is not optional.
Drying and Recoating Times
Drying time depends on the stain type, temperature, humidity, and airflow. Water-based stains usually dry to the touch in 2–4 hours, while oil-based stains take 6–8 hours.
General Drying Guidelines
| Stain Type | Dry to the touch | Recoat Time | Full Cure |
|---|---|---|---|
| Water-based | 2–4 hours | 4–6 hours | 24 hours |
| Oil-based | 6–8 hours | 24 hours | 48–72 hours |
| Gel stain | 8–10 hours | 24 hours | 48 hours |
When to Apply a Second Coat
Most furniture pieces need only one or two coats of stain. If you want a darker color, apply a second thin coat after the first is fully dry. Avoid building up too many layers, because a thick stain can become sticky and interfere with the topcoat.
Wait Before Sealing
Let the stain cure fully before applying a clear topcoat. Oil-based stains generally need 24 hours, while water-based stains may be ready in 4–6 hours. Check the label for specific instructions.
How to Seal Stained Furniture
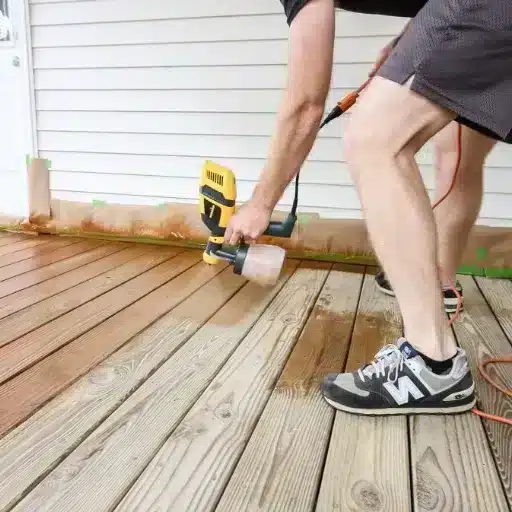
Stain adds color but offers little protection. A clear topcoat seals the wood, protects against scratches and moisture, and makes the surface easier to clean. For more on sealers, read our guide on how to seal stained wood.
Polyurethane
Polyurethane is the most durable option for high-use furniture like tables and dressers. Oil-based polyurethane adds a warm amber tone, while water-based polyurethane dries clear and has a lower odor. Apply two or three thin coats, sanding lightly with 220-grit paper between coats.
Polycrylic
Polycrylic is a water-based protective finish that dries clear and resists yellowing. It is a good choice for light-colored stains or painted furniture. It is less durable than polyurethane for very high-traffic pieces.
Wax
Paste wax gives furniture a soft, low-sheen finish and is easy to reapply. It is best for low-use decorative pieces because it offers less protection than polyurethane.
Oil Finishes
Tung oil and linseed oil penetrate the wood and enhance the grain. They are easy to apply and repair but require more frequent reapplication than film-forming finishes.
Staining Different Wood Species
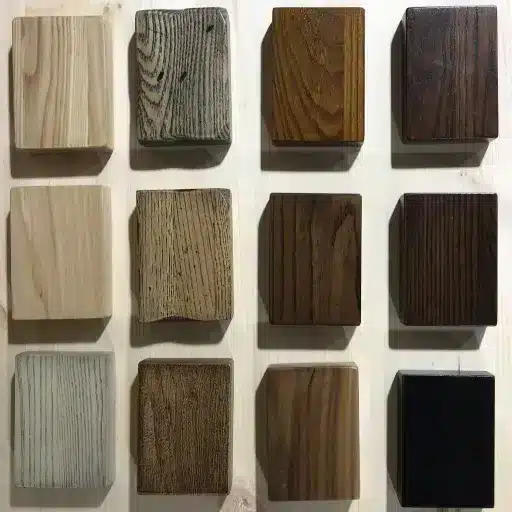
Not all wood behaves the same way with stain. Matching your technique to the species will save you frustration.
Pine
Pine is affordable and widely used for furniture, but it blots easily. Use wood conditioner and a light stain or gel stain for the most even results.
Oak
Oak has open grain that accepts stain beautifully. It is one of the most forgiving woods for beginners and works well with oil, water, or gel stains.
Maple
Maple is dense and close-grained, which makes stain absorption uneven. Use conditioner, apply thin coats, and test carefully.
Cherry
Cherry darkens naturally with age and sun exposure. Choose a lighter stain than your final goal, or skip the stain altogether and use oil for a natural look.
Walnut
Walnut is naturally rich in color and often does not need staining. A clear oil or polyurethane finish usually shows off the wood best.
Common Furniture Staining Mistakes
Even experienced DIYers make these errors. Avoiding them will save you time and rework.
Skipping Sanding Steps
Stain highlights imperfections. If you stop at 120 grit, the scratches will show through. Work up to 220 grit for a smooth finish.
Not Using Conditioner on Softwoods
Pine, maple, cherry, and poplar almost always benefit from conditioner. Skipping it is the most common cause of blotchy results.
Leaving Excess Stain on the Surface
A thick stain does not mean a darker color; it means a sticky surface that attracts dust and never cures. Wipe off the excess thoroughly.
Staining in Poor Ventilation
Stains and sealers release fumes that can be harmful in enclosed spaces. Work outdoors or in a well-ventilated room, and wear a respirator if needed.
Applying Topcoat Too Soon
If the stain is not fully dry, the topcoat can pull the color, create streaks, or fail to adhere. Wait the full drying time recommended on the can.
If blotches do appear, sand back to bare wood, apply conditioner, and restain.
Sustainable Furniture Finishing Choices

At VitalWood Global, we believe that a beautiful finish starts with responsible materials. The wood you choose and the products you apply both affect the environmental impact of your project.
Start With Responsibly Sourced Wood
Look for FSC-certified or otherwise responsibly sourced furniture lumber. Certified wood comes from forests managed for biodiversity, reforestation, and long-term ecological health. Choosing durable, high-quality lumber also means fewer replacements over the life of the piece.
Choose Low-VOC Stains and Sealers
Water-based and plant-oil finishes generally emit fewer volatile organic compounds than traditional oil-based products. Lower VOCs mean better indoor air quality during application and less environmental impact. The EPA explains how volatile organic compounds affect indoor air quality.
Dispose of Rags and Leftovers Responsibly
Oil-soaked rags can spontaneously combust if piled together. Lay them flat to dry outside, store them in a sealed metal container with water, or follow local hazardous waste guidelines. Leftover stain should never be poured down drains or onto soil.
Longevity Is Sustainability
A well-sealed finish that lasts 5–10 years reduces the total product used, the labor involved, and the waste generated. Investing in proper prep and a quality topcoat is one of the simplest ways to make your furniture project more sustainable.
Frequently Asked Questions
Do I need to sand between coats of stain?
Usually no. Sanding between stain coats is not necessary and can remove color. Only sand if the surface feels rough or if you need to remove raised grain. Sanding between topcoat layers is recommended for a smooth finish.
How many coats of stain should I apply?
Most furniture pieces need one or two coats. More than two coats can cause stickiness and poor adhesion of the topcoat. Build color with thin coats rather than one heavy application.
Can I stain over painted furniture?
No. Stain needs to penetrate bare wood. Painted furniture must be stripped or sanded down to bare wood before staining. Gel stain is the only exception; it can sometimes be applied over a clean, lightly scuffed existing finish.
How long should the stain dry before polyurethane?
Oil-based stain generally needs 24 hours before polyurethane. Water-based stain may be ready in 4–6 hours. Always check the manufacturer’s label for specific instructions.
What is the best stain for pine furniture?
For pine, use a pre-stain wood conditioner first, then a light-colored oil or water-based stain. Gel stain is also a popular choice because it sits on the surface and reduces blotching.
Can I use gel stain on furniture?
Yes. Gel stain is excellent for furniture, especially vertical surfaces, softwoods, or pieces with an existing finish you do not want to strip. It is easier to control than liquid stain.
How do I fix a blotchy stain?
Light blotching can sometimes be evened out by applying another thin coat of stain. For severe blotches, sand back to bare wood, apply conditioner, and restain.
Conclusion
Staining wood furniture is one of the most satisfying home projects you can take on. With the right prep, the right stain, and a protective topcoat, you can transform a plain or worn piece into something that looks custom-made. The formula is simple: sand thoroughly, condition softwoods, stain thin, wipe off the excess, and seal for protection.
Start with quality, responsibly sourced wood, choose a finish that matches your wood species and project needs, and do not rush the drying times. If you need guidance on selecting the right wood for your next furniture project, contact our team. We are here to help you build something beautiful and lasting.