

Prefinished Engineered Flooring Over Concrete: 2026 Guide
Yes, you can install prefinished engineered flooring over concrete. It is the one flooring type the industry recommends for slabs at or below grade, because its cross-ply core handles the humidity swings a slab throws at it. But the slab, not the plank, decides whether the job lasts. Concrete wicks ground moisture upward, and if that moisture is not measured and managed first, even a premium factory-finished floor can cup, buckle, and grow mold within months.
Last spring, Daniel stood in his half-finished basement in Colorado. His contractor had quoted him a glued-down engineered oak floor, and it looked beautiful in the sample. What nobody mentioned was that the slab was eight months old, unsealed, and reading 82% relative humidity. Six weeks after install, the planks were cupping at the seams and a musty smell had settled in. The floor was not defective. The slab was never asked to prove itself.
This guide fixes that. You will learn the three tests a slab has to pass, the right method for glue-down versus floating, the radiant-heat rules most guides skip, and what a slab installation really costs in 2026. By the end, you will know exactly what to request from your supplier and your installer before a single plank goes down.
Also worth knowing up front: prefinished engineered flooring is a specific product with specific strengths and limits. If you are still weighing finishes, start with our full guide to prefinished engineered wood flooring and come back here for the slab specifics.
Key Takeaways
- Prefinished engineered flooring is the recommended construction over concrete because its cross-ply core is dimensionally stable; solid hardwood is not.
- Your slab must pass three tests first: moisture (≤75% RH per ASTM F2170, or ≤3 lbs/1,000 sq ft/24 hr per ASTM F1869), flatness (about 1/8″ over 6′), and cleanliness.
- Glue-down gives the most solid result and suits wide planks and radiant heat; floating is faster, cheaper, and repairable but needs a vapor barrier and shows bevels more.
- Over radiant heat, keep the slab surface at 80–85°F (27–29°C) and ramp about 2–5°F per day.
- A moisture failure on a prefinished floor cannot be sanded out. It is replacement, not repair, which is why testing is cheap insurance.
The Short Answer: Can Prefinished Engineered Flooring Go Over Concrete?

Yes, and it is often the best choice. Engineered flooring can be installed on, above, or below grade, and the NWFA recognizes engineered construction as the appropriate wood option over slabs. The factory finish adds a bonus solid wood cannot offer: nothing has to cure on site.
However, three conditions decide success. The slab must be dry (moisture-tested and within limits), flat (within typical tolerances), and clean (free of sealers, curing compounds, and old adhesive). Meet those, and you have a floor that performs for decades. Skip them, and you have an expensive problem.
Why Prefinished Engineered Wins on a Slab
Solid hardwood is a single piece of wood. When a slab below it releases moisture vapor, that piece swells across its width, and the floor cups or buckles. Engineered planks stack a real-wood veneer over a cross-ply core, with the plies running perpendicular to each other. That construction resists the movement a slab imposes.
The prefinished part matters too. Site-finished floors are sanded and coated in the room, which means a wet finish has to cure over a cold, moisture-emitting slab. That is a known failure mode. Factory-finished planks arrive fully cured, so the finish is never compromised by the slab’s conditions, and the floor is walkable the day it is laid.
One honest limit: because the finish is already applied, a moisture-damaged prefinished floor cannot be sanded back to health. Understanding that trade-off is part of choosing well, and our breakdown of common prefinished engineered hardwood problems explains how to tell a normal micro-bevel from a real defect before you call anyone.
The One Thing That Kills Slab Installations: Moisture
Concrete is porous. It releases moisture vapor continuously, and a slab-on-grade or below-grade slab releases more than one sitting above grade. Wood flooring responds to that moisture by expanding, and trapped moisture underneath grows mold.
Two tests define whether your slab is ready. Both are the industry standard:
| Test | What it measures | Standard limit | Notes |
|---|---|---|---|
| ASTM F2170 (in-situ RH) | Relative humidity inside the slab | ≤75% RH | Probe drilled to 40% of slab depth (drying one side) or 20% (two sides). Preferred method today. |
| ASTM F1869 (calcium chloride) | Moisture vapor emission rate | ≤3 lbs/1,000 sq ft/24 hr | Slab must be at least 28 days old to be valid. |
Run one test per 1,000 sq ft, with a minimum of three probes per area. Any single probe over the limit fails the slab, so a low average proves nothing. If a calcium chloride test lands within 15% of the limit, confirm it with an F2170 probe.
Why this matters so much: at 80% RH, moisture-reactive urethane adhesives begin losing bond strength, and engineered planks can delaminate or support mold within 6 to 18 months. That is not a slow decline. It is a floor that fails in its second year.
You also want the wood itself in balance. Aim for a plank moisture content of 6–9%, and ensure the slab is within about 2% of the wood before installation.
Preparing a Concrete Slab: Cure, Flatness, Cleanliness, pH
Moisture is the headline, but the slab has to be ready in three other ways.
Cure time. New concrete should be at least 30 days old, and preferably 60. Some manufacturers require 60 to 90 days under conditioned air. Poured too fresh, a slab is still releasing its mix water at rates no floor can survive.
Flatness. Most specs call for the slab to be flat within 1/8″ over 6 feet, or 3/16″ over 10 feet. Grind high spots and fill low spots with a patching compound or self-leveler. Floating floors bridge small dips but cannot hide a hump, and glued floors telegraph every irregularity.
Cleanliness. The slab must be free of curing compounds, sealers, paint, drywall mud, grease, and old adhesive. These contaminate the bond and block a moisture barrier from working.
pH. Concrete surface pH should sit between 6 and 9. High readings often signal excess moisture, which may point you toward a mitigation coat.
Here is the checklist to run before anyone schedules the install:
- Confirm cure time and that HVAC has run for at least 5 days.
- Measure moisture with F2170 or F1869, recording every probe location.
- Check flatness with a 6′ or 10′ straightedge.
- Grind or patch as needed, then vacuum thoroughly.
- Verify pH and, if high, plan a mitigation step.
- Document everything. A contractor’s photos and readings are your warranty defense.
Moisture Barriers and Mitigation Systems
Every slab install needs moisture protection. The right kind depends on your method and your readings.
- Floating floors: lay a 6-mil (some specs call for 6–10 mil) polyethylene vapor barrier. Use a single sheet where possible, overlap seams by 8 inches or more, and turn the barrier up the walls behind the baseboard.
- Glue-down floors: use a moisture-barrier adhesive system (a urethane adhesive engineered to double as a barrier). This avoids a separate membrane and bonds the floor at the same time.
- Over-limit slabs: when readings exceed the limits, you need a moisture mitigation system, such as a roll-on epoxy or urethane membrane, applied before the floor. This is mandatory, not optional.
Be skeptical of the claim that an above-grade slab needs no barrier. Above-grade slabs usually emit less vapor, but “less” is not “none,” and the cost of a barrier is trivial next to a failed floor.
Glue-Down vs. Floating Over Concrete
This is the decision that shapes the feel, the cost, and how repairable the floor is.
| Factor | Glue-Down | Floating (T&G) | Click-Lock Floating |
|---|---|---|---|
| Feel underfoot | Most solid, quietest | Somewhat hollow | Lightest, hollowest |
| Best for | Wide planks, large open areas, radiant heat | Narrower planks, DIY, future removal | Fast DIY, rentals |
| Slab prep needed | Highest (very flat, dry) | Moderate | Moderate |
| Repair | Hard; planks cut out | Planks unlock and replace | Planks unlock and replace |
| Moisture control | Moisture-barrier adhesive | Vapor barrier + underlayment | Vapor barrier + underlayment |
| Relative cost | Higher | Moderate | Lowest |
A few rules decide this for you. Nail-down and staple-down are not options over concrete without a plywood sleeper system. Lightweight concrete (under roughly 100 lbs, or a slab a nail sinks into when dragged) cannot be glued at all and must be floated. And wide planks over 7 inches generally perform better glued, because they move more across their width.
Glue-down also transfers radiant heat better, which matters if you are heating the slab. If you are set on glue-down, note the practical targets: about 90% adhesive transfer and a 100–150 lb roller pass. For the full step-by-step, our engineered wood flooring installation guide covers tools, sequence, and every method in detail.
Radiant Heat Over a Concrete Slab
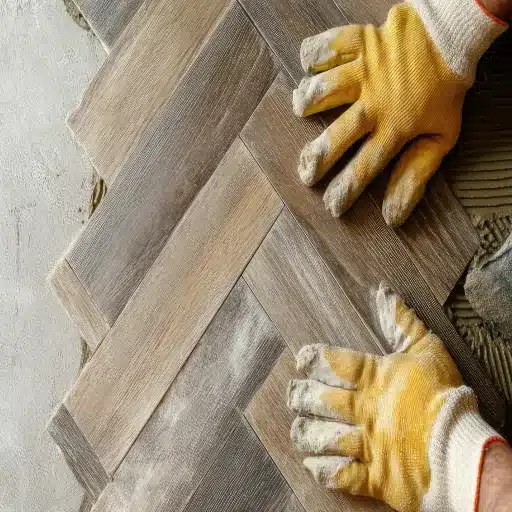
In-slab radiant heating is common in modern construction, and it is a genuine reason to choose engineered wood over solid. But heat demands discipline.
Keep the slab surface at or below 80–85°F (27–29°C). Measure the slab surface with a sensor, not the room air. Some manufacturers cap the limit as low as 80.6°F, so always check your plank’s own specification.
Ramp gradually. Raise the temperature about 2–5°F per day when bringing the system up, and never push full heat into a freshly laid floor. Sudden temperature swings cause more gapping and cupping than steady warmth ever does.
Control vapor and monitor temperature. Over a heated slab, some specs call for a dedicated polyethylene film, plus a calibrated slab sensor and thermostat to hold the ceiling. A data logger helps you prove you stayed within limits if a warranty question ever arises.
Mind the species. Some brands restrict or exclude certain dense species over radiant heat, while others approve only a short list, often oak and walnut. Your manufacturer’s approval list is the final word.
One more note: heat plus a floating floor makes micro-bevels more visible, because the floor moves as humidity and temperature shift. If a seamless look matters over radiant, glue-down usually looks better.
Installation Day: Acclimation, Gaps, and Traffic
Prep is done, the slab passed, and now the floor goes in. A few details protect the work.
- Acclimate planks for 48 to 72 hours in opened boxes, and some factory specs ask for 5 to 7 days. Keep the room at 60–80°F and 30–50% relative humidity, with HVAC running at least 5 days before, during, and after.
- Leave expansion gaps of 3/8″ to 1/2″ at every wall and fixed object, then conceal them with trim. A floor pinned tight against a stationary object has nowhere to move, and it will buckle.
- On glue-down, spread adhesive with a notched trowel, lay into wet adhesive, and check transfer as you go. Roll the finished floor, then restrict traffic for 8 to 10 hours. Heavy traffic waits about 24 hours.
Daily and seasonal habits matter as much as install day. Sustained indoor humidity outside roughly 35–55% is the most common reason a good slab floor develops gaps or cupping later.
What It Costs: Slab Installations in 2026
Slab work adds lines a wood-subfloor job never has. Expect the following ranges, then compare against your bids.
| Cost line | Typical range |
|---|---|
| Prefinished engineered material | $4–$9 per sq ft |
| Vapor barrier or underlayment | $0.30–$1.00 per sq ft |
| Adhesive (glue-down) | $0.30–$0.60 per sq ft |
| Slab prep (grinding, self-leveler, mitigation) | $1–$4 per sq ft |
| Labour, floating | Included in base install |
| Labour, glue-down | +$1–$5 per sq ft over floating |
| Total installed | $8–$15 per sq ft |
Priya learned this the helpful way. Renovating a 900 sq ft main floor over an existing slab in Texas, she budgeted for material and labour only. Her installer flagged the slab at 78% RH and quoted a mitigation coat at roughly $2.50 per sq ft. It added about $2,250 to the job, which stung at the time. Two years later, her floor is flat, tight, and immaculate, while a neighbour’s cheaper install over an untested slab is already cupping at the seams.
For generic engineered pricing beyond the slab adders, see our engineered wood flooring cost guide.
Mistakes That Cause Failures, and What They Cost
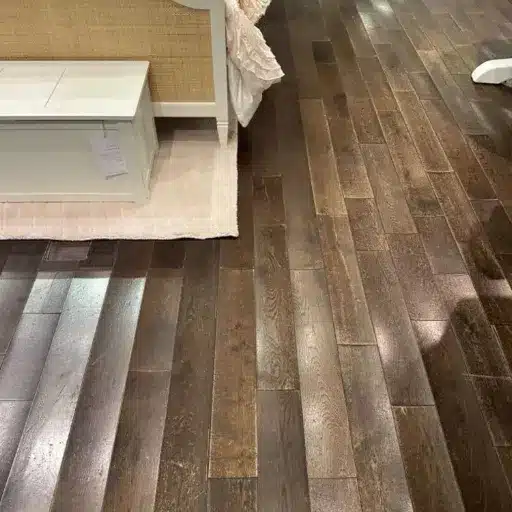
The single most expensive mistake is installing over an untested slab. A documented case from Wood Floor Business followed a homeowner who glued prefinished engineered flooring directly to a slab using a combination adhesive and moisture barrier, without checking moisture. Within three to four months, the floor had hollow spots, blackening, buckling, and mold, and boards were releasing from the concrete. Inspection found high moisture on both the wood and the slab.
Three lessons stand out:
- No adhesive or barrier is impervious to excessive moisture. A combination product does not excuse you from testing.
- A glued floor over poorly isolated concrete can fail in year 3 to 5, and that failure is a prep problem, not a product defect.
- On a prefinished floor, the damage cannot be refinished away. The factory topcoat cannot be sanded out of a swollen plank, so a moisture failure means replacement. Read more about why in our guide to refinishing engineered hardwood floors.
Other frequent, avoidable errors include skipping the flatness check, installing over an uncured slab, omitting the expansion gap, and installing in full bathrooms or steam-prone areas where no wood floor belongs.
On a related note, below-grade slabs carry the highest moisture risk of all, so if your project is a basement, review our dedicated guide to engineered wood flooring for basement before you specify.
How Long Will It Last Over Concrete?
A well-prepped slab installation can last as long as the finish and wear layer allow, often 20 to 30 years or more before the surface needs attention. Lifespan over concrete depends less on the plank and more on three things: humidity control, moisture management at the slab, and how much wear traffic the floor sees. Our full breakdown of how long does prefinished engineered wood flooring last splits finish life, wear-layer life, and core stability into numbers you can plan around.
Frequently Asked Questions
Can you put prefinished engineered flooring directly on concrete?
Yes. Engineered flooring is the recommended wood choice over concrete at or below grade, as long as the slab passes moisture, flatness, and cleanliness tests. Glue-down or floating are both valid; nail-down is not, unless you add a plywood subfloor.
What is the maximum moisture in a concrete slab before installing engineered flooring?
The industry baseline is ≤75% RH (ASTM F2170) or ≤3 lbs/1,000 sq ft/24 hr (ASTM F1869). Your specific manufacturer may set a stricter limit, and that limit governs.
Do I need a moisture barrier over concrete?
Yes. Floating floors need a vapor barrier, typically 6-mil polyethylene. Glue-down floors need a moisture-barrier adhesive or a separate mitigation membrane. Over-limit slabs need a mitigation system.
Is glue-down or floating better over a concrete slab?
Glue-down feels more solid, suits wide planks and radiant heat, and transfers heat better. Floating is faster, cheaper, and easier to repair, but shows bevels more and needs precise humidity control. Match the method to your planks and your slab.
Can you install prefinished engineered flooring over radiant heat?
Yes, but keep the slab surface at 80–85°F (27–29°C), ramp about 2–5°F per day, and confirm your specific product is approved for radiant heat. Some species are restricted.
How long does a concrete slab need to cure?
At least 30 days, and preferably 60 under conditioned air. Some manufacturer specs require 60 to 90 days before installation.
How flat does a concrete slab need to be?
Commonly within 1/8″ over 6 feet or 3/16″ over 10 feet. Grind high spots and fill low ones before installing.
Can prefinished engineered flooring go over concrete in a basement?
Below-grade slabs carry the highest moisture risk. It is possible with correct testing and mitigation, but confirm the product is approved for below grade and never skip the barrier.
Conclusion
Prefinished engineered flooring and concrete slabs are a natural pairing. The cross-ply core resists the movement a slab creates, the factory finish eliminates on-site curing risk, and the floor is ready to walk on the day it is installed. What makes or breaks the job is the slab, not the plank.
Three steps decide everything. Test the slab and respect the moisture limits. Prepare it for flatness and cleanliness. Choose your method deliberately, especially if radiant heat is in play. Do that, and you get a floor that stays flat and tight for decades.
Ready to specify a slab-ready floor? Contact VitalWood Global for moisture-testing guidance, product data sheets, samples, and wholesale quotes. Our team will help you match the right prefinished engineered construction to your concrete project, and confirm the install method your warranty requires. Request your quote today →