

Prefinished Engineered Hardwood Flooring Problems (and How to Avoid Them)
Most prefinished engineered hardwood problems are not manufacturing defects. Gaps, overwood, cupping and peeling finishes usually trace back to installation errors, site conditions or maintenance, and only a minority are genuine factory faults. That distinction decides who pays for the repair.
Two years ago, Dana glued 2,000 square feet of 6.3-inch engineered oak over a slab her contractor had tested. By the first winter she could slide a credit card into gaps across roughly 20 percent of the floor. Her installer blamed the manufacturer. The retailer blamed her humidity. A contractor called it “normal winter movement.” Nobody measured anything, until an NWFA Certified Flooring Inspector did, and his report forced a full remove-and-replace.
If you are still choosing a floor, our guide to prefinished engineered wood flooring covers specifications and finish systems from the manufacturer’s side. This article answers a narrower question: something looks wrong with the floor you have. Is it a defect, is it normal, who is responsible, and what does the fix cost?
Key Takeaways
- Most “prefinished flooring problems” are site or installation issues, not factory defects. Three of the four categories below belong to someone else.
- Micro-bevels are not gaps. A real gap is about 1/8 to 3/16 inch, not uniform, and stays open at the end of the humid season.
- Dry-cupping is the engineered-specific failure. Low humidity curls the edges up, so the remedy is to add humidity, the opposite of wet cupping.
- Delamination and shear failure look alike and are treated differently. So does “the finish peeled” versus “the dog scratched it.”
- Radiant heat, slab moisture and subfloor flatness all have published numbers, and most problems here trace back to whether those numbers were met.
Prefinished Engineered Hardwood Problems: The Short Answer
Prefinished engineered hardwood problems fall into four groups: appearance the floor is designed to have, installation error, site conditions, and genuine manufacturing defects. Only the fourth is the factory’s responsibility, and it is the smallest group by far. The symptom tells you less than the cause does.
| Symptom | Likely responsible party | How to verify | Remedy |
|---|---|---|---|
| Gaps between boards | Site conditions | Measure width; check if it closes in the humid season | Humidity control, then filler or board replacement |
| Overwood at joints | Manufacturing or installation | Dry-fit a carton on a flat table; check with a feeler gauge | Board replacement; a recoat will not fix it |
| Cupping (edges up) | Site conditions | Compare moisture at board bottom and top | Fix the moisture source, dry fully, then assess |
| Crowning (centre up) | Installation (sanding) | Check whether it was sanded while cupped | Re-sand if the wear layer allows, else replace |
| Delamination | Manufacturing | Try to separate layers by hand at a failed board | Board or full replacement |
| Peeling finish | Manufacturing | Check for peeling outside dent marks | Warranty claim; refinish only if the wear layer allows |
| White scratches | User wear | Confirm the scratch reads bright white against the grain | Accept, or recoat with an approved system |
| Hollow spots | Installation | Tap the floor for a dull, loose sound | Adhesive injection or board replacement |
| Squeaks or popping | Installation or subfloor | Locate the sound; check fastening and subfloor movement | Face-nail, inject adhesive, or fix the subfloor |
| Click-lock separation | Installation or subfloor | Check subfloor flatness and wall expansion gaps | Reseat; the subfloor must be flat for it to hold |
| Telegraphing | Subfloor or framing | Lay a straightedge across the surface | Feather or level the subfloor, then reinstall |
The Two Tests That Settle Most Arguments
Does it close in the humid season? NWFA’s convention is to inspect gaps at the end of the humid season. Still gapped then, and it is not seasonal movement.
Is it uniform? Normal movement is evenly distributed and proportional to board width. One wide gap in one place is a joint that opened.
Bevels, Gaps and Overwood: Normal, or a Defect?
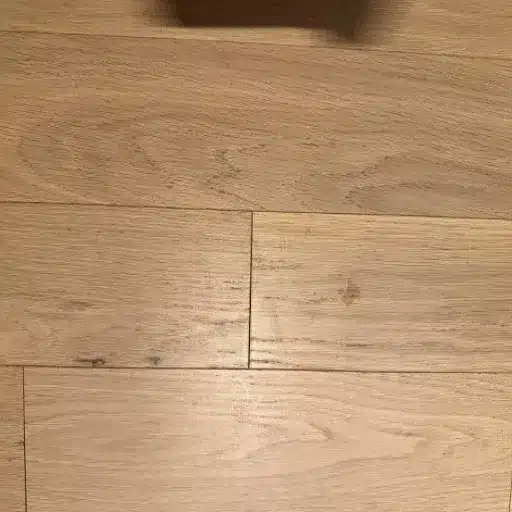
Micro-bevels are normal. A factory finish will not hold on a sharp 90-degree edge, and a prefinished floor is never sanded flat after installation, so the bevel absorbs milling variance and hides small height differences between planks. Ignore the forum claim that “99.9 percent of factory-finished engineered hardwood is beveled.” It has no source and gets used to dismiss real complaints.
Overwood at butt joints is different. NWFA guidance holds that end joints on prefinished flooring should be fillable and barely visible from a standing position. If you can catch a fingernail on the joint, that is overwood, not a bevel. The often-repeated “5 percent of boards may be outside tolerance” rule is reported industry practice, not a located clause. Your manufacturer’s written specification governs. Our comparison of prefinished and unfinished hardwood flooring covers how finish timing affects appearance over the years.
Gap Problems in Engineered Hardwood: Seasonal or a Real Error
Wood is hygroscopic, so its width moves with moisture content. Warm 30°F air at 50 percent relative humidity up to 70°F indoors and relative humidity can drop to roughly 10 percent, which explains most winter gapping in one number.
Normal gaps close in summer, spread evenly, and scale with board width. An 8-inch plank moves about twice as much as a 4-inch plank, and quartersawn or riftsawn stock shrinks up to 33 percent less than plainsawn. Those coefficients come from the USDA Forest Service Wood Handbook.
NWFA guidance calls for 30 to 50 percent relative humidity and 60 to 80°F year-round, while manufacturer warranty windows run 30 to 60, 35 to 55 and 45 to 55 percent across brands. No contractor can satisfy every brand’s window in one house, which is why the written spec on your product governs. The NWFA’s own discussion of gaps is the best diagnostic script available.
Not every gap is environmental. In one documented case, a manufacturer’s representative specified the wrong adhesive and every end joint gapped. If your gaps cluster at board ends, scrutinise the adhesive.
The remedy ladder: control humidity; fill with colour-matched filler worked into the bevel and scraped flush; use slivers for oversized gaps; replace boards when the joint is too far gone. Putty in a moving gap crumbles within a season. Our article on how long prefinished engineered wood flooring lasts explains when such a floor reaches the end of its life.
Overwood and Lipping at Butt Joints
Uneven joints come from milling tolerance, a subfloor dip, a high fastener, or deflection in the assembly. Mitigation is limited, and end bevels only help cosmetically.
Say it plainly: a screen-and-recoat does not fix overwood. Manufacturers have suggested it anyway. If someone offers you a recoat for a height difference, ask how a coating removes material. The preparation that prevents this is in our engineered wood flooring installation guide.
Cupping and Crowning: Reading the Moisture Gradient
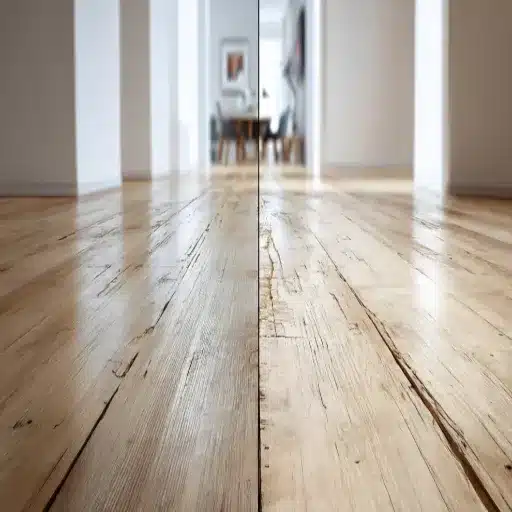
The direction of moisture movement tells you which problem you have. Bottom wetter than top, and the edges rise: cupping. Top wetter than bottom, and the centre rises: crowning.
| Problem | What the board does | Moisture gradient | First response |
|---|---|---|---|
| Cupping | Edges rise, centre stays low | Bottom wetter than top | Find and stop the moisture source |
| Crowning | Centre rises, edges stay low | Top wetter than bottom, or sanded while cupped | Stop surface moisture; re-sand only if warranted |
| Dry-cupping | Edges rise, looks like cupping | Top drier than the core beneath | Add humidity; do not dry the house out |
Wet cupping almost always means moisture is reaching the underside. One documented inspection found wood moisture content of 18.6 to 42.9 percent against 6.4 to 12.9 percent for other wood objects in the same house, with board bottoms at 36.4 percent. Not all of it is a leak; one mall floor cupped and buckled when the HVAC shut down overnight and condensation formed on the slab.
Never sand a cupped floor while it is still wet. Flattening a floor that still has to move back is what causes the next problem.
Dry-Cupping: The Engineered-Specific Failure
Dry-cupping happens under low humidity. The real-wood lamella on top shrinks while the cross-laminated core barely moves, and the mismatch stresses the board into an edge-up cup. Wood Floor Business named the mechanism. Wider boards, plainsawn cuts and thicker wear layers all make it worse.
Marcus hit this in a cold-climate house in his first February. His contractor blamed moisture and lent him a dehumidifier; two weeks of drying made it visibly worse. Running a humidifier to hold the house near 40 percent reversed it over a month. If your floor cups in heating season and humidity is below 30 percent, add moisture rather than removing it.
Crowning: Almost Always a Sanding Error
Crowning is usually caused by sanding a floor that was still cupped. The centre of a cupped board is drier than its edges at the time of sanding, so once the floor reaches equilibrium the middle sits above the new surface. Surface moisture from wet mopping or steam mops is the second cause and usually reverses.
Crowning from improper sanding is structural and does not reverse. It needs re-sanding, only if the wear layer allows, or replacement. As field practice rather than a standard, mild cupping often settles within roughly 4 to 12 weeks. If your floor gets wet repeatedly, our notes on water resistance in engineered wood flooring explain what the products tolerate.
Delamination and Shear Failure: Two Different Failures
Owners call every layer separation “delamination.” The trade separates two events. Bond-line failure, true delamination, is a clean separation at the adhesive between layers. Shear failure is a break within the wood fibre itself, with the bond intact. The warranty may cover one and not the other.
The strongest evidence available comes from a Fraunhofer WKI climate-chamber study. Researchers built 18 engineered floors over radiant-heated slabs and ran them at 30°C and 24 percent relative humidity for 17 days, then 14 percent for 22 days. They found no delamination in any of the 18, only minor surface checking and joint opening in the top layer. Wood Floor Business reported the findings.
WKI attributed real-world delamination to production faults: missing adhesive, too-low bonding pressure, glue beads not flattened during pressing, a glue type prone to losing adhesion over years, and residual ammonia in smoked oak preventing a polyurethane bond. The trade’s breakdown of bond-line failure versus shear is worth reading before you argue about either.
The industry does not fully agree. One camp holds that abnormal humidity is not the typical cause in a well-made product; another reports delamination under abnormal humidity. Both positions are live.
What is not in dispute is that defects exist. In one documented case roughly 50 percent of boards were defective, layers separable by hand, with no adhesive in areas 4 to 10 inches long. Structural defects like this are among the few outcomes usually covered by warranty. This is the part we control, so it is the part we test: our finish and bond-line quality control explains how a bond line is checked before a plank ships.
Finish Problems: Peeling, Flaking, Whitening and Sheen Mismatch
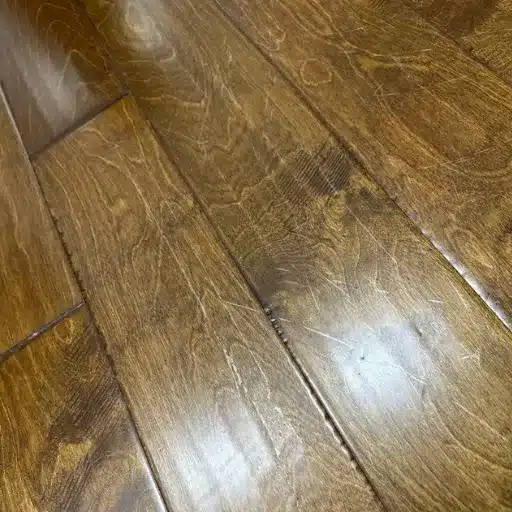
Peeling and Flaking: How a Defect Is Actually Proven
Elena’s prefinished engineered walnut, with a factory UV acrylic finish, began peeling about two months after installation. Her retailer suggested the dog had damaged it. The inspector’s reasoning is worth remembering: he found topcoat adhesion failure with the base coat intact, and peeling also present outside the dent marks. Dog damage follows dent marks; a peeling finish does not. The 25-year warranty covered the claim. Other genuine signatures include sheen mismatch across dye lots and blonde, splotchy bevel edges on stained finishes.
White Scratches on Aluminum Oxide
A scratch in a hard, opaque aluminum-oxide film reads as a bright white line. That is the coating fracturing, not the wood being gouged, which is why prefinished floors can look “scratched” earlier than site-finished floors under identical traffic.
If the finish is worn but the wear layer is sound, restoration may be available. Our article on whether you can refinish prefinished engineered hardwood sets out the 2.5 mm rule and the two tests that decide it. The generic sand-and-recoat procedure lives in our refinishing engineered hardwood floors guide.
Correcting the “You Can’t Recoat Aluminum Oxide” Myth
You will read that aluminum-oxide floors cannot be recoated. That is false as stated. Bona specifies Bona Prep and the Bona Recoat System for aluminum-oxide, ceramic and other factory prefinished floors. With a preparation system, let the finish dry about 24 hours, then scratch it with a coin; if it flakes or peels, do not recoat. With a recoat system, abrade an inconspicuous area with a 220-grit screen; if abrasion exposes raw wood, removes colour or removes finish from the high spots, stop.
Two hard rules. Never recoat over wax, polish or an oil maintenance coating, and run a mineral-spirits rag test to reveal wax residue. Know why recoat genuinely fails, too: insufficient mechanical key, high surface tension, adhesion-blocking additives, and cleaner or oil-soap contamination, which NWFA names as the most common cause of a rejected recoat. Daily care is the cheaper path, and our prefinished engineered flooring maintenance guide covers it. Our veneer finishing page explains how these coatings are built and cured.
Hollow Spots, Squeaks, Popping and Click-Lock Separation
Hollow spots on a glue-down floor come from low spots, insufficient adhesive coverage, or no weighting during cure. A documented case: a 3/8-inch prefinished engineered acacia glued to slab showed hollows, blackening and adhesive release with a mould odour three to four months after installation, with wood moisture content of 18.6 to 42.9 percent and insufficient coverage. Two failures compounding each other.
Squeaks on a nail-down floor are friction or subfloor movement. Popping on a glue-down or floating floor is usually a void under the plank or a failed joint.
Click-lock separation has four mechanisms: subfloor deviations creating pivot points that traffic flexes until the profile fails; expansion gaps that are too tight (buckling and tenting) or too loose (lateral shifting); grit in the groove grinding away fibre, with no fastener redundancy; and low-density foam underlayment compressing unevenly under load. Reseat with a tapping block, replace planks, or accept that a floating assembly over an out-of-plane subfloor will keep failing until the subfloor is fixed.
Subfloor and Slab Problems That Show Up Later
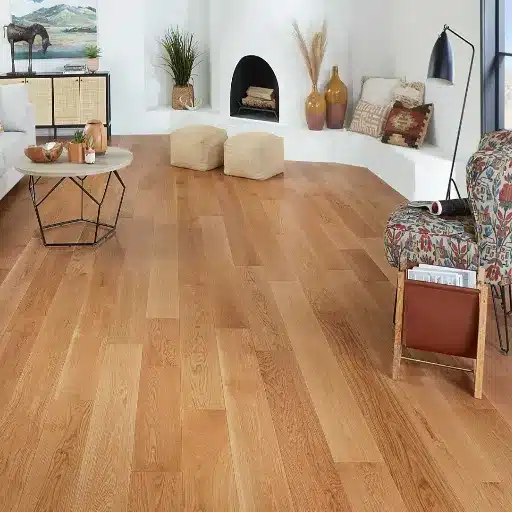
Telegraphing is subfloor and framing irregularity reading through the finished floor, usually from framing members not installed in plane, changes in framing direction, and dimensional lumber that crowns, cups or twists as it dries. Small imperfections can be patched and feathered with an elastomeric compound. Underlayment reduces telegraphing but cannot fix a transition that exceeds the floor manufacturer’s requirement.
Slab moisture testing to ASTM F2170 is the step that gets skipped. Probes are set at 40 percent of slab thickness, so 2 1/2 inches in a 6-inch slab. They need 72 hours to reach equilibrium, with one test per 1,000 square feet and a minimum of three per test area. The worst location governs. The commonly used threshold is 75 percent relative humidity, with some guidance allowing 80, but your manufacturer’s written requirement governs.
Slab drying takes 90 to 150 days depending on size, depth and weather, and builders routinely install before that window closes. Flatness wants to be 3/16 inch in 10 feet, tighter on some specs and stricter for glue-down. Wood moisture content at installation should be 6 to 9 percent, within roughly 2 to 4 percent of the wood subfloor. If your floor is going over concrete, our guide to prefinished engineered flooring over concrete covers the constraints that end in warranty denials.
Radiant Heat: Read the Warranty Before You Blame the Floor
Radiant heat is where warranty terms diverge most, so treat everything below as brand-specific rather than universal. Surface-temperature caps are commonly 27°C (81°F) on some brands and 85°F on others. Many warranties restrict systems to hydronic in-slab only, excluding electric and in-screed heating. At least one major manufacturer excludes floating installation over radiant-heated concrete entirely, and does not warrant squeaking, popping or crackling in floated assemblies.
The hardest clause is the one stating that gapping and seasonal surface checking are typically excluded even when every guideline was followed. Some brands also exclude exotic species over underfloor heating, naming wenge, ipe, jatoba and sucupira. If you are installing, follow the ramp schedule: a gradual increase over roughly five days, beginning about two days after installation. Check the warranty before you install, not after the gapping starts.
Diagnosing Engineered Hardwood Problems: What to Document

Take measurements in this order: moisture readings from the subfloor and from several planks, dated, with the indoor conditions; an indoor humidity log covering the weeks after installation, not just today; board-width measurements (a 3-inch board now at 2 15/16 inches directly confirms moisture loss); and photographs with a reference straightedge across the joints, plus a coin in the widest gap for scale.
Ask the right questions. When did you first notice it? A problem that appeared a month into heating season points to moisture loss. Does it close in the humid season? Is it uniform? Are the ends or the edges affected?
Then escalate in order: installer, then manufacturer, then an NWFA Certified Flooring Inspector. In Dana’s case the certified report was detailed enough to force a full remove-and-replace. A manufacturer’s in-house inspection may produce a report that draws no conclusion, which is not the same as a finding in your favour. Keep your acclimation records and the installer’s moisture report. Without them, you are arguing from memory, and memory loses.
What It Costs to Fix Each Problem
| Remedy | Typical cost | Best for |
|---|---|---|
| Colour-matched filler, up to the bevel | $50 to $200 per room in materials | Small, stable gaps |
| Adhesive injection per hollow | $30 to $150 per spot | Isolated hollow spots and popping |
| Single-board replacement | 150 to $400 per board, installed | Overwood, delamination or a failed joint |
| Professional screen-and-recoat | $2 to $4 per sq ft | Worn finish on a sound, thick wear layer |
| Professional full refinish | $3 to $8 per sq ft | Deep wear, only if the wear layer allows |
| Partial tear-out | $5 to $12 per sq ft | One room or one failed zone |
| Full tear-out and replacement | $8 to $25 per sq ft | Failure across the floor, or a spent wear layer |
Treat every figure as a 2026 range to verify locally. Ask bidders to itemise the aluminum-oxide surcharge on abrasive work, because a factory finish needs more abrasives and a slower first pass. Our engineered wood flooring cost page breaks out materials, labour and disposal.
One rule of thumb from the field rather than a standard: many contractors advise repairing only while the repair stays under roughly 30 to 40 percent of replacement cost. Past that line, the money is better spent on new flooring. On a 1.2 to 2 mm wear layer, a full refinish quote often approaches a replacement quote. When the numbers converge, replace.
How to Avoid Prefinished Engineered Hardwood Problems
- Specify the wear layer for the room and the lifespan you want. Thin veneer cannot be refinished, and no finish warranty changes that.
- Test the slab or subfloor before delivery. ASTM F2170 moisture, flatness to 3/16 inch in 10 feet, wood moisture content 6 to 9 percent.
- Acclimate, and record it. Temperature, humidity and duration, in writing.
- Hold indoor relative humidity in the 30 to 50 percent band year-round. Add a humidifier in heating season. This single habit prevents most of the problems in this article.
- Match the install method to the assembly. Glue-down for slabs and radiant heat; floating only where the subfloor is flat and the warranty allows it.
- Buy from a supplier who publishes tolerances, coating system and wear layer in writing, and keep spare cartons from the same lot.
- Read the warranty exclusions before you buy. Gapping, cupping and peaking are commonly excluded as site-related.
Red Flags in a Product Listing
Wear layer not stated. “Seven layers” with no detail on which coats contain aluminum oxide. A finish-only warranty with no structural coverage. No named certification.
Ready to specify a floor that will not generate these calls? Talk to our team about samples, specifications and wholesale pricing.
FAQ
Do prefinished floors have gaps?
Some gapping is normal seasonal movement. Wood shrinks in dry air and expands in humid air, so a floor that gaps in winter and closes by summer is behaving correctly. Gaps that stay open at the end of the humid season, spread unevenly, or exceed about 1/8 inch point to a real problem.
Is overwood a defect, or is it normal?
Overwood at butt joints should be fillable and barely visible from a standing position. If you can catch a fingernail on the joint, that is overwood rather than a bevel. It can come from milling tolerance, a subfloor dip, high fasteners or deflection, and it is not normal.
Why is my engineered hardwood cupping in winter?
Winter cupping usually means the underside is wetter than the top, from slab moisture, a leak, a crawlspace, or condensation on a cold slab. It can also be dry-cupping, where low humidity shrinks the top lamella against a stable core. Check indoor humidity before assuming the floor is wet.
What is dry-cupping?
Dry-cupping is the engineered-specific failure where low humidity makes the real-wood lamella shrink while the cross-laminated core barely moves, curling the board edges upward. It looks identical to moisture cupping but has the opposite cause. The remedy is to add humidity, because drying the house out makes it worse.
Can cupping be fixed without replacing the floor?
Often, yes. Stop the moisture source, let the floor dry completely, and hold indoor humidity in the 30 to 50 percent band. Mild cupping frequently settles within roughly 4 to 12 weeks once conditions are stable. Never sand a cupped floor while it is still wet, because it will crown once it dries.
What is the difference between delamination and shear failure?
Bond-line failure, true delamination, is a clean separation at the adhesive between layers. Shear failure is a break within the wood fibre itself, with the bond intact. Both look like layer separation to an owner, but the warranty may cover one and not the other.
Does low humidity cause delamination?
Not on the evidence. A Fraunhofer WKI chamber study ran 18 engineered floors at 24 percent relative humidity for 17 days and then 14 percent for 22 days, and found no delamination in any of them. It attributed real-world cases to production faults. The industry still debates this, and both positions are live.
Can you recoat a prefinished floor without sanding?
Yes, with the right system. Bona specifies Bona Prep and the Bona Recoat System for aluminum-oxide and other factory prefinished floors. Run a test patch first: coat a small area, let it cure, then try to scratch it off. If it lifts, do not recoat. Never recoat over wax or polish.
Why are my click-lock floorboards separating?
Four common causes: subfloor deviations that create pivot points, expansion gaps too tight or too loose, grit in the groove grinding away fibre, and low-density underlayment compressing unevenly. Reseating helps temporarily. A floating assembly over an out-of-plane subfloor will keep failing until the subfloor is levelled.
Does the warranty cover gapping and cupping?
Usually not. Most manufacturer warranties treat post-installation cupping, gapping and peaking as site-related and exclude them. Structural defects such as delamination, splitting and geometry faults are the ones typically covered. Read the exclusions before you buy rather than after the floor moves.
How much does it cost to fix a failed engineered hardwood floor?
Colour-matched filler runs $50 to $200 per room in materials, a screen-and-recoat $2 to $4 per square foot, a full refinish $3 to $8, and replacement $8 to $25. Many contractors stop recommending repair once it reaches roughly 30 to 40 percent of replacement cost. Verify locally.
How do I tell a bevel from a gap?
A bevel is a machined chamfer at the plank edge, so it is consistent from board to board and uniform in width along every joint. A gap varies in width, appears at some joints but not others, and widens with the dry season. Run a fingertip along the joint: a bevel is smooth, a gap catches.
Conclusion
Most prefinished engineered hardwood problems are the building’s, not the board’s. Gaps, overwood and cupping usually trace to humidity, subfloor preparation or installation, while delamination and peeling finishes are the genuine manufacturing faults worth pursuing, and the Fraunhofer WKI evidence shows how narrow that category is. Diagnose by cause, not by symptom, and the question of who pays answers itself.
Four things decide your outcome. The moisture measurement tells you which direction the problem runs. The season tells you whether the movement is normal. The wear layer tells you whether repair is available. And the warranty tells you what is covered, before you spend a dollar.
Getting this right is not only about money. Keeping a certified, sustainably sourced floor in service holds on to the carbon already stored in its veneer and keeps repairable material out of a landfill. Repairing before replacing is the lower-carbon choice. When the veneer genuinely is spent, replacing it with a thicker specification is the responsible answer.
Have a floor you need to specify or diagnose? Talk to our team about samples, specifications and wholesale pricing, and we will tell you plainly which problems are ours to own and which are not.