
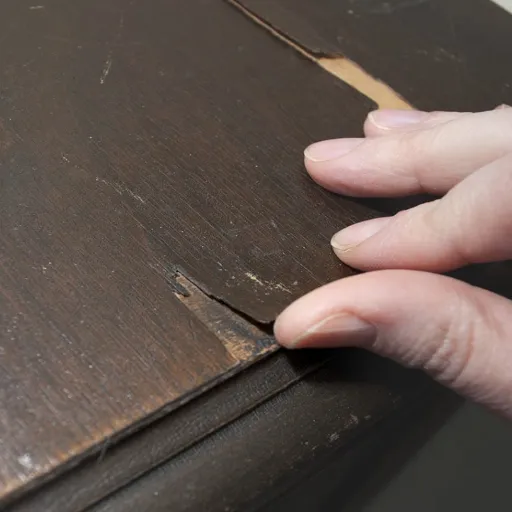
Veneer Checking After Pressing: Moisture, Lathe Checks and Conditioning
Veneer checking after pressing needs a check of the wood, panel moisture, and the work done before finishing. The press may not have made the crack. A cut made during veneer production can leave a small split that shows up later.
Finding lines on a finished face is frustrating, especially when the panel looked sound at unloading. Before you change the glue or press cycle, name what you see. Then look for its cause. This guide gives you a way to inspect the defect, trace the batch, and plan a controlled trial without copying a universal moisture or press recipe.
Key Takeaways
- Identify whether the line is in the wood, a seam, the bond, or the coating.
- Check veneer, core, and backing conditions separately; room humidity alone cannot describe the layup.
- Keep cooling, adhesive cure, and moisture stabilization as separate release checks.
- Use retained offcuts and a documented trial before approving a repair or changing production.
Diagnose veneer checking after pressing
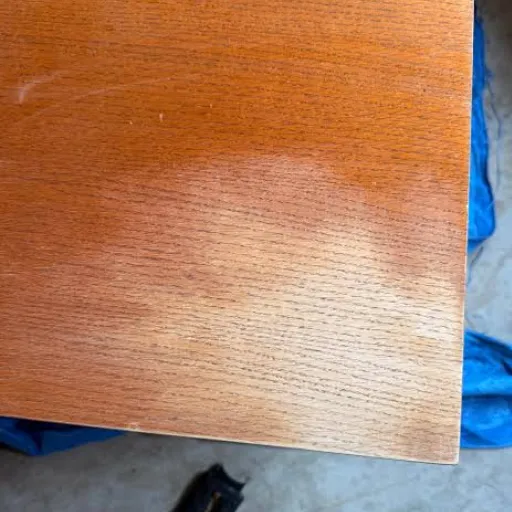
Wood checking involves cracks in the veneer itself, commonly following the grain. An open joint between leaves is a different observation. So is a raised patch where the face has separated from the core.
These faults can occur together. Describe each one you can see.
Start with an overview of the panel and a close view of the affected area. Record the grain direction, leaf joints, panel edges, and raised areas. When were the lines first seen? Use that confirmed stage in your notes.
If nobody checked the face before finishing, its earlier condition is unknown. Do not turn that gap into a claim that the coating caused the cracks.
Use this table as an observation aid, not an acceptance test or a repair prescription.
| What you see | Question to investigate | What the observation cannot establish |
|---|---|---|
| Fine lines following grain within a leaf | Does the crack enter the wood? | Whether cutting, moisture, or another process caused it |
| A gap following a leaf joint | Did the joint open during assembly or later movement? | That the whole veneer face is checking |
| A raised or loose patch | Is there a local bond failure? | That more pressure will solve it |
| A network of fine coating cracks | Is the damage confined to the finish? | Whether the wood underneath is intact |
| Alternating light and dark leaves | Is reflected appearance contributing? | That the surface is cracked |
Illustrative scenario: A cabinet face looks clean after pressing, but fine lines become obvious under its clear finish. The operator calls them glue failure. A better first action is to compare an unfinished retained offcut, the affected face, and the leaf joints.
That gives the team a place to start. It cannot prove the cause from looks alone.
Before changing adhesive, review the veneer adhesive guide alongside the instructions for the exact product in use. Choosing a glue means knowing the actual veneer, backing, core, and press method. A different glue name alone does not explain why a particular batch developed lines.
Ask the fabricator and finisher to examine the actual layers before abrasive work hides the evidence. Avoid trying to flatten a blister or sand out a suspected crack just to see whether it disappears. Retain an untouched area for review and identify any area used for a trial.
How lathe checks become visible surface defects
A cutting fissure can exist before a leaf reaches the bonding line. The ACIAR veneer manufacturing monograph, published in 2017, explains peeler checks in rotary veneer and the distinction between its tight and loose sides. Use it to review cut quality in incoming leaves. Remember that its focus is rotary veneer production.
The loose side contains the cutting checks; the tight side is the opposite face. These terms describe the sides of a leaf. Check depth can vary within a flitch, or group of leaves from one log section.
A smooth face can still have hidden splits. Ask the veneer supplier about the cut and sides if the job record is unclear.
Inspect the leaf before assigning a cause
Keep offcuts from the same leaf sequence. Mark which face was exposed. Compare them with unused material from the batch where available.
Record whether lines can be seen before bonding and whether their direction resembles the complaint. Don’t treat a different species or an unrelated spare sheet as an equivalent control.
Need a closer look? Ask the supplier or a trained examiner to choose the method. Flexing an unknown leaf to make a fissure visible may change it.
Document such work separately from the original condition. A photograph of a finished panel cannot measure the depth of a cutting check through the coating.
Review sanding and face orientation
Excessive sanding can leave the veneer too thin to resist stresses and increase checking risk. Record the supplied veneer thickness, the sanding sequence, and any rework. Compare a face given extra sanding with one that followed the normal route. The supplied thickness alone cannot tell you how much face remains.
Face orientation also belongs in the record. Book matching reverses alternate leaves, so the exposed sides may differ across a face. That can make a surface complaint harder to judge. The site’s barber-pole effect guide addresses alternating light-dark appearance; it is useful when the concern is contrast rather than an open wood crack.
There is no universal instruction here to put one side outward for every construction. Ask how the chosen appearance, cut quality, backing, and glue work together. Confirm an orientation change on a representative finished sample before applying it to the job. Flipping a leaf is not proof that the moisture history or bond has been corrected.
Trace moisture through veneer, core and adhesive
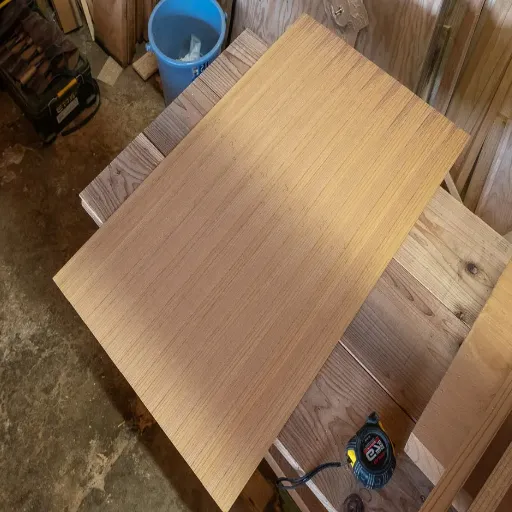
Veneer can swell when it takes up water and shrink as it dries. A bonded core restrains that movement. Stress can then help an existing weak area open into a check, even after an unchanged press cycle.
Moisture content measures water in the material; relative humidity describes the air. Equilibrium moisture content is the level wood tends toward in that air. Newly unpacked stock may not yet be there. Water from flattening, glue, and storage all belongs in the panel’s history.
The historical NC State veneer-checking bulletin connects checking risk with face moisture, cut quality, panel components, gluing, and conditioning. Its furniture-production guidance is useful context, but its moisture recommendation should not become a rule for every species, substrate, climate, and adhesive.
Build a component record
Record the veneer batch, core type and batch, backing, storage location, and dates of movement into the assembly area. Measure components using a method suitable for the material and thickness. A meter reading taken through a thin leaf onto a support may include the support’s response; confirm the instrument maker’s method rather than treating the display as an isolated leaf measurement.
Make each reading traceable:
- Name the meter and its setting.
- Mark where and when you took the reading.
- State which leaf, core, or backing you measured.
- Flag any support or thickness limit that could affect the result.
If the method is not suitable, ask the supplier for a better one. Leave that result unknown until it can be checked. A room humidity value cannot fill a missing wood moisture field.
Illustrative scenario: The veneer has been stored in the assembly room, while the core arrives from another storage area just before glue-up. The operator records only the veneer reading. The missing core history becomes a question for the investigation, not evidence that the core caused the crack. A useful comparison documents both components before the next trial.
Include water added during preparation and bonding
Ask whether the leaves were flattened, dampened, or otherwise treated before assembly. Record the treatment and the steps used to condition it afterward. Water added to make a leaf easier to handle still belongs in its moisture history. Do not add water to cracked material as an informal repair without an approved process.
For a water-containing adhesive, record the actual spread and the maker’s permitted application conditions. Extra adhesive can alter the water introduced to the layup. Reducing spread without checking the product requirements can introduce a different bond problem, so investigate it as a controlled variable.
Choose a project target, not an average of published ranges
Published values have different scopes. NC State’s May 1990 furniture bulletin calls for 6% face moisture at pressing. The 2014 decorative veneer manual cites a 6% to 12% leaf range under its referenced standard. These are historical source values, not interchangeable instructions.
Neither sets the target for an unreviewed layup. Do not average them to make a new rule.
Ask the veneer, core, and adhesive suppliers to reconcile the permitted conditions for the actual assembly. Record the intended service environment too. Review the site’s veneer storage and handling guidance when material changes rooms or waits between preparation and pressing.
The record should show the state of the stock at glue-up. Time indoors alone does not tell you that.
Control assembly, pressing and post-press conditioning
Leaving the press is one event in the panel’s history. It does not establish that the adhesive has completed its required cure, that the face is ready for sanding, or that the whole assembly has stabilized. Check each point on its own before the next step.
The decorative veneer technology manual, second edition 2014, links veneer preparation, bonding, sanding, and finishing. It supports reviewing the full sequence rather than blaming the last machine used. Apply its general principles through the instructions and specification for the assembly you are making.
Capture the assembly window
Identify the adhesive product, batch, mix where applicable, and technical data sheet revision. Record when spreading began, when the layup closed, and when pressure was applied. Compare those events with the maker’s open and closed assembly limits under the actual shop conditions.
An instruction that was suitable for another adhesive is not a substitute for this record. If the operator reports a delay, keep the actual elapsed time rather than replacing it with the usual cycle. Note stops, panels stacked while waiting, and any change from the first to the last layup in the load.
Check the process actually delivered
Record the press method, its settings, and available evidence that the intended conditions reached the assembly. Review load arrangement and support as well as the control display. Ask the equipment and adhesive suppliers which checks are appropriate before changing pressure, temperature, or time.
For bag pressing, the site’s vacuum press veneering guide covers setup and leak checks. Use it for that equipment task. Do not transfer a hot-platen schedule to a vacuum bag, or assume an equipment adjustment explains a crack already present in incoming veneer.
Separate cooling, cure and moisture stabilization
Document panel support and storage after unloading. Note the room conditions and each check time. Use separate release checks:
| Check | Evidence to review | What it does not prove |
|---|---|---|
| Cooling | The specified cooling and support conditions | That glue has fully cured |
| Adhesive cure | The exact product’s time and process requirements | That panel moisture has stabilized |
| Moisture readiness | Suitable readings and the agreed process requirements | That the finish will hide a defect |
A cool face is not a cure test. Follow the relevant stacking instructions and agree on the next step before releasing the batch.
Before sanding or coating, check the requirements for that next process against the actual panel condition. If the rules conflict or the record has gaps, ask the supplier to clarify them. Do not use a coating as a test of whether a doubtful assembly will remain stable.
Keep a panel identifier through sanding and finishing. If lines appear later, you can then connect them to its preparation and press record instead of comparing an anonymous finished face with an unrelated production log. That link helps the supplier review the actual job.
Run a documented trial and decide whether to repair
A useful trial answers a defined question. It should not begin with simultaneous changes to veneer moisture, adhesive, spread, press time, and finish. If the trial looks different afterward, you would have no clear basis for deciding which change mattered.
Start with the batch in question. Keep samples that show its actual condition. Keep an untouched reference, unused matching leaves if available, and labeled offcuts.
Photograph the affected panels before repair work. Separate observations made at unloading, after conditioning, after sanding, and after finishing.
Use a short batch worksheet
| Record field | What to enter |
|---|---|
| Material identity | Leaf sequence, core batch, backing, supplied face thickness |
| Initial conditions | Component readings, method, room conditions, storage history |
| Assembly | Adhesive identity, spread record, mix, actual assembly times |
| Pressing | Equipment, load arrangement, settings, recorded interruptions |
| Later processing | Support, inspection times, sanding sequence, finish system |
| Observed defect | Location, grain relation, joint relation, first confirmed sighting |
| Trial question | One proposed change, reason, reference sample, review criteria |
Use this worksheet to guide a review. It is not a standard lab test. Add the project-specific acceptance and test requirements supplied by the responsible parties.
Mark unknown fields clearly. A completed form is only useful if its entries reflect the actual batch.
Compare like material and agree on release criteria
Choose a trial variable from the evidence, such as bringing component conditions into the agreed range before assembly. Keep the rest of the recorded process the same where you can. Label the reference and trial panels so nobody confuses them. Use the same viewing conditions at each review.
Record any difference you could not control, such as a core batch change. Ask the suppliers which checks and conditioning are needed before you judge the result. If you cannot explain the other changes, the trial cannot show what the planned change did.
Illustrative scenario: A team compares retained offcuts with a trial using the same identified veneer sequence and adhesive. It records the faces before coating and again afterward. If the trial differs, the record supports a narrower discussion about the changed condition; it does not establish a guaranteed prevention method or a long-term field result.
Put repair behind diagnosis
Filling a visible line addresses appearance. It does not establish that the cause of movement has stopped or that the bond is sound. Ask the fabricator and finisher to check the crack depth and the wood left in the face. They also need to review the proposed coating and the approved appearance before choosing a repair.
When a local treatment cannot meet the agreed requirements, review veneer panel replacement and sequence matching before authorizing replacement. Adjacent leaf sequence and finished appearance matter to that decision. A repair decision does not approve the revised process. Review both before you release the job.
Questions about veneer checking after pressing
Can the finish crack while the wood stays intact?
Yes, cracking can occur in a coating, so a visible network of lines does not automatically identify a wood defect. Ask the finisher to examine the actual layers. Record the pattern and compare retained material before choosing a treatment. A photograph alone may leave the depth of damage unresolved.
What moisture content should veneer have before pressing?
Use the agreed limits for your veneer, core, backing, glue, and service climate. Published values cover different processes. Do not combine them into one target. Confirm how you will measure thin leaves.
Then record the condition of each part near glue-up; room humidity alone cannot tell you its wood moisture content.
How long should panels condition after pressing?
There is no single period that establishes readiness for every assembly. Follow the relevant adhesive and panel-processing instructions, and distinguish cooling from cure and moisture stabilization. Record support, room conditions, and inspection times. Ask the responsible supplier to define readiness when the next operation’s requirements are unclear or conflict.
Will filler stop checking from coming back?
Filler may conceal a line, but it does not prove the underlying moisture or construction issue has been resolved. Evaluate the actual panel and proposed finish system before approving a repair. Keep an untreated reference and agree on how the trial’s appearance and suitability will be assessed before extending it.
Should the tight side always face outward?
Do not make that a universal rule. Confirm the leaf’s cut, side identification, matching arrangement, backing, and intended finish with the supplier and fabricator. Review a representative finished sample before changing orientation. Choosing a face direction cannot by itself establish correct component moisture, a sound bond, or acceptable final appearance.
Before coating the next panel, use the veneer finishing guide to prepare the finishing discussion. Bring the batch record and retained samples so the next action follows the observed defect and the actual assembly requirements.