
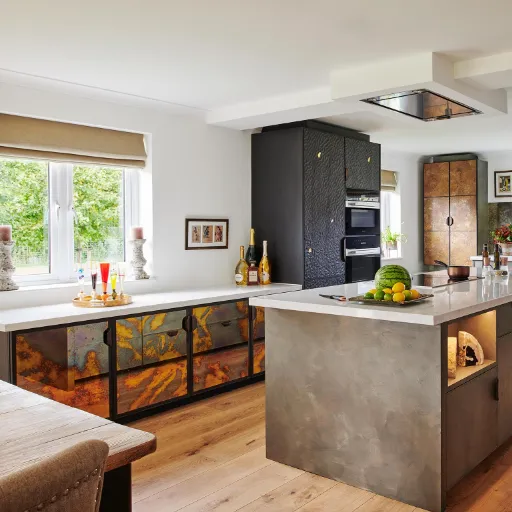
Engineered Wood Flooring for Kitchens: What Survives
Engineered wood flooring for kitchens works when the wear layer, the core and the installation are chosen for the room. The kitchen asks four specific things of a wood floor, and only one of them is about species.
A sink base takes water every day. A dishwasher bay hides a supply line behind a panel. Winter heating pulls relative humidity below the band the floor was made for, and the joints cup before anyone notices a problem.
Most advice stops at “engineered handles moisture better than solid wood.” That is true, and it is not enough. A thin wear layer over a soft core will fail in a kitchen as surely as solid oak, only later and with less warning.
This guide is written for the people specifying engineered wood flooring for kitchens: designers, contractors, cabinet makers and owners mid-renovation. You will get the numbers to put on a quote, the humidity band to hold, the sequencing question nobody resolves, and 2026 installed costs against tile, vinyl plank and laminate. If the same kitchen needs veneered cabinet fronts, plywood or edge banding, send the specification for a review and we will confirm what can be matched across the run.
Key Takeaways
- Engineered wood flooring for kitchens survives on the build, not the species: roughly 3 mm of wear layer, a stable core, sealed edges and an installation that lets the floor move.
- The NWFA’s residential band is 60-80°F and 30-50% relative humidity, year round. Drift below it in a heated winter and engineered floors can dry-cup at the joints.
- The cabinet sequence is genuinely contested. Floating floors must be free to float, and an island or toe kick can pin one that was meant to move.
- Kitchen flooring cost, engineered wood: $7 to $20 per sq ft installed in 2026, against $9 to $28 for tile, $6 to $16 for vinyl plank and $4 to $14 for laminate.
Can You Put Engineered Wood Flooring in a Kitchen?
Yes. Engineered wood is a sound kitchen floor when four conditions line up. The wear layer has to be thick enough to refinish, and the core has to hold its shape through the humidity swing. The edges have to be sealed, and the installation has to leave the floor free to expand and contract.
Spill discipline sits on top of those four, and it is the cheapest of them: clean up standing water promptly, especially at the sink and the dishwasher.
The four conditions are worth stating plainly, because a floor that meets three of them still fails:
- Wear layer. About 3 mm is the practical residential target for a floor that can be refinished at all.
- Core. Plywood or high-density fiberboard plies that resist the seasonal swing better than a single solid board.
- Edges. Sealed, or at least tight enough that a spill does not wick straight into the core.
- Installation. The floor must be able to move, and the cabinets must not be sitting on it in a way that stops it.
Why the layers matter comes down to how wood moves. A solid plank is one piece of wood, so it expands across its full width when humidity rises. An engineered plank is a stack of thin plies glued with the grain running in alternating directions.
Each ply resists the movement of the one above and below it, so the whole board moves a fraction of what a solid board of the same width would. That is the entire mechanical argument for engineered flooring in a kitchen, and it is why a wide engineered plank can sit over a concrete slab where a wide solid plank cannot.
The construction basics are covered in our complete engineered wood flooring guide. What follows here is the kitchen part.
Kitchen Pros and Cons, and Who Should Choose Something Else
The case for engineered wood flooring for kitchens is narrower than the marketing suggests. Here are the engineered wood flooring kitchen pros and cons, honestly weighted.
| What it gives you | What it costs you | |
|---|---|---|
| Warmth and feel | Warm underfoot, quieter than tile, kinder to a dropped glass | Nothing, other than the floor itself |
| Look | Real wood face, refinishable surface, ages rather than wears out | A natural material that will show the odd dent |
| Continuity | Runs straight into a living or dining area without a transition | One floor to protect instead of two to ignore |
| Water tolerance | Tolerates spills that are wiped up, and humidity swings better than solid wood | Fails under standing water and slow leaks |
| Maintenance | Sweep, vacuum, damp mop, and that is most of it | No steam cleaners, no wet mopping, no soaking |
| Repair | Can be refinished once, sometimes twice, if the wear layer allows | Replacement of a damaged board means cutting and re-fitting |
The downsides, stated plainly
The first downside is water. BuildDirect’s engineered wood guide puts it in five words: “More stable does not mean waterproof.” CanFloor makes the same distinction and names where the risk sits, which is the sink, the dishwasher, the refrigerator’s water line and the exterior door. If a listing calls a floor waterproof, check what the term covers before the cabinets are ordered.
The second is a finite surface. A floor can only be sanded back as far as its wear layer allows. A thin one has no refinishing life at all, so the first deep scratch or water stain is a replacement rather than a sand.
The third is that wood is not sterile. If someone in the household is managing an immune condition or a serious allergy, tile or sheet vinyl is easier to keep clean and easier to disinfect.
Choose tile, vinyl plank or laminate instead if any of these describe the kitchen:
- Water is used heavily and mopping is the normal routine, not the exception.
- The dishwasher or the refrigerator has leaked before, or the plumbing is old.
- The room is a rental or a rental-grade renovation where the floor must survive neglect.
- The budget is under about $6 per sq ft installed and the timeline is short.
That last point isn’t a knock on engineered wood. It’s a statement about which floor fits which job. A $4 laminate that is correctly installed in a kitchen the owners look after will outperform a $14 engineered plank installed over a wet slab with the cabinets pinning it down.
The Engineered Wood Flooring Specs That Matter in a Kitchen
A kitchen specification is short. Five lines do most of the work, and they are the five lines a sales conversation tends to skip.
| Spec | What to ask for | Why it matters in a kitchen |
|---|---|---|
| Wear layer | 3 mm nominal, stated in writing | Sets how many times the floor can be sanded, if at all |
| Core | Plywood or HDF, with the ply construction described | Determines how the board handles the humidity swing |
| Edges | Sealed or micro-beveled and tight | Stops a spill from wicking into the core |
| Finish | Factory-applied, rated for residential traffic | Takes the wear that the wear layer is there to protect |
| Installation | Floating, glue-down or nail/staple, stated up front | Decides whether cabinets and islands can sit on the floor |
| Warranty | Read the exclusions, not the term | A warranty that excludes kitchens is not a kitchen warranty |
Wear layer: the number that decides refinishing
The wear layer is the wood above the core, the part you see and the part a sander touches. It is also the number most often quoted as a range instead of a figure.
CanFloor describes the market range as 2 to 5 mm. That is accurate as a description of what is sold, and useless as a buying rule, because 2 mm and 5 mm are different floors.
The useful reference is the NWFA refinishable program, as summarized by Quality Hardwood. Under that program, a floor needs about 3.2 mm of wear layer if it is unfinished and smooth, or 2.5 mm if it arrives factory-finished and smooth. Below those figures, it does not count as refinishable.
Quality Hardwood goes further and calls 3 mm the practical residential target. At that thickness a floor will often take one full refinish, and sometimes two if the first sand is careful.
Those figures are planning benchmarks, not promises. A specific product’s refinishing life depends on how much material the manufacturer left above the tongue, what finish is on it, and what its own warranty says. Ask for the wear layer in millimeters on the quote, and ask whether the product is refinishable at all. Some engineered floors are not, and that is a legitimate product, but not one you should buy expecting to sand it in ten years.
This is also why the species question is secondary. A 4 mm wear layer of red oak will generally outlast a 1.5 mm wear layer of white oak in a kitchen, because the surface that takes the damage is more than twice as thick.
Example, not a customer case. A designer specifies a wide-plank engineered floor for a 120 sq ft galley kitchen. The quote lists “2 mm wear layer” and the price looks good against the alternatives. Two years later a water stain at the sink base cannot be sanded out, because there is not enough wood above the core to sand. The floor is replaced in a patch, and the patch is visible.
Core and edges
The core is where the stability argument lives. Look for a description of the ply count or the core material, not only the word “engineered.”
A plywood core with alternating grain direction is the traditional build. An HDF core is denser and more uniform, and it behaves differently under a spill: it resists surface water well and swells badly if water reaches an unsealed edge.
That is why edges matter as much as the core. A tight, sealed edge slows the wicking that turns a small spill into a swollen joint. A loose butt joint at the end of a plank gives water a direct route into the core, and once it is in there, no finish will get it out.
Finish
The factory finish is the layer that absorbs daily life, so it should be rated for the traffic the room sees. A matte or low-sheen polyurethane is the usual choice in a kitchen, because it hides the fine scuffs that a high-gloss surface exaggerates and it does not show every grease mark.
Ask what the finish is and what it is rated for. “UV-cured” describes how the coating was set, not how hard it is. The rating and the warranty claim are the numbers that matter.
Moisture, Steam and Leaks: What Damages the Floor
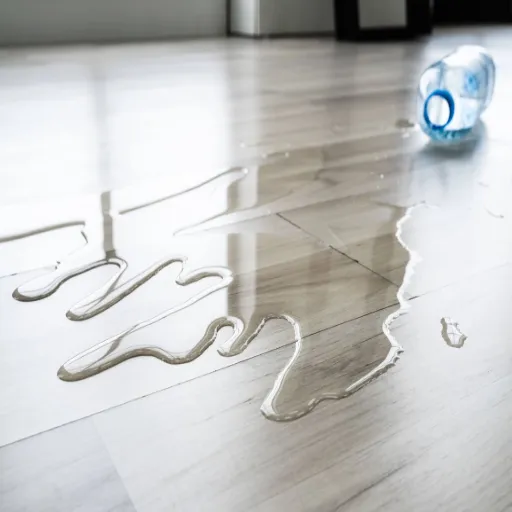
Water is the failure mode, and the useful question isn’t whether a kitchen is humid. It is which specific things put water where it should not be, and what the floor can tolerate before it stops recovering.
The humidity band
The NWFA’s winter weather guidance is specific: keep the home between 60-80°F and between 30-50% relative humidity, year round. The same page notes that engineered floors can dry-cup when they lose moisture in the dry season, which is the opposite of the leak everyone worries about and as damaging to the joints.
That band is the single most useful number in any engineered wood flooring kitchen moisture plan. A kitchen that swings from 70% in a wet summer to 25% in a heated winter is asking the floor to do something it was not built for, and no wear layer will compensate.
Ambient’s installation instructions state the same 30-50% range, and EKO’s specify 30-55% for at least a week before, during and after installation. Different manufacturers draw the line in slightly different places, so treat 30-50% as the working band and the product’s own document as the authority.
The four risk points
CanFloor names the places where kitchen water gets in, and the list is worth memorizing:
- The sink base. Spray, drips down the cabinet face, and the occasional overflow.
- The dishwasher bay. A supply line or a door seal, hidden behind a panel.
- The refrigerator’s water line. A slow drip that runs under the appliance and is invisible until the boards lift.
- The exterior door. Rain driven against the threshold, and snowmelt tracked in.
Each of these is a plumbing or detailing problem before it is a flooring problem. A $12 supply line and a drip tray cost less than a plank replacement.
Spills, steam and cleaning
The rule for kitchen wood flooring is the same as for any sealed wood floor: wipe, do not soak. A puddle that is mopped up within a few minutes is a non-event on a sealed floor. The same puddle left overnight at a plank end can swell the core, and a swollen core does not shrink back.
Steam cleaners are the wrong tool for engineered wood. BuildDirect’s guide advises against steam and wet mopping, and the reason is mechanical: steam drives moisture past the finish and into the joints under pressure.
Mats help, with one caveat. A mat at the sink catches the drips, and a rubber-backed mat can trap moisture underneath it, so lift and dry both the mat and the floor regularly. Felt pads under chair and table legs prevent the scratches that no finish resists forever.
The full routine is in our guide to how to clean wood floors. The kitchen-specific part is the spill window and the mat discipline.
Example, not a customer case. A dishwasher supply line fails under the counter over a long weekend. The flooring under the appliance bay is soaked through. The flooring a foot in front of it is dry and looks perfect, which is exactly why the leak goes unnoticed until the boards in front of the dishwasher start to cup at the joints.
Installing Around Cabinets, Islands and Appliances
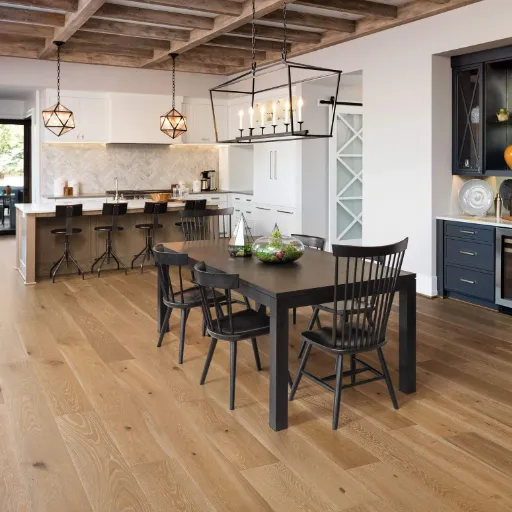
This is where engineered wood flooring for kitchens differs from a bedroom floor. Engineered wood flooring kitchen installation is a sequencing problem before it is a fixing problem, and it is where the advice in the market genuinely conflicts. Three sources, three positions:
- Hunker (editorial, 2022): in a full remodel, lay the wood floor before the base cabinets go in, mark the cabinet line on the floor, use plywood of the same thickness under the cabinet zones, and run the flooring under all movable appliances, including the dishwasher.
- One manufacturer’s installation manual (Americana Floors): “Wood flooring products MUST NOT be installed prior to the installation of cabinetry and or any other fixed furniture,” and placing cabinets or a built-in range over the floor may void the warranty.
- Another manufacturer’s guidelines (Anthem): “Floating floor installations must be free to float without interference from trim, kitchen islands, cabinets, etc.”
Read together, those three are not contradictory so much as conditional. The manual that forbids cabinets-over-floor is protecting a specific installation system. The floating guideline is protecting a specific failure mode. Hunker is describing a full remodel where the floor goes in first and the cabinets are fixed through it.
The decision rule that follows is simple enough to use:
If the floor is floating, nothing fixed may sit on it. No island, no peninsula, no run of base cabinets tightened down through the planks. The floor needs a gap at every fixed vertical surface and a clear path to move.
If the floor is glued or nailed, cabinets can sit over it, provided the manufacturer’s own document allows that and the expansion is handled at the room perimeter. Get that in writing from the supplier before the cabinets arrive, not after.
Under movable appliances, the floor goes all the way in. A dishwasher, a range and a refrigerator all need to come out at some point. If the flooring stops at the appliance’s front edge, the appliance cannot be removed without destroying the floor in front of it. This is the one detail where Hunker’s advice and appliance service reality agree: the day the dishwasher comes out, a floor that runs under it is the difference between a repair and a re-lay.
The numbers your installer needs
Manufacturer installation guidelines converge on a small set of figures, and they are worth putting in the job file:
| Check | Figure | Source type |
|---|---|---|
| Subfloor flatness | 3/16″ in 10 ft, or 1/8″ in 6 ft | Manufacturer guidelines (Anthem, BHW, Ambient) |
| Expansion at vertical obstructions | 1/2″ | Manufacturer guidelines (Anthem, BHW) |
| Expansion at fixed objects, one brand | 15 mm (about 5/8″) | Manufacturer instructions (EKO) |
| Room humidity during and after install | 30-50% RH | Manufacturer instructions (Ambient) |
| Temperature during and after install | 60-80°F | Manufacturer guidance and NWFA |
| Large open areas | Expansion or a transition beyond about 30 ft by 50 ft | Manufacturer instructions (Ambient) |
A 3/16″ dip across a 10 ft straightedge doesn’t sound like much. Over a kitchen run it is enough to make a floating floor rock, and a floor that rocks works its joints loose.
Acclimation is the last item. Follow the specific product’s instruction rather than a rule from a different floor. Some engineered products want days in the room, and some are designed to be installed straight from the carton. EKO’s instructions explicitly say not to acclimate its product like solid hardwood.
The full method workflow is in our guide to engineered wood flooring installation. The kitchen part is the sequencing and the expansion path.
Example, not a customer case. A 400 sq ft open plan kitchen, dining and living area is laid as one continuous floating floor. The kitchen island is fixed through the planks, and the toe kick is scribed tight at both ends of the run.
Six weeks later the floor in front of the island has a visible ridge where two planks have climbed over each other. Nothing was defective. The island pinned a floor that was designed to move.
Species, Color and Pattern for a Kitchen Floor
Species decides the look and the dent resistance. It does not decide whether the floor survives, which is why this section is shorter than the wear layer section. The four species below come up most often in kitchen specifications:
| Species | Janka hardness (lbf) | Density (lb/ft³) | Volumetric shrinkage |
|---|---|---|---|
| Hard maple | 1,450 | 44.0 | 14.7% |
| White oak | 1,350 | 47.0 | 16.3% |
| Red oak | 1,220 | 43.8 | 13.7% |
| Black walnut | 1,010 | 38 | 12.8% |
Janka hardness measures the force needed to embed a 0.444″ steel ball to half its diameter, typically at 12% moisture content, per The Wood Database. It predicts dent resistance, and it says nothing about water.
For engineered oak flooring kitchen work, white oak is the usual answer: 1,350 lbf, a warm neutral tone, and enough grain variation to hide everyday scuffs. Our engineered oak flooring page covers the species in more detail. Red oak is slightly softer and reads pinker. Hard maple is the hardest of the four and the least forgiving of a finish that shows marks. Black walnut is the softest and the most expensive, and it will show a dropped can.
Color choice is a design decision with one practical constraint: a light floor shows dust and dark wood flooring in a kitchen shows every crumb and footprint. A mid-tone with visible grain is the most forgiving of both.
Pattern has a cost attached. Herringbone and chevron add roughly $2 to $4 per sq ft in labor and 15 to 20% in waste, according to Modernize’s 2026 figures, because every cut at the pattern edge is a discarded piece. A herringbone engineered wood flooring kitchen layout pays that premium on every cut edge. In a small galley that premium buys a lot of visual interest. In a 400 sq ft open plan it buys a large bill.
One piece of context, stated carefully: the NKBA’s 2026 Kitchen Trends Report (September 18, 2025) found wood flooring the most popular choice among 94% of respondents. That figure is for wood flooring generally, not engineered wood specifically, so treat it as a signal about the material category rather than a number for this product.
What Engineered Wood Flooring for Kitchens Costs in 2026
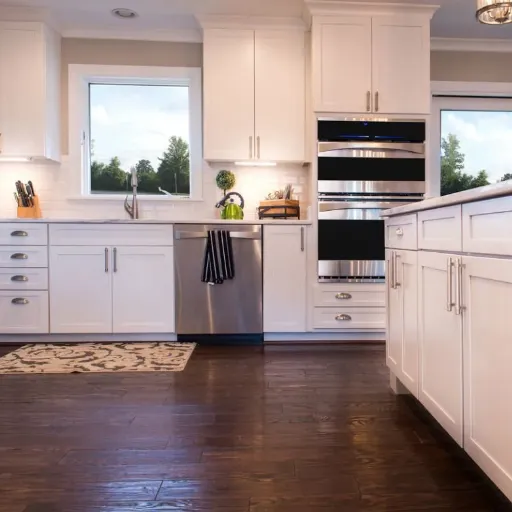
Installed engineered wood flooring for kitchens runs $7 to $20 per sq ft in the US, according to Modernize’s 2026 cost data, updated August 12, 2026. Material is $3 to $13 and labor $3 to $8 of that. D&G Flooring’s March 24, 2026 benchmark lands in a similar place, at $6 to $10 for budget, $8 to $15 mid-range and $13 to $23 for premium, with engineered running 10 to 20% below solid hardwood.
The other materials, from Modernize’s 2026 pages:
| Floor | Installed cost per sq ft |
|---|---|
| Engineered wood | $7 to $20 |
| Tile (ceramic) | $6 to $13 |
| Tile (porcelain) | $8 to $18 |
| Luxury vinyl plank | $6 to $16 |
| Laminate | $4 to $14 |
Those ranges overlap heavily, which is the point. At the low end, laminate and vinyl plank undercut engineered wood. At the top end, porcelain tile costs more than most engineered floors.
On price alone, the engineered wood vs tile kitchen decision and the engineered wood vs vinyl plank kitchen decision are both closer than the marketing on either side suggests. The room usually decides before the budget does.
What a kitchen project costs
Per-square-foot pricing flatters a kitchen, because several costs do not scale with area. Modernize lists removal at $1 to $3 per sq ft, subfloor prep at $1 to $5, trim and transitions at $4 to $10 per linear foot, and stair work at $40 to $120 per tread.
Here is the arithmetic for three kitchen sizes at a mid-range $13 per sq ft installed, before extras:
| Kitchen size | Flooring | + 10% waste | + removal at $1.50/sq ft | Indicative total |
|---|---|---|---|---|
| 100 sq ft galley | $1,300 | $1,430 | $1,580 | ~$1,600 to $2,200 with trim and prep |
| 200 sq ft standard | $2,600 | $2,860 | $3,160 | ~$3,300 to $4,200 |
| 400 sq ft open plan | $5,200 | $5,720 | $6,320 | ~$6,600 to $8,000 |
Those totals are arithmetic on published per-square-foot ranges, not measured project data. A kitchen that needs the appliances moved, a toe kick returned or a transition into two adjacent rooms will land above them. The per-room detail lives in our guide to engineered wood flooring cost.
One budget line is easy to forget: the cost of getting the sequence wrong. Lifting and re-laying a floating floor after the island has been fixed through it is a second installation, not a repair.
FAQ About Engineered Wood Flooring for Kitchens
Are engineered wood floors good for kitchens?
Yes, when the floor is built and installed for the room. Engineered planks resist humidity swings better than solid wood because the cross-layered core moves less. Look for roughly 3 mm of wear layer, sealed edges, a humidity band of 30-50%, and an installation that lets the floor move.
Can you use engineered hardwood in a kitchen?
You can, and it is a common choice in engineered wood flooring open plan kitchen layouts, where the kitchen shares a floor with a living area. The conditions are the same ones above, plus two habits: wipe standing water promptly, and never use a steam cleaner. A thin or unsealed product is the wrong pick, whatever the species.
What is the best engineered wood flooring for a kitchen?
The best engineered wood flooring for kitchen use is a specification, not a brand. Look for at least 3 mm of wear layer, a plywood or high-density core with sealed edges, a factory finish rated for residential traffic, and a warranty that does not exclude kitchens. Confirm the installation system before the cabinets go in, not after.
Which is better for a kitchen, tile or engineered hardwood?
Tile wins on water and does not need refinishing. Engineered wood wins on warmth, quiet and resale appeal, and it tolerates spills that are wiped up. Choose tile for a kitchen with heavy water use or an old dishwasher. Choose engineered wood for an open plan where comfort matters.
Do engineered wood floors hold up in a kitchen?
They hold up well against traffic, dropped items and the seasonal humidity swing, and badly against standing water and slow leaks. The wear layer and finish take the daily damage. The core is what fails when water gets past an edge, and by the time it shows, the board is gone.
Do kitchen floors go under the cabinets?
Engineered wood flooring under kitchen cabinets depends on the installation system, and the two answers are both defensible. A floating floor must stay free, so fixed cabinets cannot sit on it. A glued or nailed floor can often run under cabinets when the manufacturer allows it. Get the answer from the product’s own installation document before ordering.
Conclusion
Engineered wood flooring for kitchens comes down to four decisions that have nothing to do with how the wood looks. The wear layer decides whether the floor can ever be refinished. The core and the edges decide how it handles the humidity swing.
The installation decides whether it can move. And the spill discipline decides how long all three of those last.
Species and color come after that. White oak at 1,350 Janka is the safe default, and no species will rescue a floor built and installed for a bedroom.
If you are specifying the whole kitchen and need veneered cabinet fronts, plywood or edge banding that match the floor, send the specification to our team. We will confirm the species, construction and matching that can be held across the run. If you want to see the material before the panel schedule is fixed, request a sample of the veneer or edge banding first.
The floor itself is a separate purchase. Getting the four decisions above onto one page, before the cabinets are ordered, is what keeps it from becoming a second one.